The Subscriptions page in MemberPress divides your members subscriptions into two tabs:
- Recurring – for all automatically recurring subscriptions
- Non-Recurring – for all one-time type subscriptions
Click on each tab to view all subscriptions on your site associated with that type of subscription.
To customize what you see on both of tabs, use the Screen Options found at the top of the page:
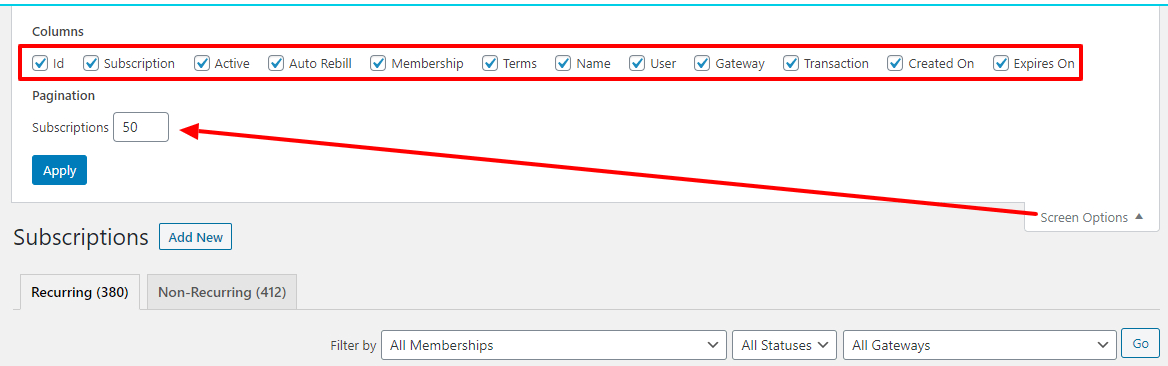
Hint: Use the Pagination option (as shown above) to enter in how many subscriptions you'd like to show per-page. This will allow you to see more subscriptions per-page and avoid scrolling through pages of subscriptions.
Add New Button
At the top of the MemberPress > Subscriptions page you will see an
Add New button. You can use this button to manually create a subscription. Note: This will NOT create a subscription on the gateway level (e.g. PayPal, Stripe, etc.). Therefore, you should only use this option to manually add a subscription that presently exists in the gateway. To learn more about how to use this feature, please see this page.
Filter Options
You can use the ‘Filter by' option to filter the subscriptions page to show you any needed information. You can filter by Membership type, Status type, and Gateway used. Simply use the drop downs to select what you are looking for, then click the ‘Go' button to initiate the filter. Filters are reset when clicking out of the Subscriptions page in your browser's tab.
You can also click each column header to sort the Subscriptions based on like items. For example, click Gateway to sort by gateway, or Membership to sort by the Membership's of your Subscriptions. Subscriptions default to display the most recent by Created On date at the very top of the list down to the oldest.
Search Options
Use the search box to search for anything on the Subscriptions page. Use the ‘by Field' option to select what you are searching for. The search options available are: Subscription (meaning the Subscription ID given by the gateway), Username, Email, ID, or Any. For accuracy, be sure to carefully enter what you are searching for in the search box without any spaces before or after the entry.
Subscriptions Table Column Options
Id – Internal ID of the Subscription.
Subscription- The unique ID of the subscription as given by the gateway.
Active – Shows whether or not the subscription is active or not. Meaning, it has an active (not expired and marked as completed) Transaction associated with it. If you see a green ‘Yes' then the user will have access to your protected content, if you see a red ‘No' they will not have access. Hovering over this field will reveal the following options:
Add Txn – Click to manually add a transaction. Doing this will not initiate any real charges.
View Txns – Click to view all Transactions associated with the Subscription.
Pause – Use to cancel the Subscription (thus preventing future billings – that can be later resumed) on the level of the gateway. Will only work properly if you have your gateway correctly configured.
Cancel – Use to cancel the Subscription (thus preventing future billings that cannot be re-initiated without re-registering) on the level of the gateway. Will only work properly if you have your gateway correctly configured.
Delete – Use to delete the Subscription. Doing so will NOT delete or refund any transactions, but it will cause the user to lose access to your protected content.
Auto Rebill – Shows the recurring payment status. Can be selected and changed with options of: enabled, pending, paused, or stopped. Enabled means the subscription will auto rebill, pending means MemberPress is still awaiting data from the gateway to enable or cancel, paused means the subscription will not auto-rebill but can be resumed, and stopped means the subscription will not be auto-rebill. IMPORTANT Note: Setting the Auto Rebill to “Stopped” DOES NOT stop the customer from being billed. This is used for testing and admin purposes only. To stop customers from being rebilled you must cancel the subscription.
Membership – Shows which Membership the subscription is associated with. Click the Membership's name to be taken to the edit page of that membership.
Terms – This column lists the terms of the subscription. For example it might say something like $20 / month. This means that the subscription will charge the member $20 every month for the life of the subscription.
Name – The user's names if entered.
User – The username of the user who purchased the subscription. Click the username to be taken to the user's profile in WordPress.
Gateway – This is the payment method the member used when purchasing the Membership.
Transactions – This is a count of how many payments the member has already made towards this subscription. If the subscription is for one month, and the member has made 6 payments. Then the member has had the subscription for 6 months. Clicking on the number will pull up the list of all transactions for that subscription.
IP – Will show the IP Address of the user.
Created On – This is the date that the subscription was created.
Expires On – This is the date that the subscription's next transaction will expire. If no new transaction is added, this will become the expiration date of the subscription.
Export Options
At the very bottom of the Subscriptions page you'll see two options for exporting:
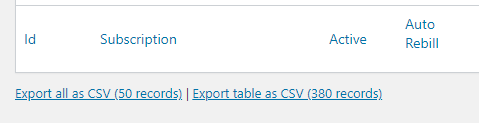
Export all as CSV – Click this link to export only the records shown on the page you are currently viewing as a CSV file.
Export table as CSV – Click this link to export all pages of the subscriptions on your site as a CSV file.


