Live translations
Since MemberPress 1.10.0, we introduced a live translation feature that takes translations available in MemberPress and updates translations on your site automatically. After you install or update MemberPress, you will see a notification icon next to the Dashboard → Updates section in your WordPress Dashboard and a new Translations section with the message that new translation(s) are available.

When you click the Update Translations button, MemberPress will download translations automatically to the wp-content/languages/plugins/ folder.
Help, MemberPress Admin was translated and I can't get it back to English! If you used this process and MemberPress admin screens are now stuck in the site language despite having the admin user's language set to English, try this workaround: How to Force Admin to English after Auto Translations
If your site is in a language not available yet, you should follow the steps from the
Manual translations section below and translate it.
If you have a custom translation of one of the supported languages in the
wp-content/plugins/mepr-i18n folder and want to keep it, go to wp-content/languages/plugins/ folder and check if translation files in your languages exist in this folder already. If they do, you’ll need to delete them first. Then, install a free WPCode plugin (please check this article for details: How to add custom code snippets in WPCode).
Once installed, create a new Snippet and paste the following into it:
add_filter( 'mepr-remove-traduttore', '__return_true');
Another option is to add this code at the end of your current theme’s functions.php file.
Manual translations
There are a few plugins that you can use to manage your translations, but sometimes these types of plugins come with their own headaches. So the way we prefer to translate plugins is by using the
PoEdit tool.
In MemberPress, you may want to translate the plugin for two reasons. Click on the links below to be taken directly to their instructions:
- New Translation – follow these instructions if translating the plugin into a language not currently included.
- Update Existing Translation – follow these instructions if you want to update one of our translations or your own.
New Translation using PoEdit
- Download the MemberPress plugin (currently stable) from your account page and save it to your desktop.
- From the .zip file, navigate to the memberpress//i18n folder, then cut and paste the memberpress.pot file onto your desktop.
- Open PoEdit.
- From the PoEdit menu, click “Create New Translation”.
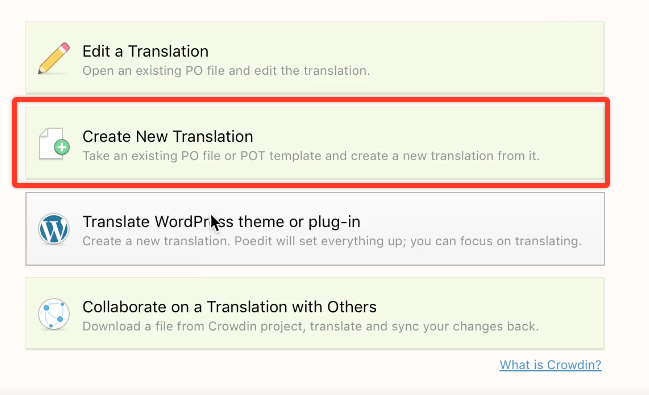
- From the menu offered, browse to your desktop and select the .pot file saved in step 2.
- The translatable strings are shown in the list on the main body of the program. Select a string to translate, and at the bottom of the program, use the “Translation:” text box to enter your new translation for that string.
- When you're done translating the strings you want, click on File -> Save As. You'll need to save your file as “memberpress-{language_code}”. So if your language code is “es_ES” (Spanish), your filename would be “memberpress-es_ES”.
- It saves two files; memberpress-es_ES.po and memberpress-es_ES.mo. If you find that it did not save the .mo file in addition to your .po file, please be sure to go to File -> Compile to MO within PoEdit to get that file saved.
- Both files need to be uploaded to your hosting server and placed in the …/wp-content/plugins/mepr-i18n/ folder. This folder is not erased when updating MemberPress; this ensures that your existing translation files will not be lost when you upgrade or update MemberPress. Adding them to …/wp-content/plugins/member press/i18n will cause them to be deleted during updates.
- Be sure to keep a copy of your .po and .mo files on your computer just in case something fails, and your translations are lost on the webhost.
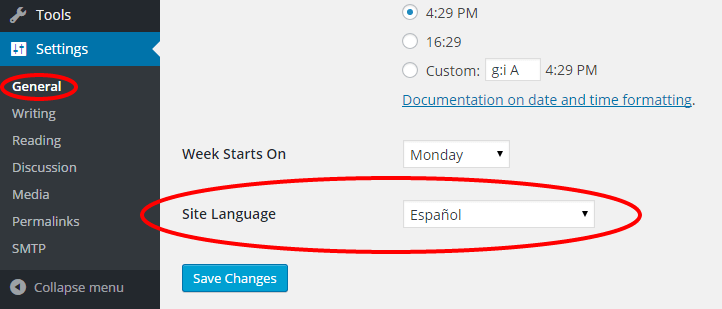
- Set your site language appropriately in the Dashboard -> Settings -> General tab (see screenshot below).
Update Existing Translation Using PoEdit
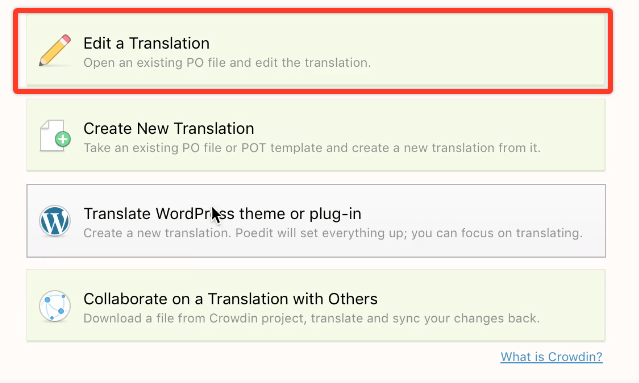
- Open PoEdit and select the ” Edit a Translation” option.
- From the PoEdit menu, select your existing .po translation file. So if it was a Spanish translation, you would open memberpress-es_ES.po.
- Click on Catalog -> Update from the POT file.
- Browse to the new …/memberpress/i18n/memberpress.pot file.
- A window will pop up showing you a list of new translatable strings and ones that were removed. Click on OK.
- The translation strings list will update, and you can now edit the new translatable strings.
- When done translating, click on Save.
- Upload the modified .po and .mo files back to your hosting server.
Translate MemberPress Add-ons
Every MemberPress Add-on, for example, Courses, Corporate, PDF Invoices, and more have its own translation .pot files. If you want to translate these Add-ons, you will need to use translation files in the
…/wp-content/plugins/{Add-on}/i18n/ folder and translate them following the same steps as above.
If your language is Spanish, your translation file names should be, for example, memberpress-courses-es_ES, memberpress-corporate-es_ES, and memberpress-pdf-invoice-es_ES. Once you translate them, they need to be uploaded to your hosting server.
For Add-ons like MemberPress Courses, MemberPress Corporate, MemberPress PDF Invoices, and MemberPress Gifting, translation files need to be placed in the
…/wp-content/plugins/mepr-i18n/ folder.
Translation files for other Add-ons need to be uploaded to the
…/wp-content/plugins/{Add-on}/i18n/ folder.


