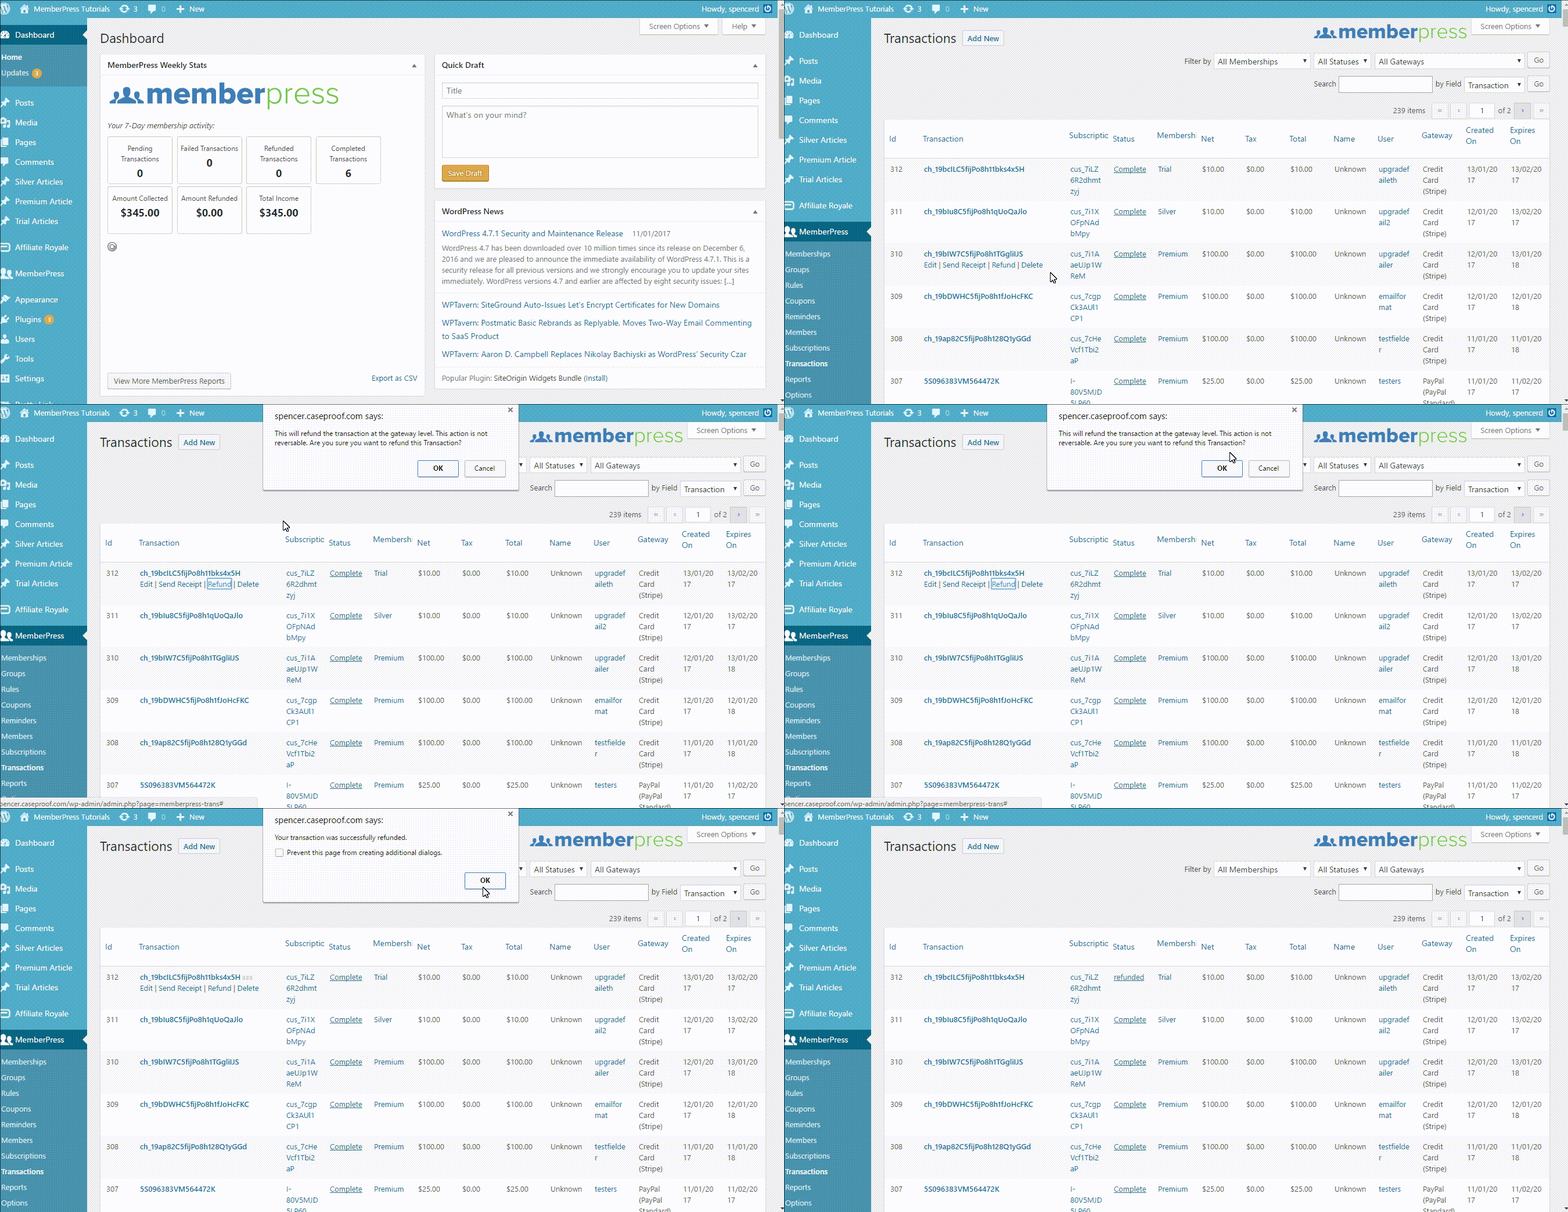
In MemberPress, there is only one correct way to refund a user's transaction, but you can process the refund in two areas.
Detailed Steps
Through the Subscriptions Page
(Helpful if refunding a transaction that is part of an automatically recurring subscription)
- Navigate to the WordPress Dashboard > MemberPress > Subscriptions page.
- For an automatically recurring subscription, make sure that you are in the ‘Recurring' tab or for a non-recurring (one-time payment) subscription in the ‘Non-Recurring' tab.
- Search for the Subscription using the Search tool on the page or by browsing.
- Hover over the unique Subscription ID for the Subscription in the ‘Subscription' column.
- Verify that you have found the correct Subscription.
- Click the ‘View Txns' Link.
- Hover over the unique Transaction ID for the Transaction you would like to refund in the ‘Transaction' column.
- Click the ‘Refund' Link.
- Click ‘OK' on the Pop-up after verifying you are canceling the correct subscription.
Special note: if the Transaction is also associated with an active Subscription that you would like to cancel, then click the ‘Refund & Cancel' link in step 5 instead of clicking the ‘Refund' link.
Through the Transactions Page
(Helpful if refunding a single transaction not associated with an automatically recurring subscription)
- Navigate to the WordPress Dashboard > MemberPress > Transactions page.
- Search for the Transaction using the Search tool on the page or by browsing.
- Hover over the unique Transaction ID for the Transaction in the ‘Transaction' column.
- Verify that you are refunding the correct Transaction (this process is irreversible).
- Click the ‘Refund' Link.
- Click ‘OK' on the Pop-up after verifying you are canceling the correct subscription.
Special note: if the Transaction is also associated with an active Subscription that you would like to cancel, then click the ‘Refund & Cancel' link in step 5 instead of clicking the ‘Refund' link.
Brief Overview
If you have already found the user's Transaction, as explained in the steps above, you can review this gif for how to refund a Transaction correctly:

Technical Requirements
Your gateway must be set up correctly for this process to work correctly.
If you are using PayPal Standard as your gateway, Advanced Mode needs to be correctly configured to utilize this functionality of MemberPress. To review setting up Advanced Mode in PayPal Standard, please visit this page.
If you use Authorize.net as your payment gateway, refunds are not possible through MemberPress. Instead, you will need to go to your Authorize.net account to initiate a refund.
PLEASE NOTE: Every refund done through MemberPress or the payment gateway will cause a loss of access since the transaction will be marked as Refunded in MemberPress. If you want a user to have access even after a refund is completed, you'd need to manually mark that transaction as Complete again after the refund has been performed.


