If you designed your website with Elementor page builder, you can protect specific parts of your design only for your members with MemberPress. To do this you will need the Elementor add-on for MemberPress which is available on all MemberPress plans. This article will show you how to install and use the add-on with your Elementor designs.
Note: You will need to install the Elementor plugin for the add-on to work correctly.
Installation
You can install the Elementor add-on directly from your site:
- Log in to your site and navigate to Dashboard > MemberPress > Add-ons
On the Add-ons page, browse the list of add-ons, or use the search tool on the page to find the Elementor add-on
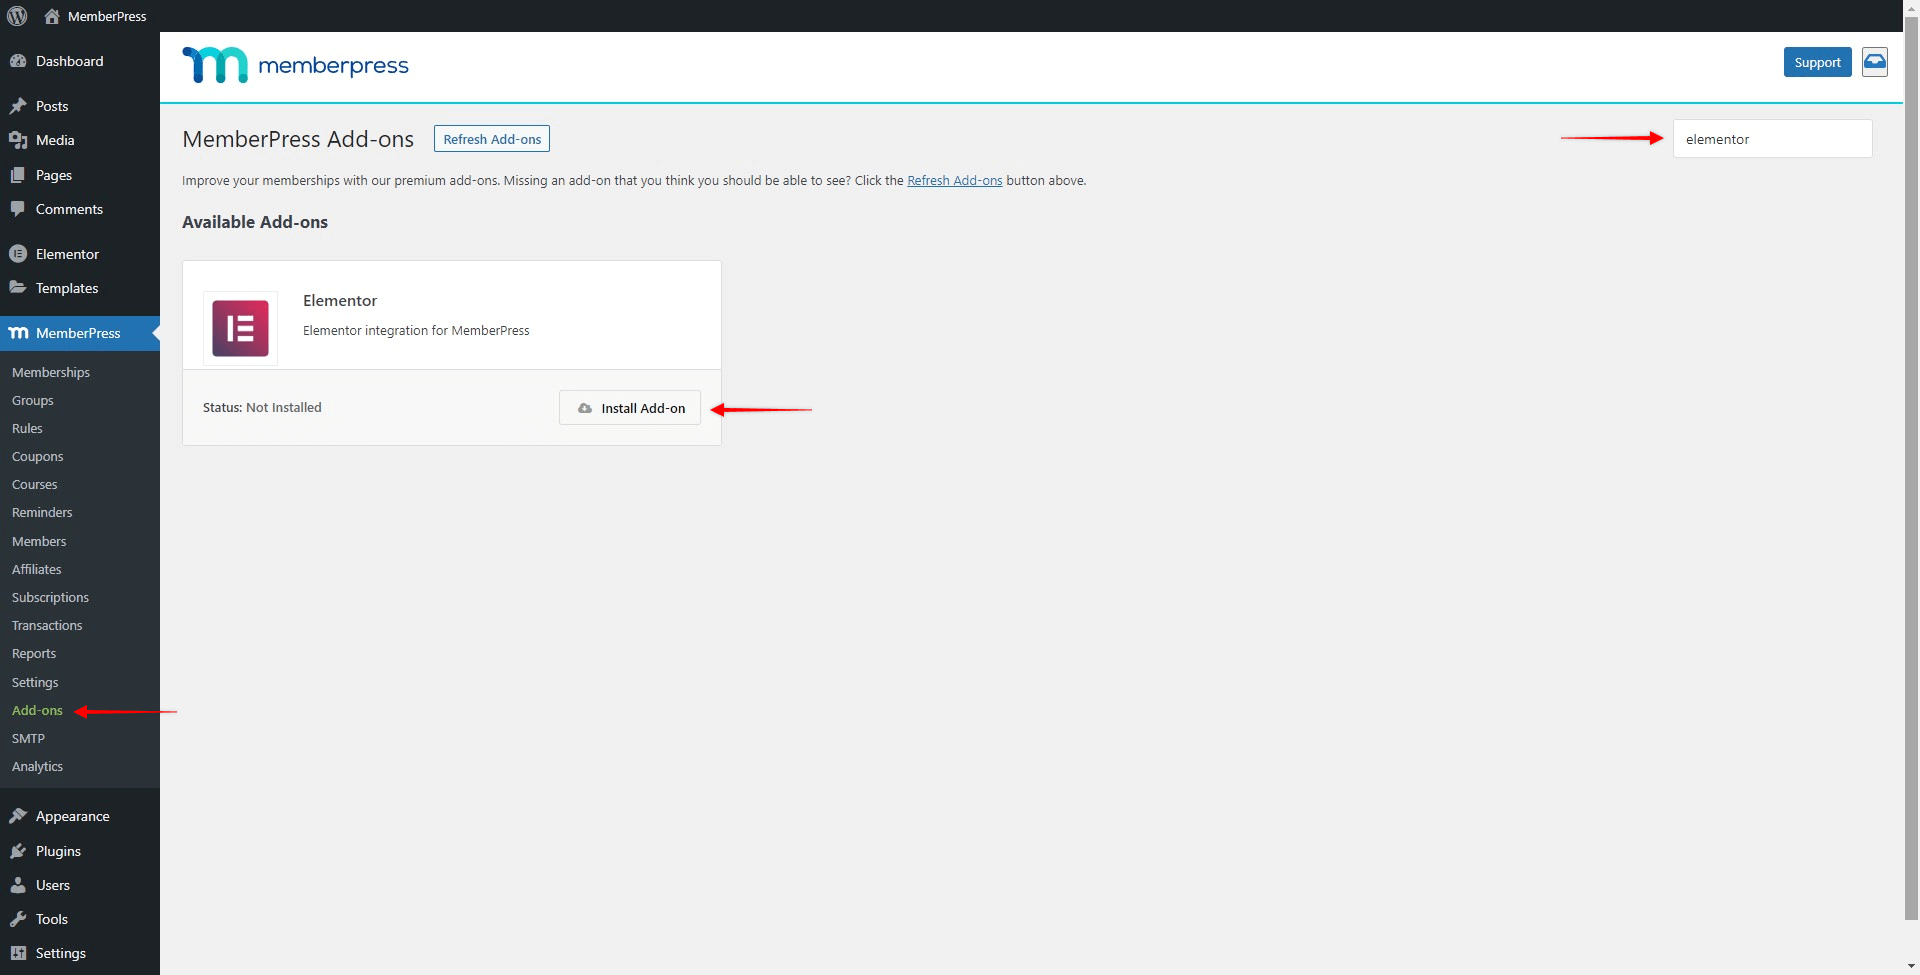
- Once you fount the Elementor add-on, click on the “Install Add-on” button. This will install and activate the addon on your site.
If needed, you can find this addon (MemberPress Elementor Content Protection) on your list of installed plugins (Dashboard > Plugins > Installed Plugins).
Protect the Sections and Flexbox Containers
Set Up Rules
In order to protect Elementor Sections or Containers, you need to create a rule (or rules), that will define the conditions needed to access protected content (e.g. an active subscription).
You’ll most likely want to use a Partial Rule as it allows you to protect different parts of the page or post, making them hidden for visitors and non-members (or for example create a paywall).
Further, as an example, we’ll show you how to create the partial rule and use it to protect Elementor content:
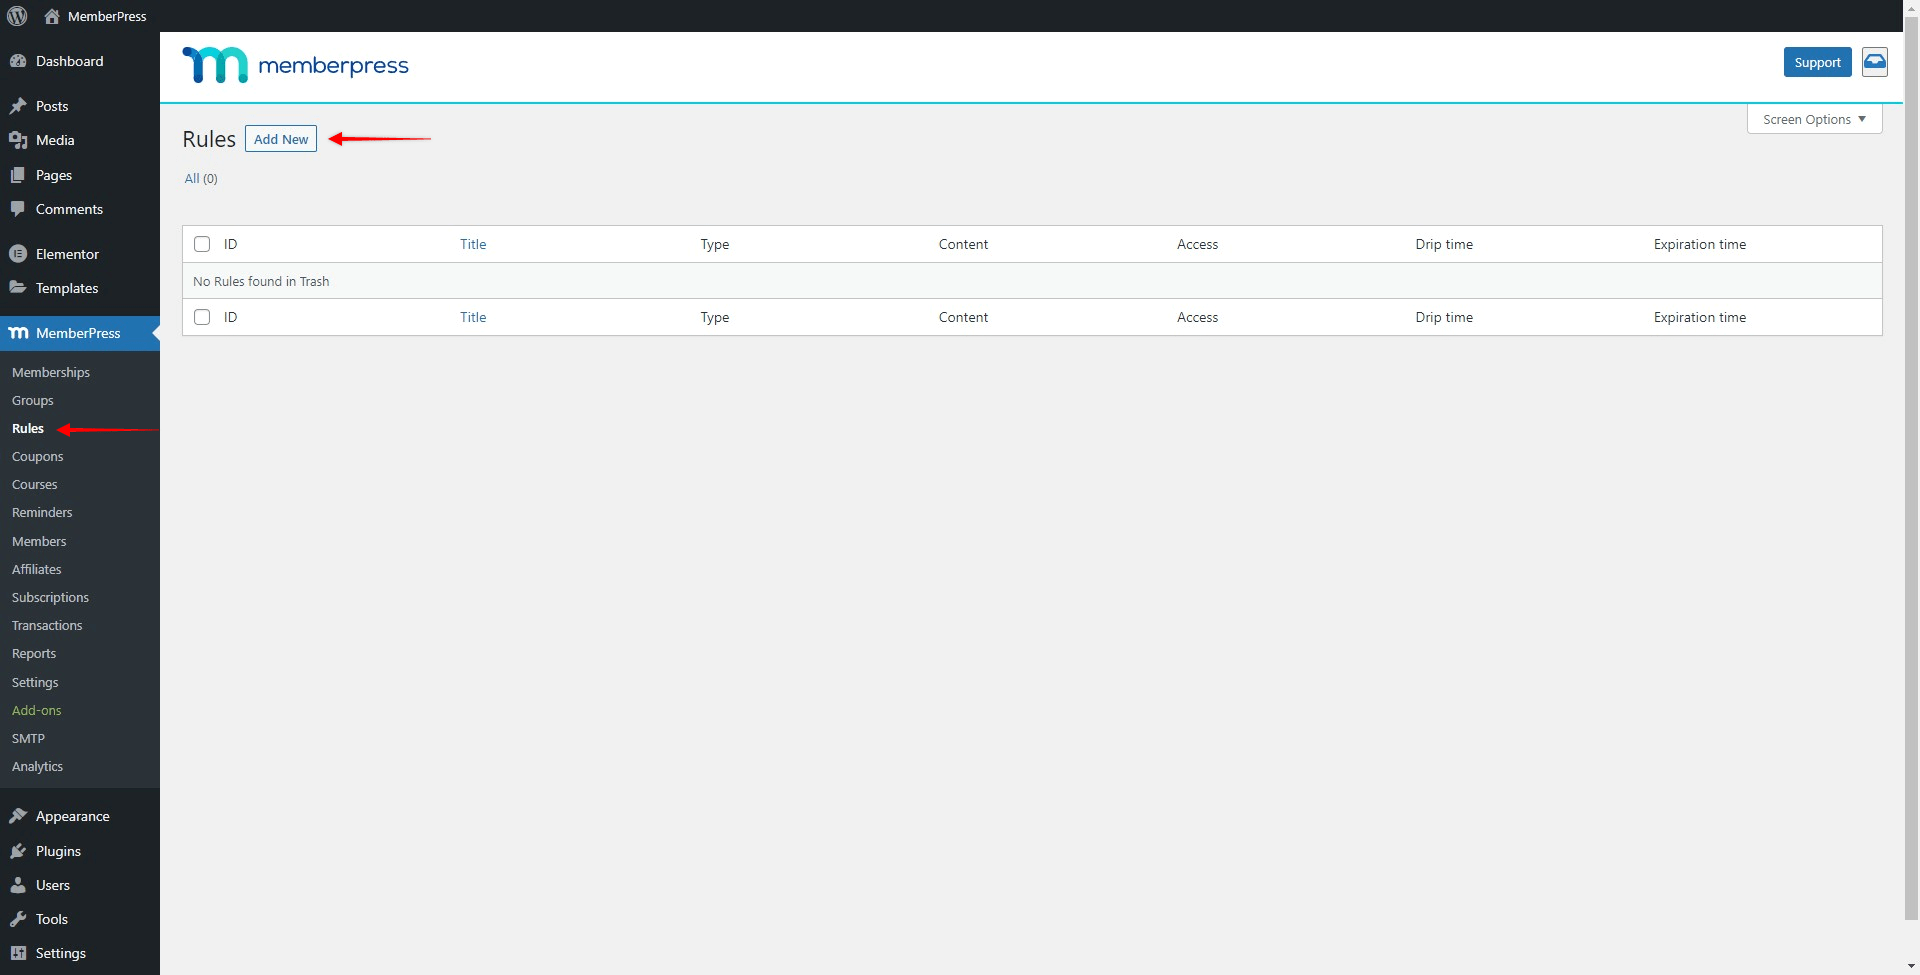
Navigate to Dashboard > MemberPress > Rules, and click on the “Add New” button
Choose the “Partial” rule type, and add your memberships to Access Conditions. You can add an unlimited number of conditions here. Next to memberships, you can also add specific members, user roles, or capabilities.
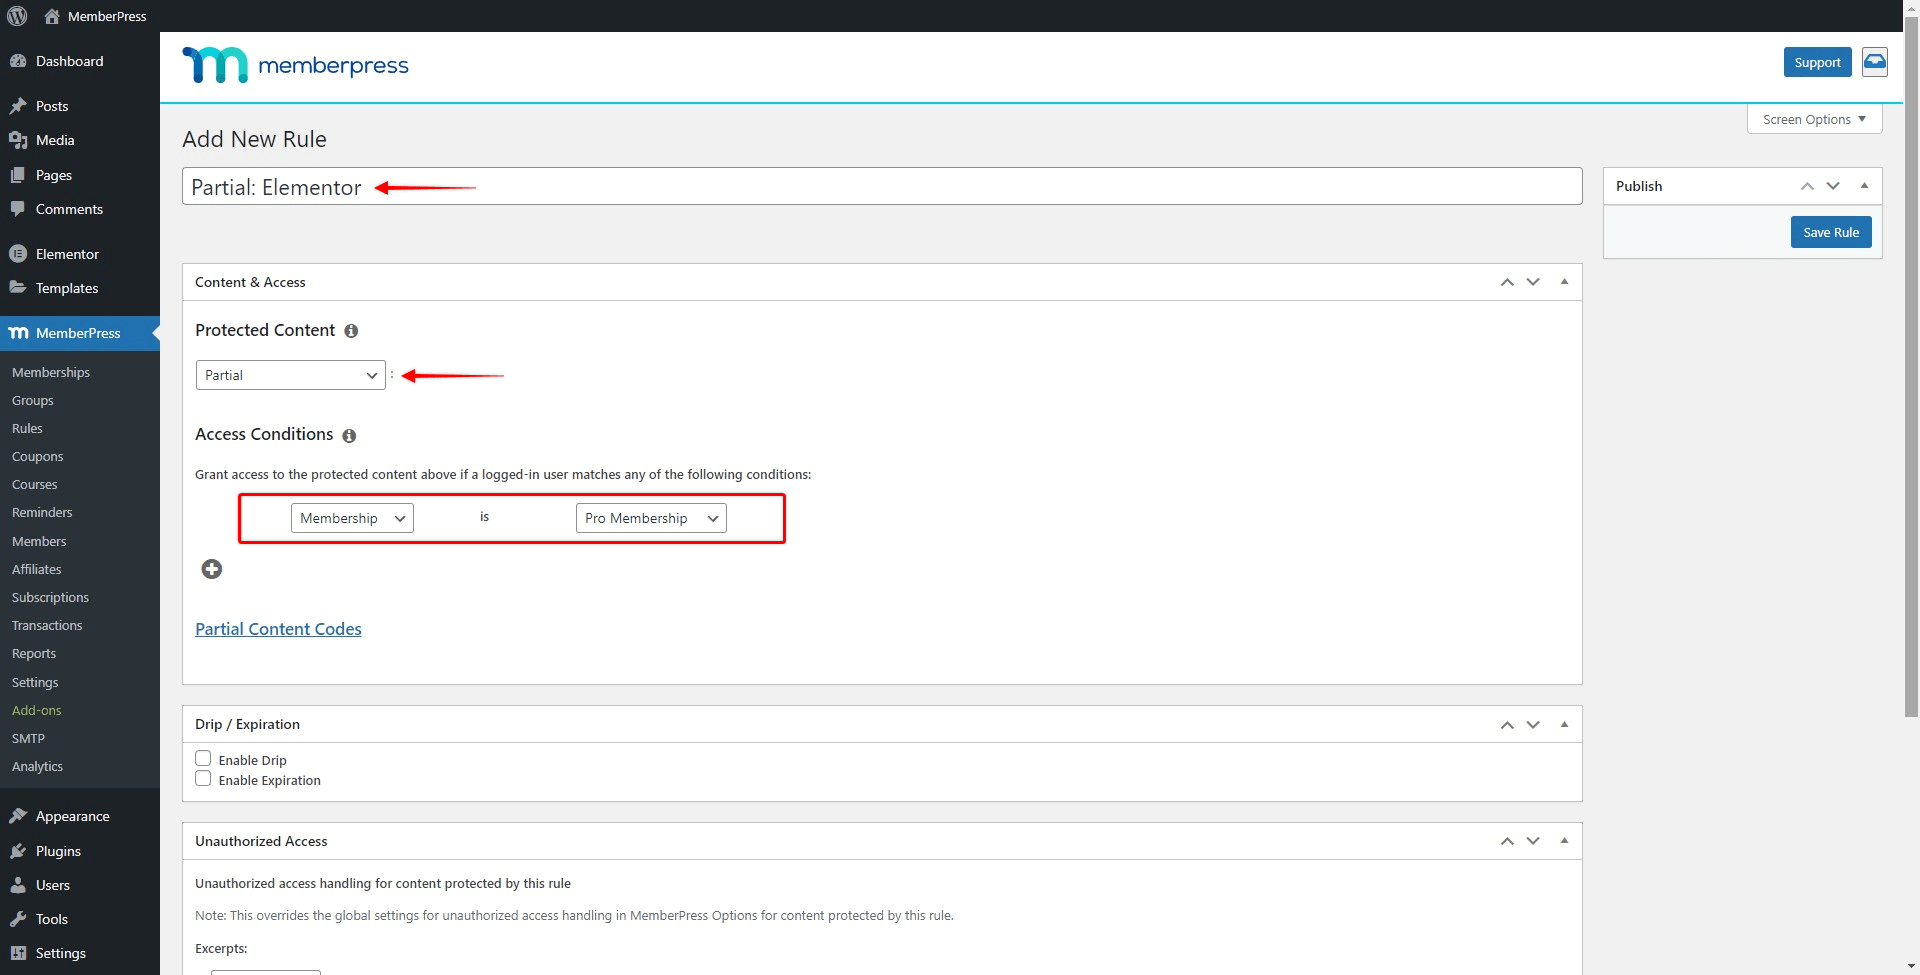
- Optionally, you can name the rule so it’s easier to distinguish different partial rules.
- Once you’re done, click the “Save Rule” button to save settings.
You can check more details about creating Rules in MemberPress by visiting the Rules Overview documentation here.
Now that you activated our Elementor add-on and created your rule, you’re ready to protect your Elementor content.
Protect Sections
You can protect any Elementor section on your site, using one rule for all of them or multiple rules, to allow access to different groups of users. It’s important to mention that you can apply only one rule to each section.
Please follow these steps to protect Elementor sections:
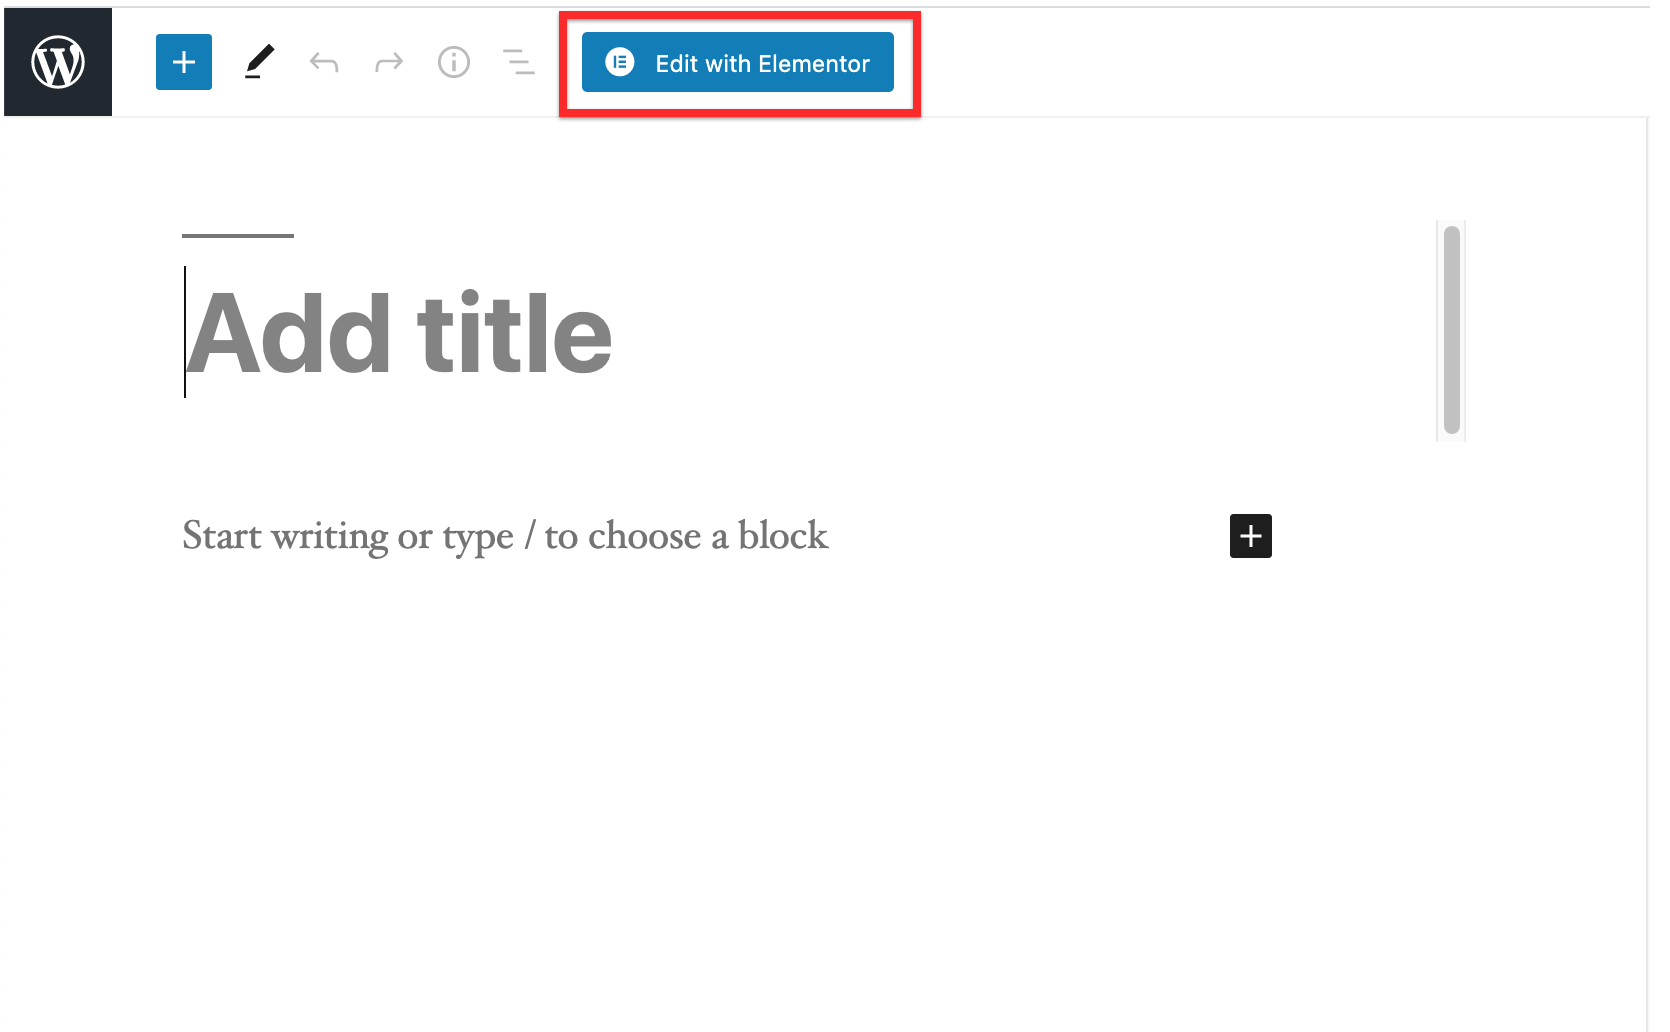
Go to a page or post where you’d like to protect existing sections (or create new ones) and launch Elementor by clicking “Edit with Elementor”:
Select the Section you wish to protect, and click the “6-dot” icon to open and edit the Section
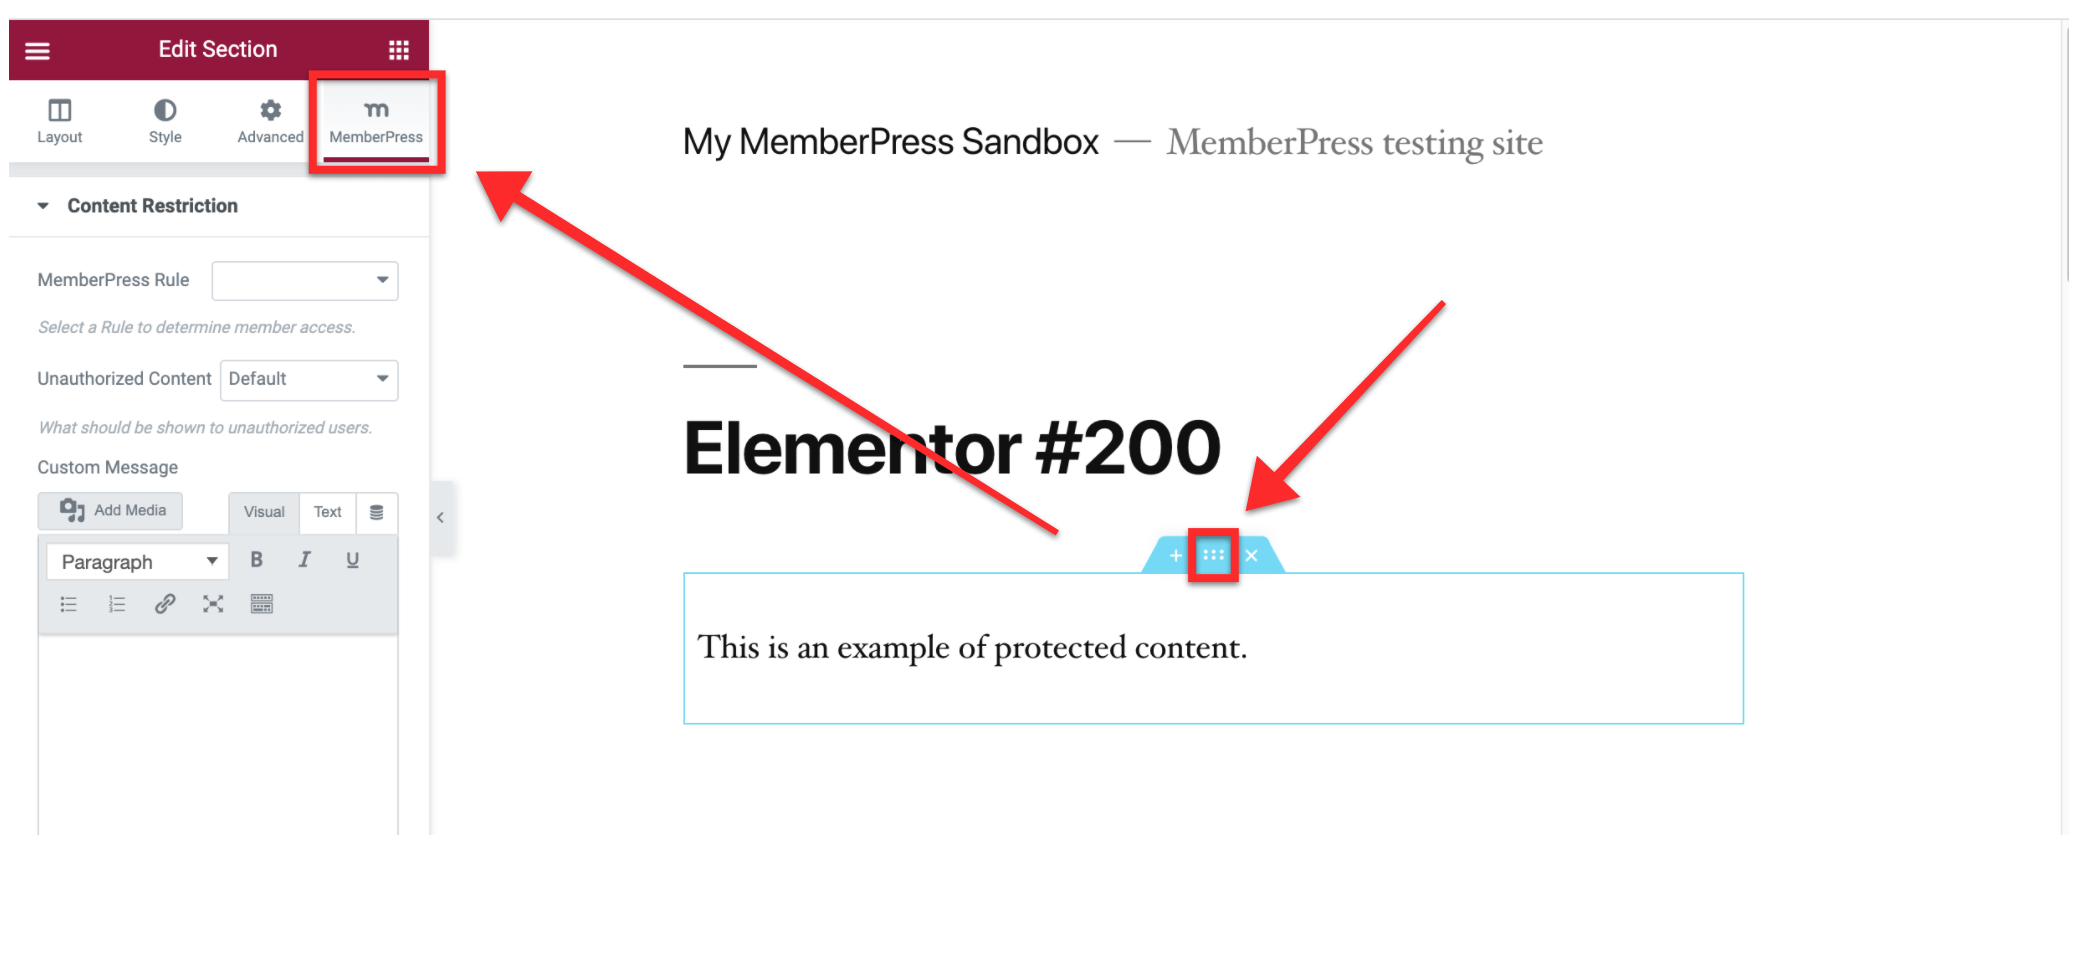
- Now, next to the standard Elementor tabs, you will notice a new “MemberPress” tab. Click on it to open the protection settings
- To apply the rule you previously created to this Section, click on the “MemberPress Rule” dropdown, and select the rule from the list.
- Next, to apply the rule, you have the additional “Unauthorized Content” option under the MemberPress tab, where you can choose how will the protected section be displayed on your page:
- Default: This option shows your default unauthorized message, which can also include the login page
- Hide: This option hides the content from unauthorized viewers
- Display Message: This option allows you to show unauthorized viewers a custom unauthorized message. Type your custom message in the Custom Message field below the Unauthorized Content field
- Click on update to save changes.
Following this, the Section you protected will not be available to users that don’t fulfill the condition set in your rule (e.g. one that doesn’t have an active subscription for the needed membership). Also keep in mind that if you have multiple conditions, users need to fulfill only one of them to access protected content.
Protect Containers
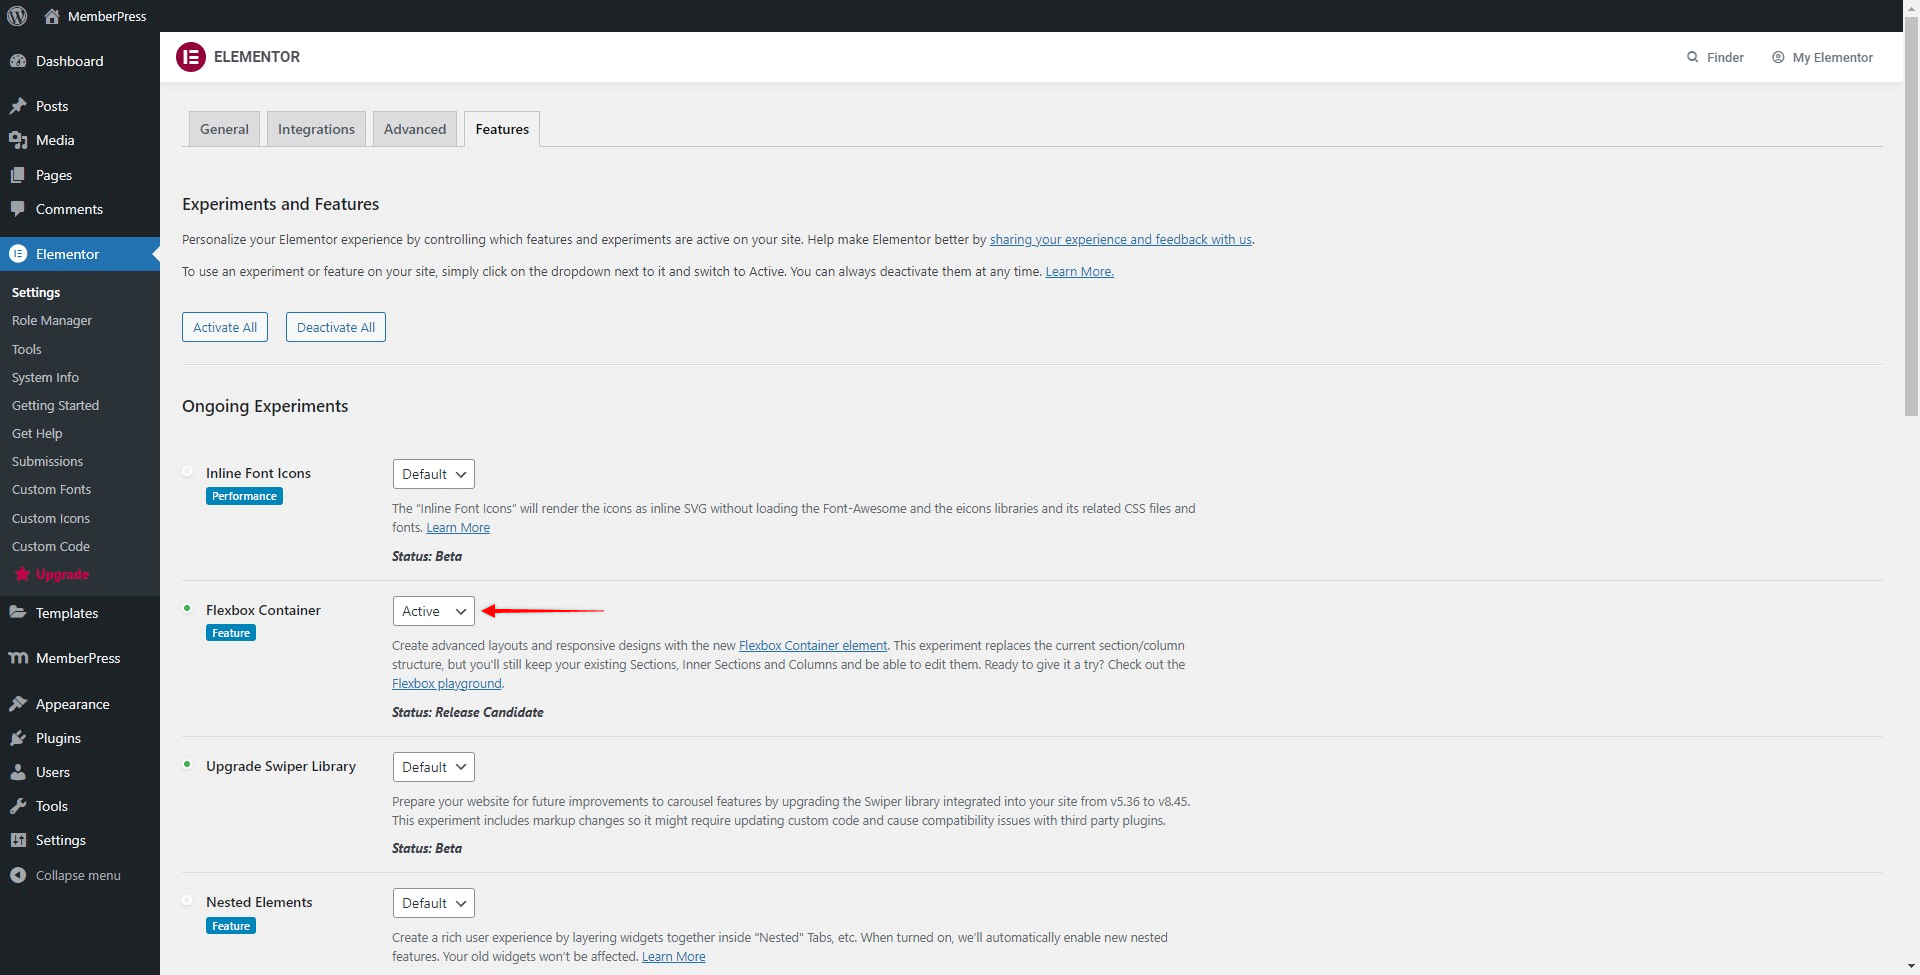
Similarly to protecting Sections, since version 1.0.4 of the MemberPress Elementor Content Protection addon, you can also protect Elementor Flexbox Containers.
Elementor Flexbox Containers can be activated at Dashboard > Elementor > Settings > Features:
Please check the following article for more details: How to Protect Flexbox Containers in Elementor.


