Currently, when users want to cancel their recurring subscriptions, they need to check the Allow Members to Cancel their own subscriptions option under the MemberPress > Account tab. Once it's checked, users can cancel subscriptions in the Account > Subscriptions tab by clicking the Cancel link and confirming that in the popup. In addition, the MemberPress Cancel Override add-on enables you to redirect users to a different page when clicking the Cancel link in the Account > Subscriptions section. This way, you can display special offers for clients or ask them to submit surveys before canceling their subscriptions.
Please note that since you can only cancel recurring subscriptions, this add-on works only with recurring memberships.
Video Tutorial
Installing the Cancel Override Add-On
To install this add-on navigate to WordPress Dashboard > MemberPress > Add-Ons, find the add-on, and click the Install Add-on button. This will automatically download and install the add-on.
Alternatively, you can also download and install the Cancel Override add-on with the download link on this page.
Enabling Cancel Override
The first step to set a Cancel URL is to go to MemberPress > Settings > Account, scroll down to the Cancel Override Settings section, and check the Enable Cancel Override option.
Creating Cancel Page
The next step is to create a new Cancel page or select an existing page. This page should contain the following shortcode:
[mepr-cancel-override]This shortcode will be replaced by the Cancel link and message from your settings. Optionally, you can use the shortcode that will display only the link, but omit the message:
[mepr-cancel-override-url]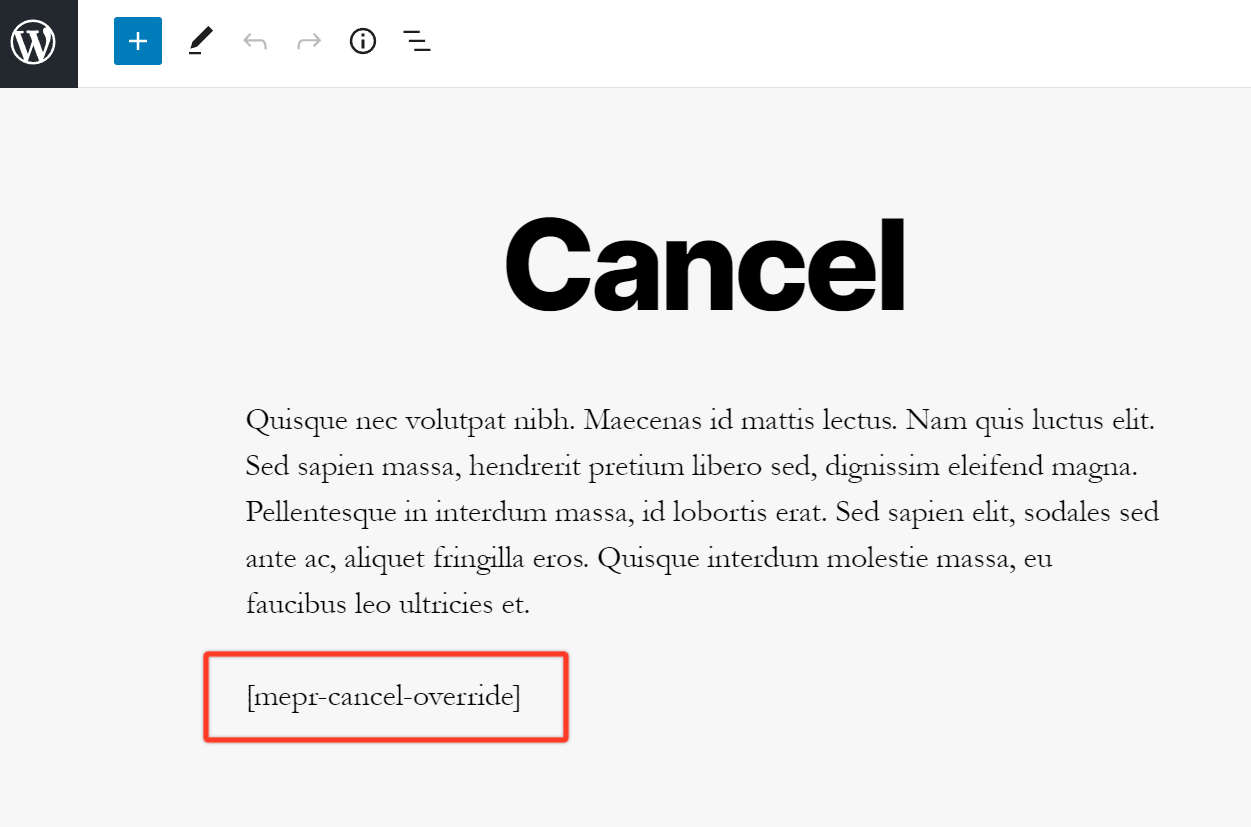
Setting up Global Cancel URL
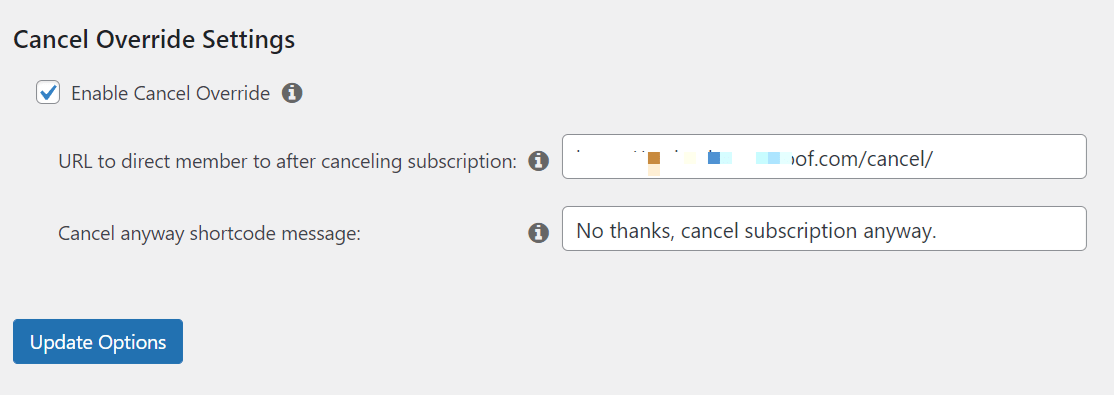
After that, go to the MemberPress > Settings > Account tab, enter the URL to the Cancel page from the previous step, and optionally change the message that will be displayed as the text of the link. Make sure to click the Update Options button to save changes.
Setting up Per Membership Cancel URL
This step is optional, but it's the best choice if you want to either override global settings for an individual membership or disable global cancel override settings and set up a cancel link for an individual membership.
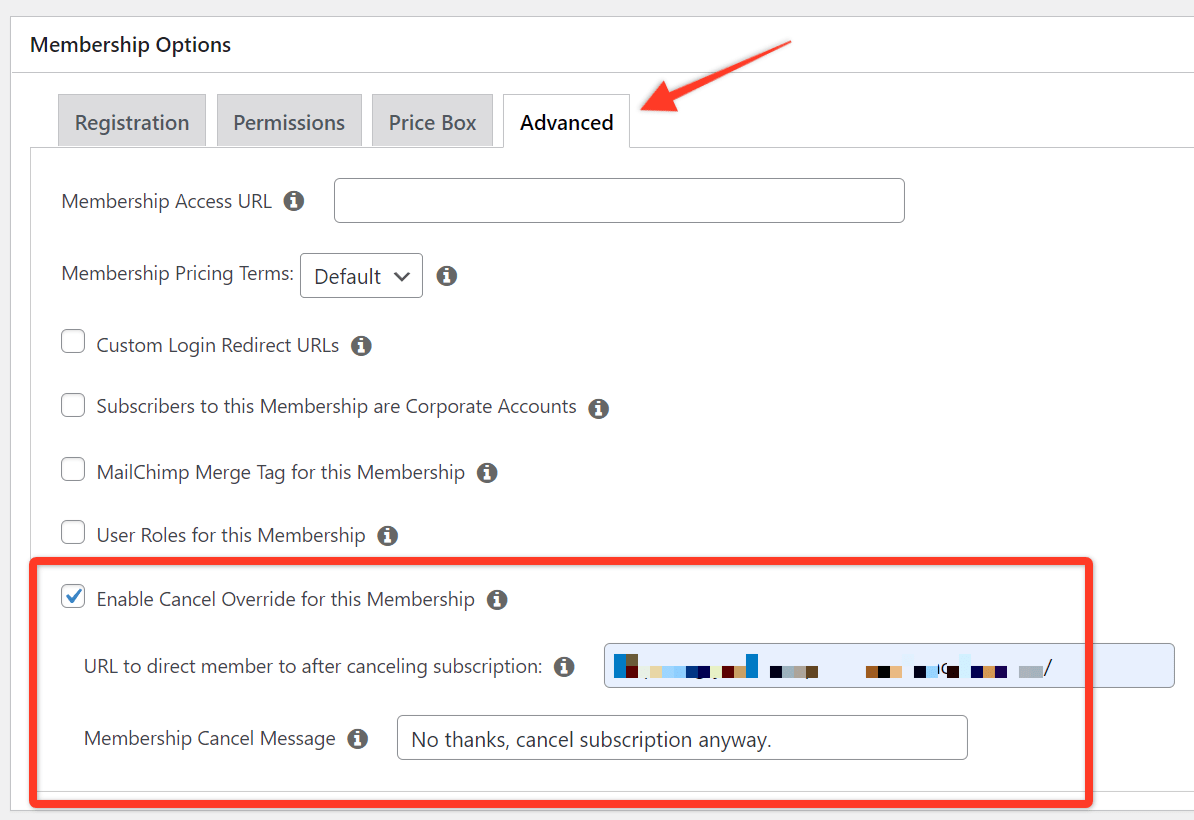
To set per membership cancel override, open the membership edit page in the MemberPress > Memberships page, scroll down to Membership Options, and click the Advanced tab. You will see the same required settings as on the global settings page. Next, enter the URL where users will be redirected when they click the Cancel button. Keep in mind that you can set the Cancel page for each membership separately so that the Cancel URL will be different from the global Cancel URL. Optionally, you can change the default Cancel Message.
Canceling Subscription
Once the user clicks the Cancel button on the Account page, they will be redirected to the page set in Global settings or if set per membership settings. Then, they can click the link generated by the Cancel settings. Once this link is clicked, they will be redirected to the Subscription tab of the Account page. There will be a message that the subscription was successfully canceled.
That's it. You should now be able to redirect people to a custom page before they can cancel their subscription!
I'm confused; help!
Shoot us an email from our support page if you need any further assistance with this add-on.


