With MemberPress Rules you can protect your valuable content and display it just to the right members. Still, when it comes to your pages and posts, Rules apply only to the content, while other areas remain visible to everyone.
If you’re using the popular wpDiscuz commenting plugin, you've surely noticed that comments your members added are affected by this. This article will show you how to protect them by combining the power of Elementor Pro and MemberPress Rules.
MemberPress Rules And wpDiscuz Issue
MemberPress Rules help you serve the right content to users with different levels of membership. At the same time, MemberPress rules can only protect the post content area.
To add wpDiscuz to your post or pages, you just need to activate it and set it up. Since wpDiscuz overtakes the default WordPress commenting system, it will be displayed in the same location – under the post content. Thus, though you protected your post content using MemberPress rules, the wpDiscuz comments remain visible.
How To Make This Work?
This article will help you use wpDiscuz with Elementor Pro and MemberPress. Thus, before we start, you need to have the following plugins installed and activated on your website:
- Elementor;
- Elementor Pro;
- MemberPress Pro (Basic, Plus, or Pro);
- Elementor Add-on for Member Press (Dashboard > MemberPress > Add-ons).
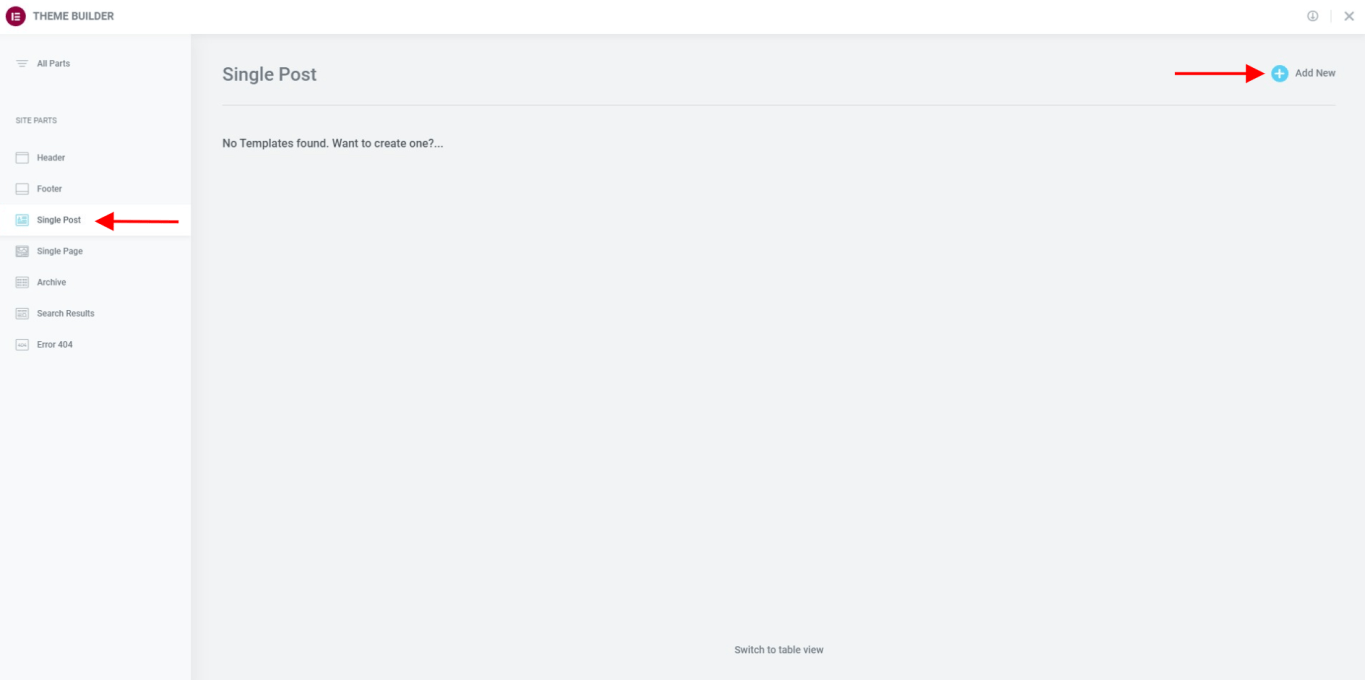
Create Elementor Single Post Template
To start, you need to set your single post template using Elementor's Theme Builder:
- Navigate to Dashboard > Templates > Theme Builder. Here, click on Single Post and then on the Add New button.
- Design your template by adding widgets you want to display like post title, post content, etc.
- In the end, add the Post Comments widget. Make sure to add the Post Comments widget to the separate section. This will add the core comments feature to your template.
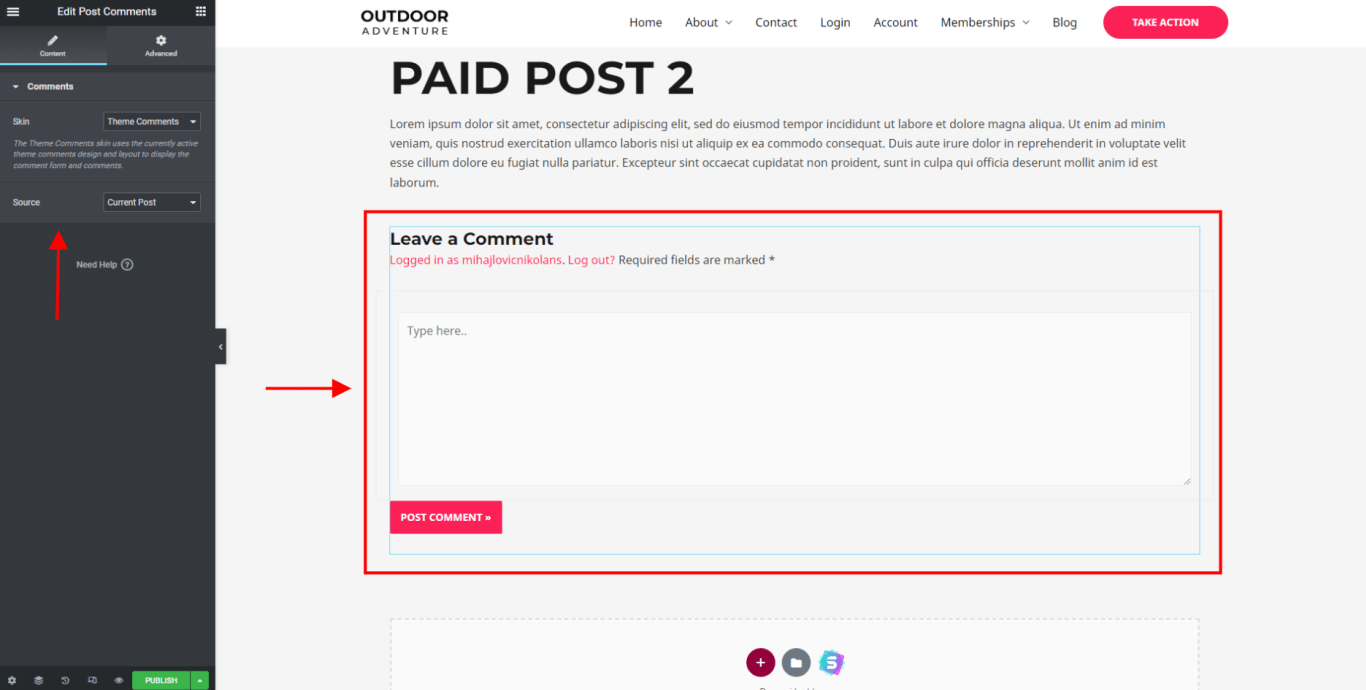
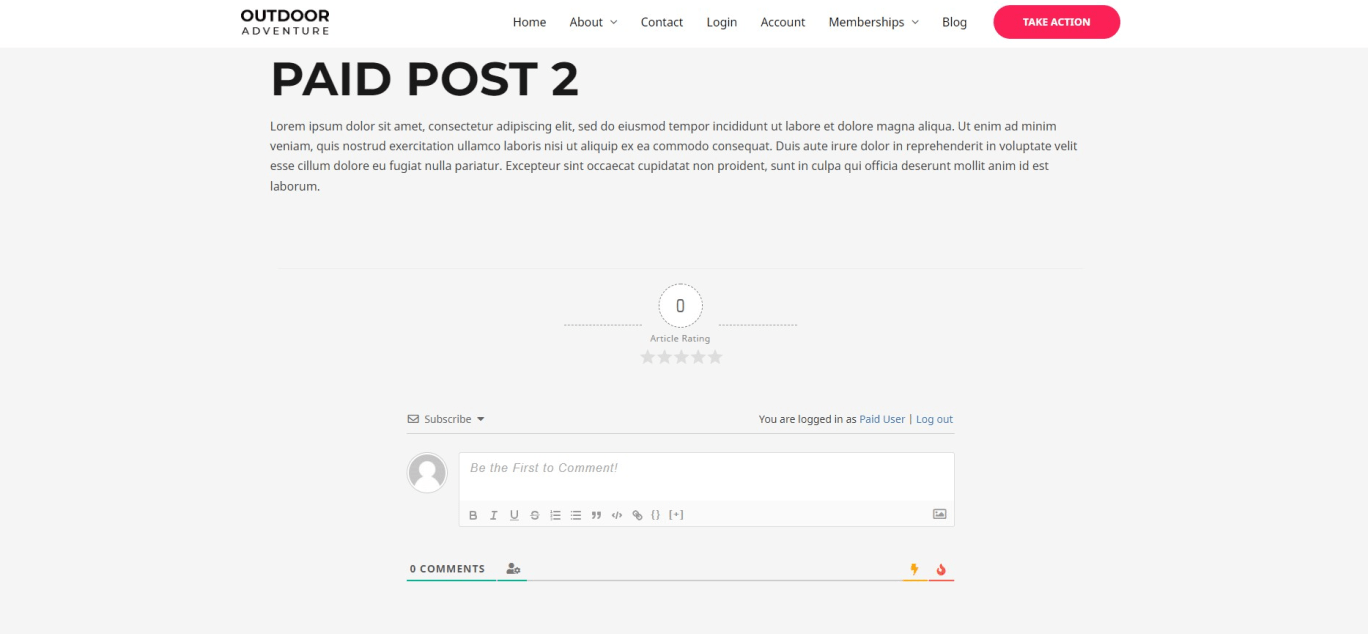
- On the front end, wpDiscuz will take over and display its form over the core comments. As a result, posts using this template should look the same as your default posts with the wpDiscuz form.
- Once you’re done, click Publish.
- Next, you will see the publish settings popup. Here, you need to choose where Elementor should apply your new template. You can set the condition to all posts, or choose a different setup based on your needs. For example, you can use it for posts belonging to a specific category, or just certain posts types.
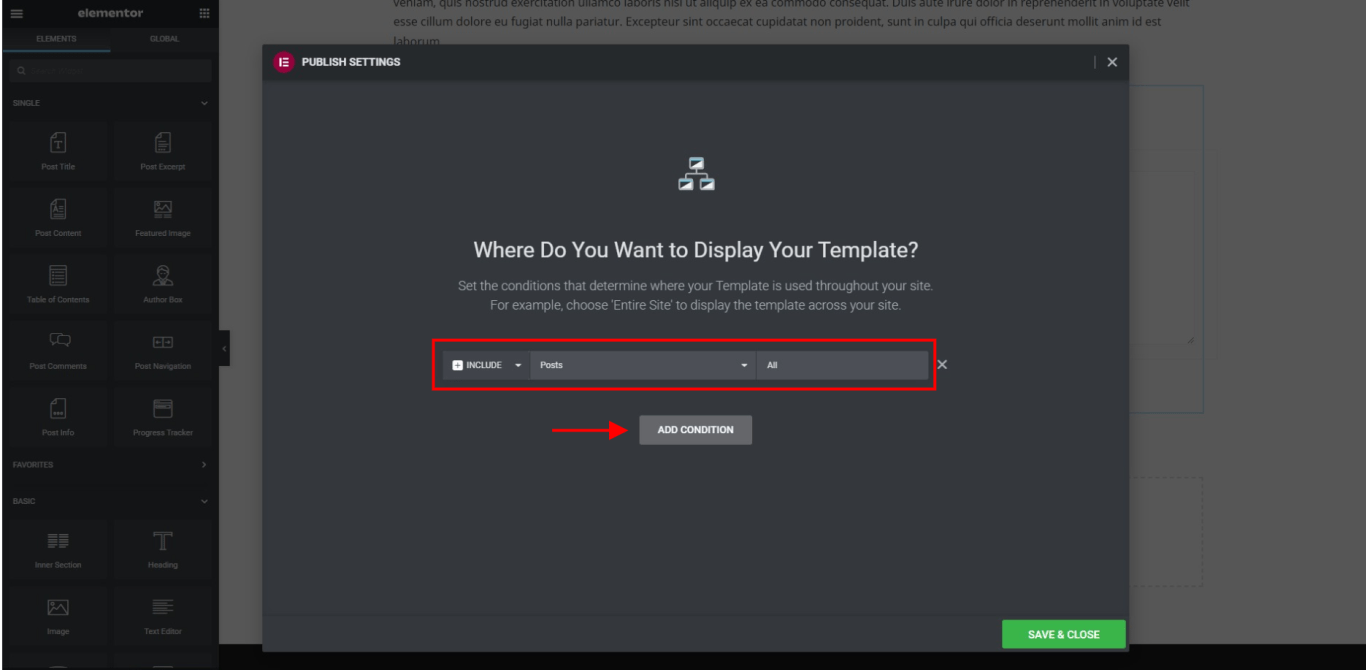
- Click on the Save & Close button to finish the template setup.
Apply MemberPress Rules To The Widget
To protect an Elementor section or container, you will need to create a MemberPress rule. The Partial Rule type usually works the best for this.
Once your rule is created, you can continue editing your template, to apply this rule to the comments section. Start editing the template you previously created, and follow these steps:
- Click on the six-dot icon on the section containing the Post Comments widget.

- In the settings panel, you will notice a MemberPress tab. Click on the tab.
- Under the MemberPress Rule dropdown, select the rule you wish to apply to these posts.
- Click the Update button to save changes.
This will apply the chosen rule to the section containing the comments in your new template. As a result, your content will be protected by the MemberPress Rule directly, and your comments section will be protected by protecting the Elementor section.
In addition, you can find more information on working with Elementor widgets and MemberPress in the MemberPress Elementor Add On article.


