The ReadyLaunch™ Registration template is available with MemberPress version 1.10.0. By default, the Registration template will be enabled.
With MemberPress classic pages, two-page checkout is the default option.
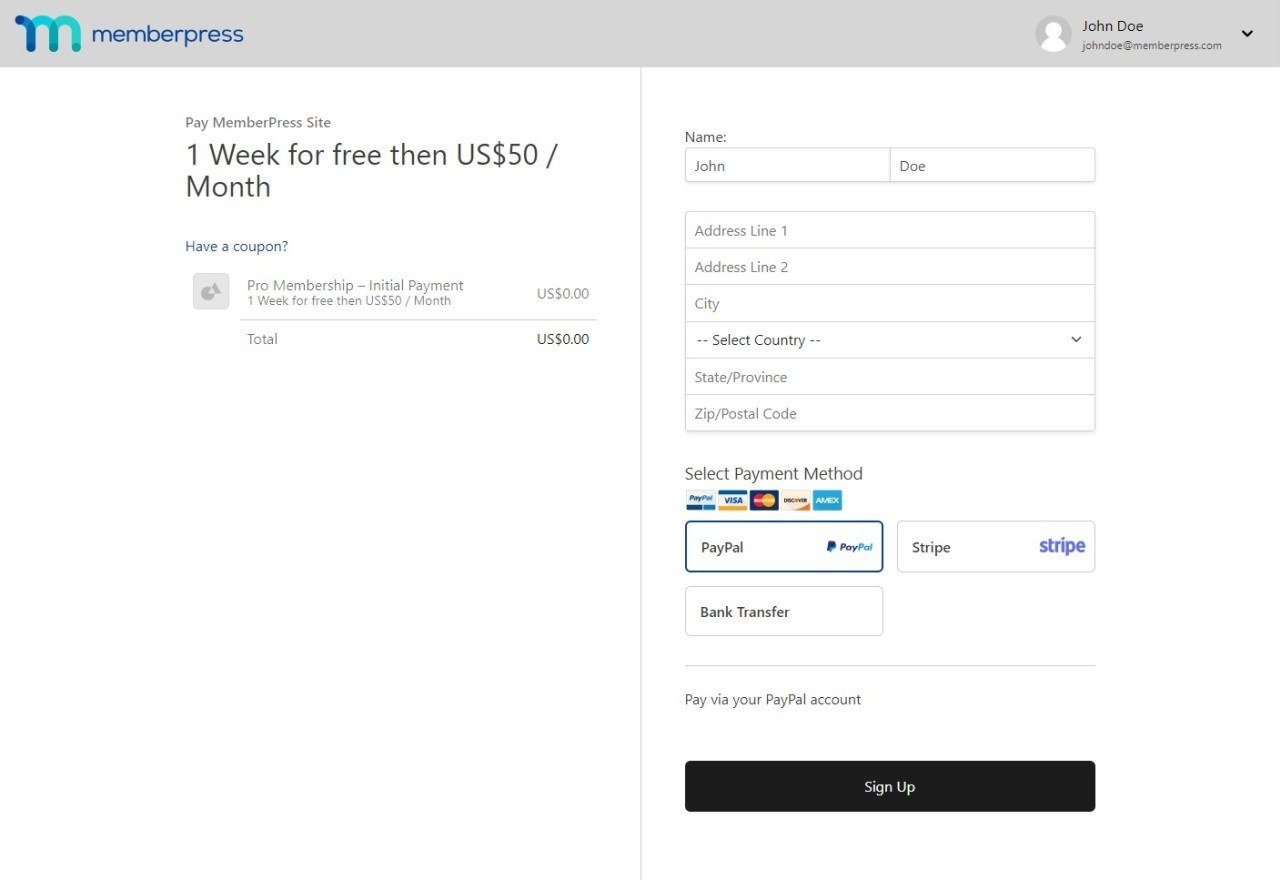
However, with ReadyLaunch™, the registration template registration form, purchase summary, and checkout are combined into one page to simplify and speed up the registration process.
The Registration template has a modern design and brings advanced data presentation to the mix. This template is also created to allow a distraction-free checkout process.
The template is full-screen. That means it minimizes the need for scrolling and requires no additional clicks. Also, the site header and footer are not included on the page. All this combines to provide users with a better checkout experience.
In addition, the template is fully mobile responsive, giving the same user experience on any device.
Deactivate ReadyLaunch™ Registration Template
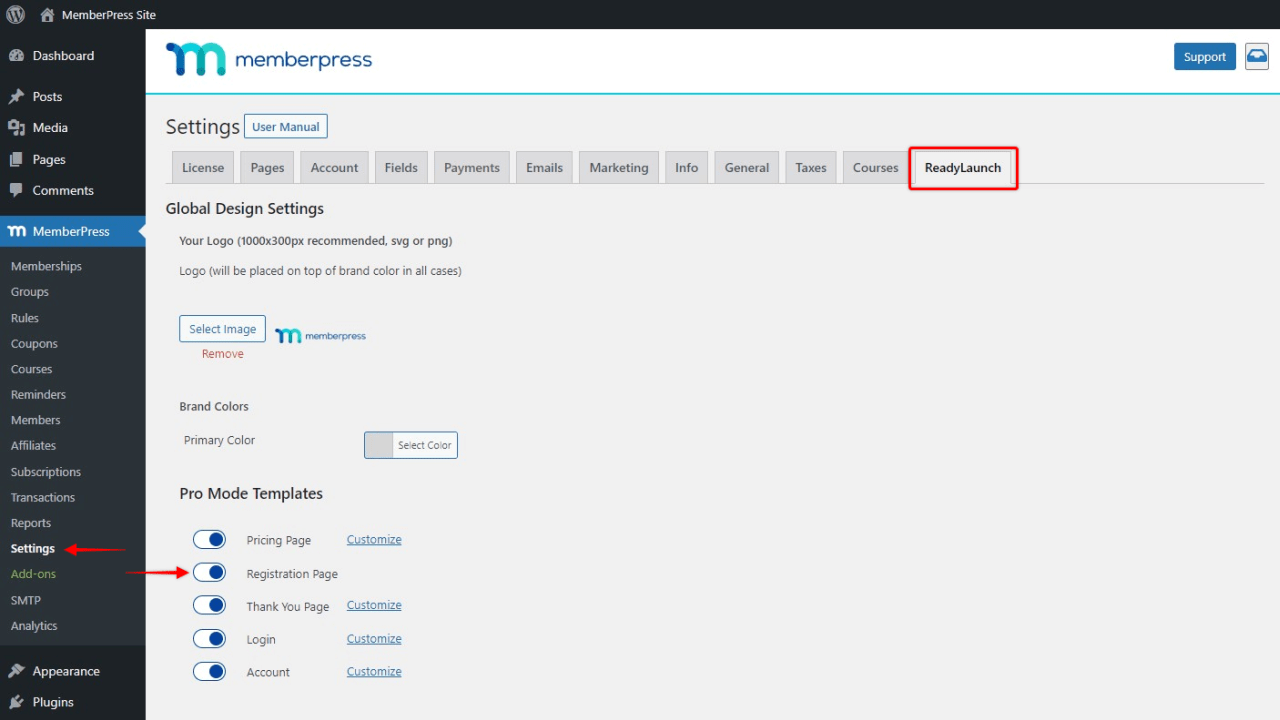
If you still need to use classic MemberPress registration and checkout pages, you can deactivate the ReadyLaunch™ Registration template by following these steps:
- Log in to your site admin area, and navigate to Dashboard > MemberPress > Settings
- Click on the ReadyLauch™ tab
- Toggle the Registration Page option off
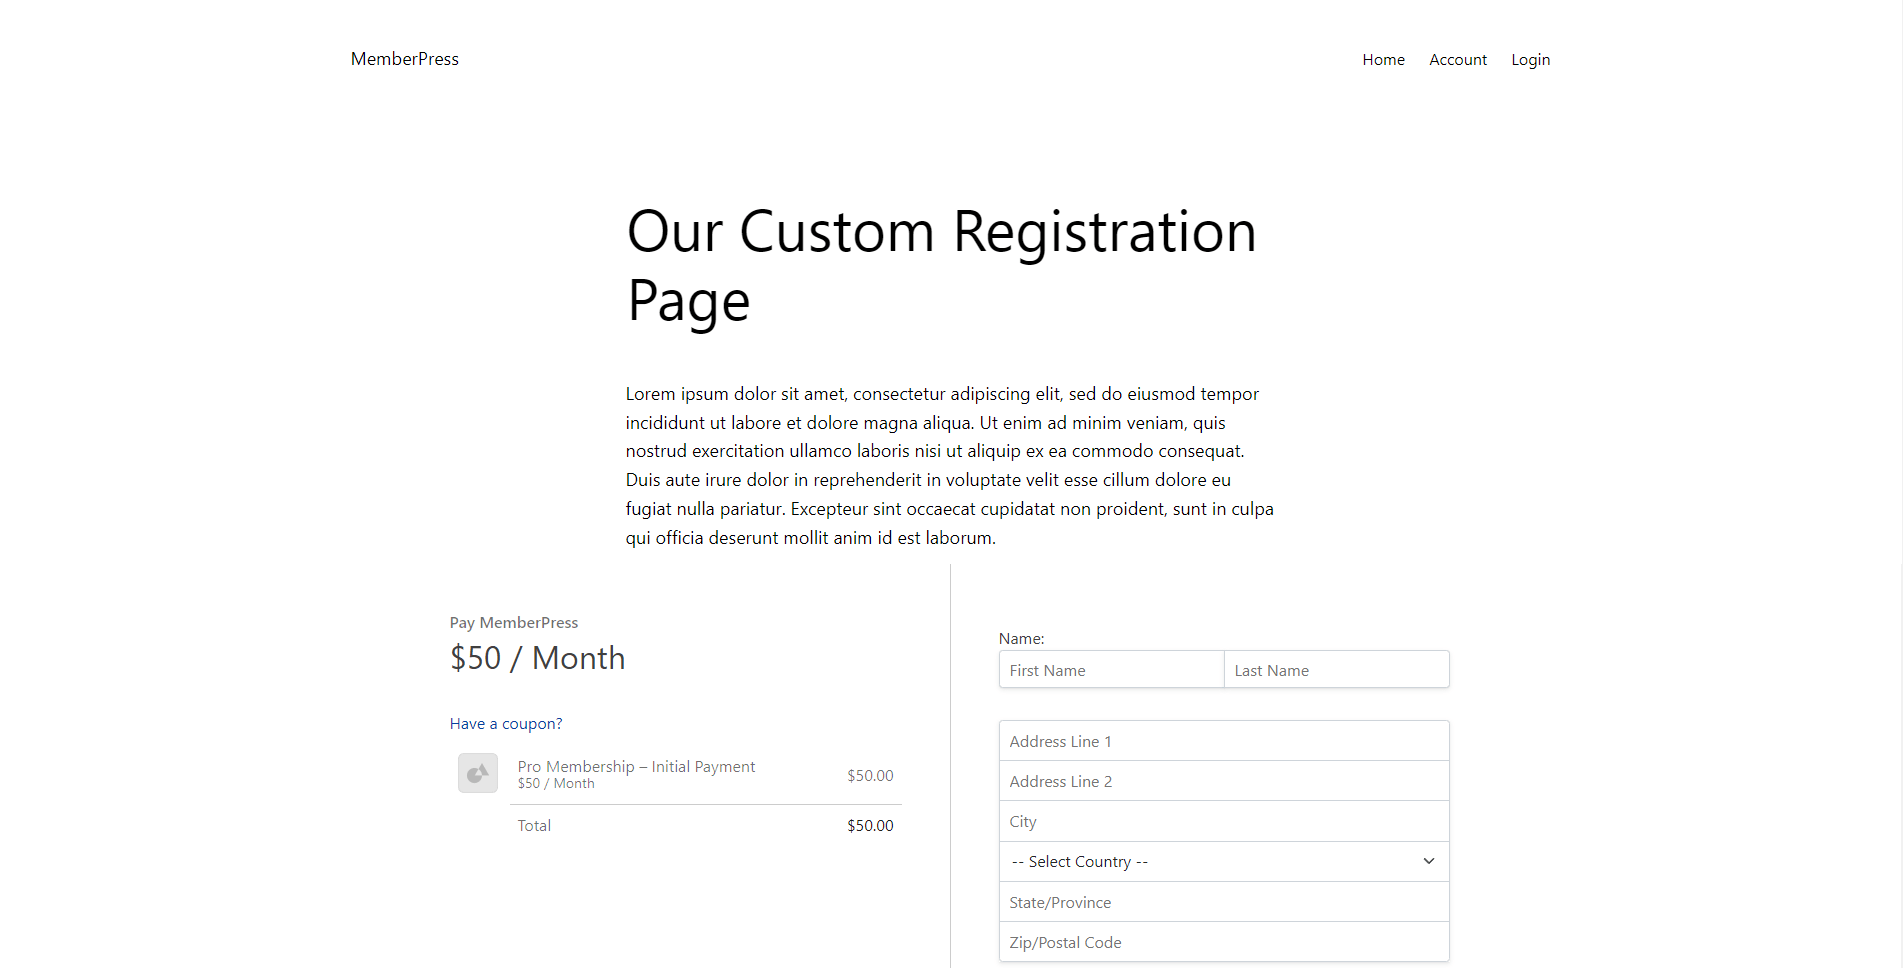
Adding the Registration Template to Custom Pages
You can add the ReadyLaunch™ Registration template to any page or post on your WordPress site. To do this, you would need to design that page or post with the default Block editor and add the ReadyLaunch™ Registration block:
- Start the Block editor on the post you wish to edit;
- Click the “+” icon to open the block inserter;
- Search or browse down the block list to find the ReadyLaunch™ Registration block;
- Click on the block to add it;
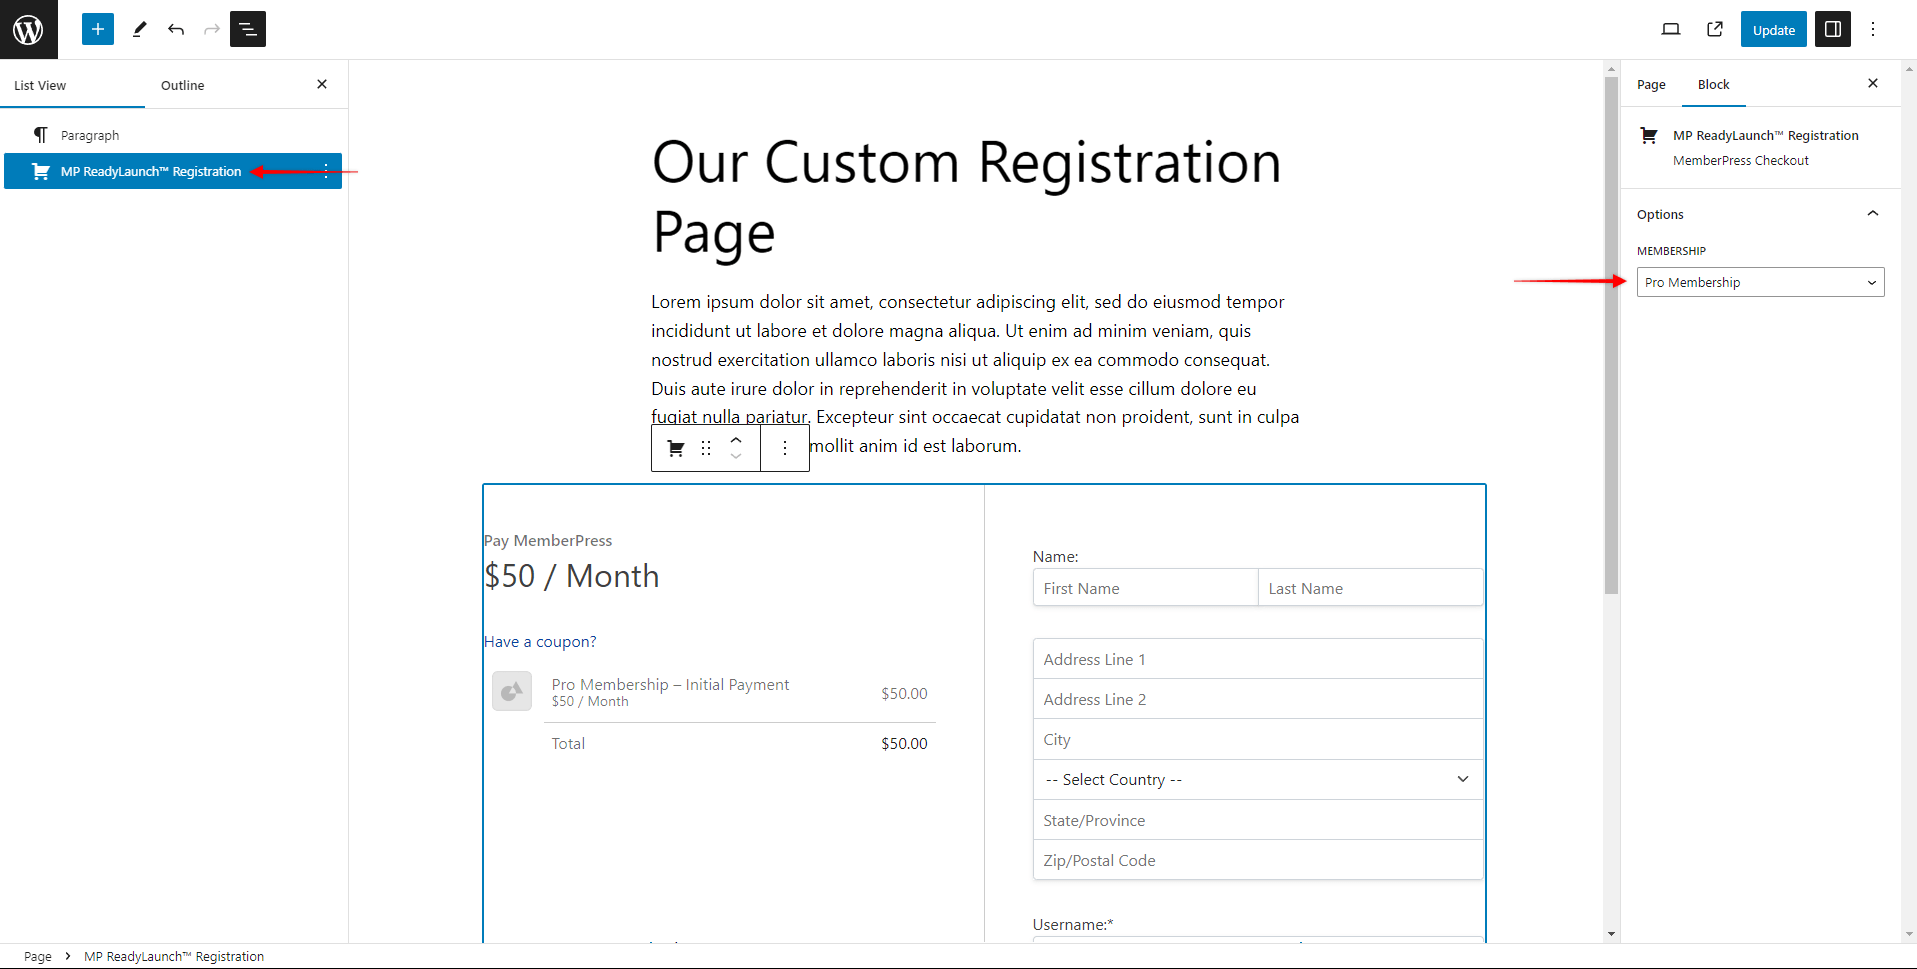
- Under the block settings, click on the “Membership” dropdown, and select the MemberPress membership you wish to use for this registration block.
This way you can design the custom registration page based on your needs and add any content. Also, this way you can use your site header and footer, while our ReadyLaunch template will be nested in the content section.
Using Shortcodes
Currently, the ReadyLaunch™ Registration template can’t be embedded into custom pages using our registration form shortcodes.
Currently, the ReadyLaunch™ Account template can’t be embedded into custom pages using our account shortcode. If you encounter a situation where you need to design a custom registration page in classic MemberPress, you'll need the classic registration form.
Learn about setting up your registration pages in classic MemberPress here: Configuring and Using the Membership Registration Pages


