If you haven't heard of Make, it's a great service for connecting various online services. Once you have the MemberPress Developer Tools installed, you can connect MemberPress to hundreds of different services through Make.
Some of the things you could potentially do with this type of integration would be:
- Create a new transaction after users sign up for specific membership,
- Send an email through your auto-responder when a credit card expires,
- Add a row to a Google Spreadsheet when a member cancels,
- Create a new member when someone fills out an online form,
- Send a text message to you when a new member subscribes,
- … And hundreds of other possibilities.
You can set up Make to receive notifications from or to send data to MemberPress.
In this article, I'll show you how to connect with Make by listening to new member signups and creating new transactions.
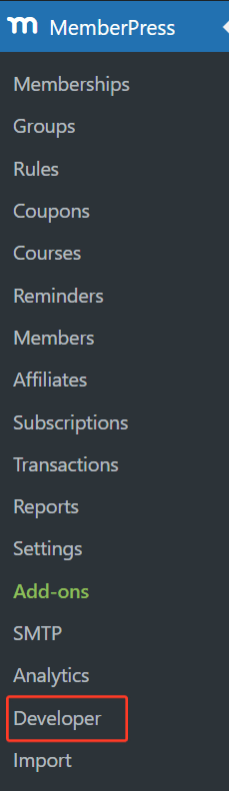
Step 1: Install MemberPress Developer Tools Add-on
Login to your WordPress website's dashboard and click on MemberPress > Add-ons.
Please scroll down to the MemberPress Developer Tools add-on, then install and activate it.
Now you'll have a new “Developer” option under the MemberPress Menu.
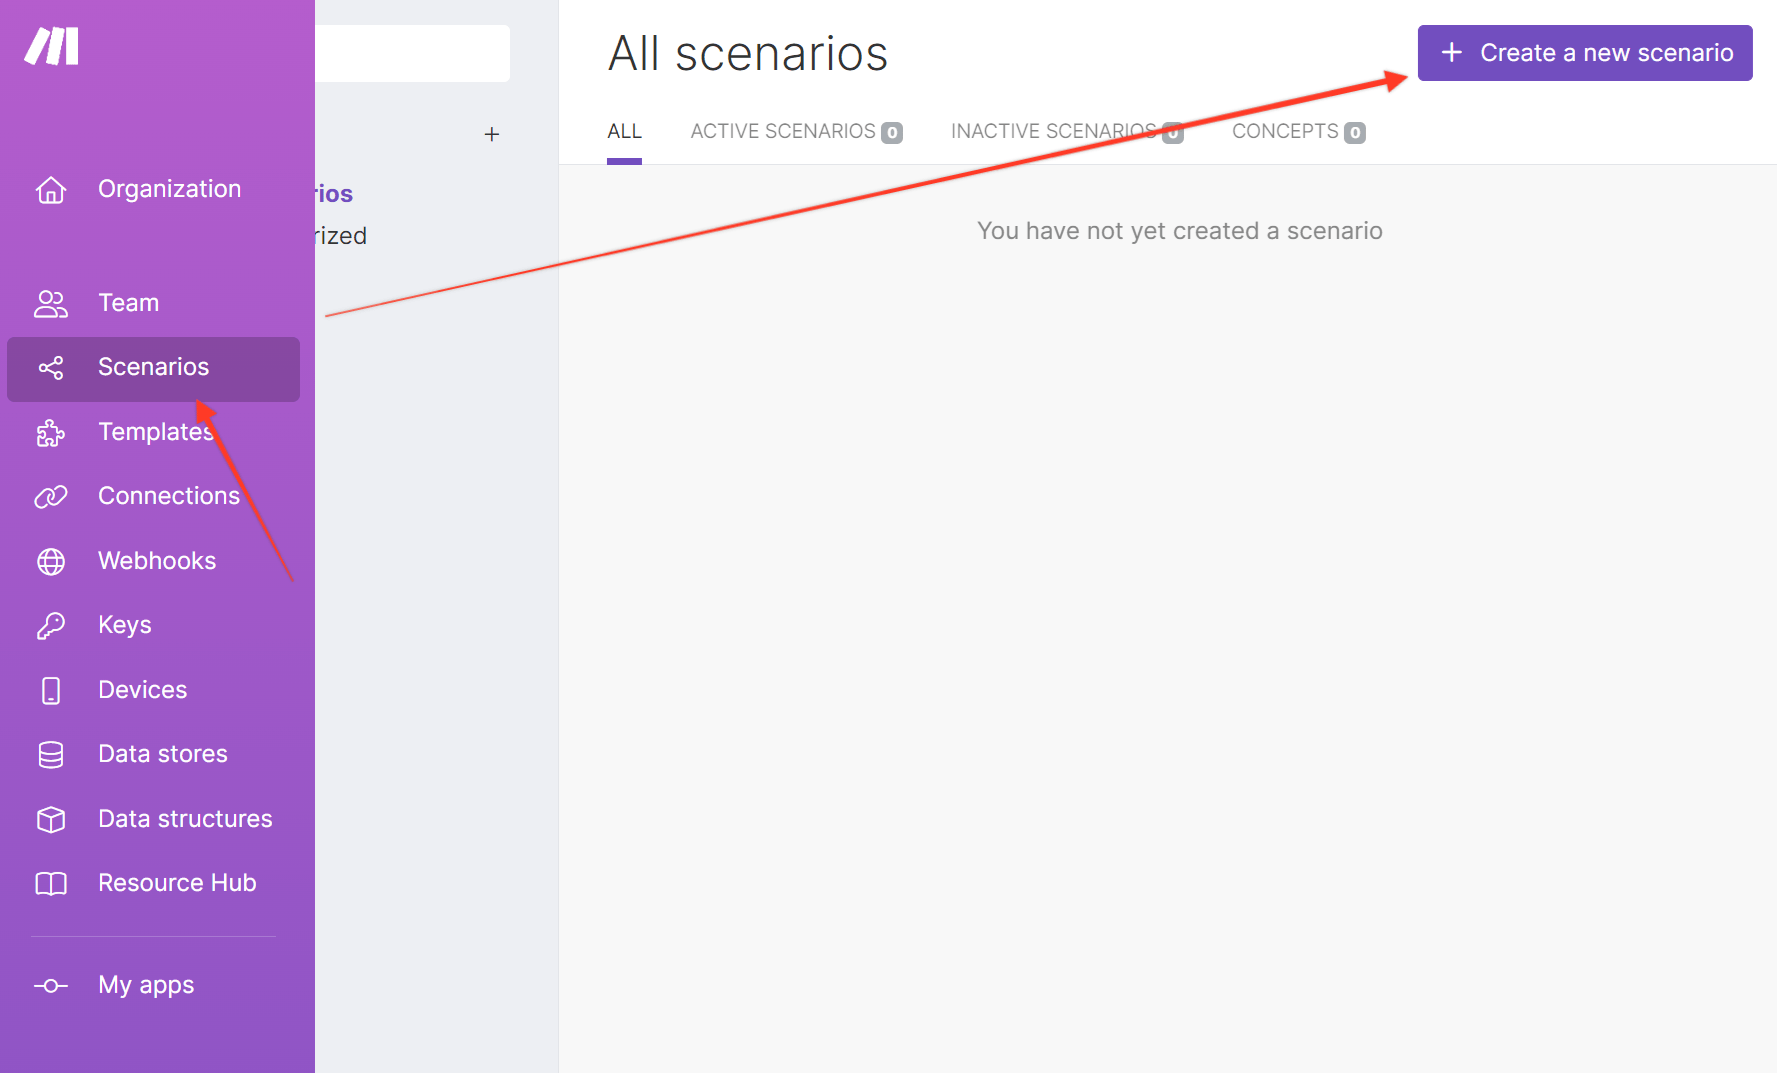
Step 2: Add a new Scenario in Make
Login to your Make account and click on Scenarios.
In the All Scenarios section, click on Create a new scenario button.
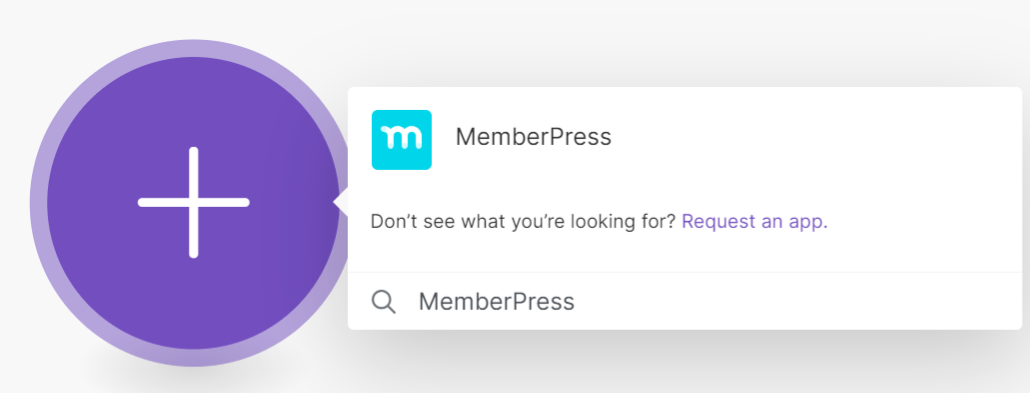
Click on the “Plus” button, search for “MemberPress”, and click on MemberPress.
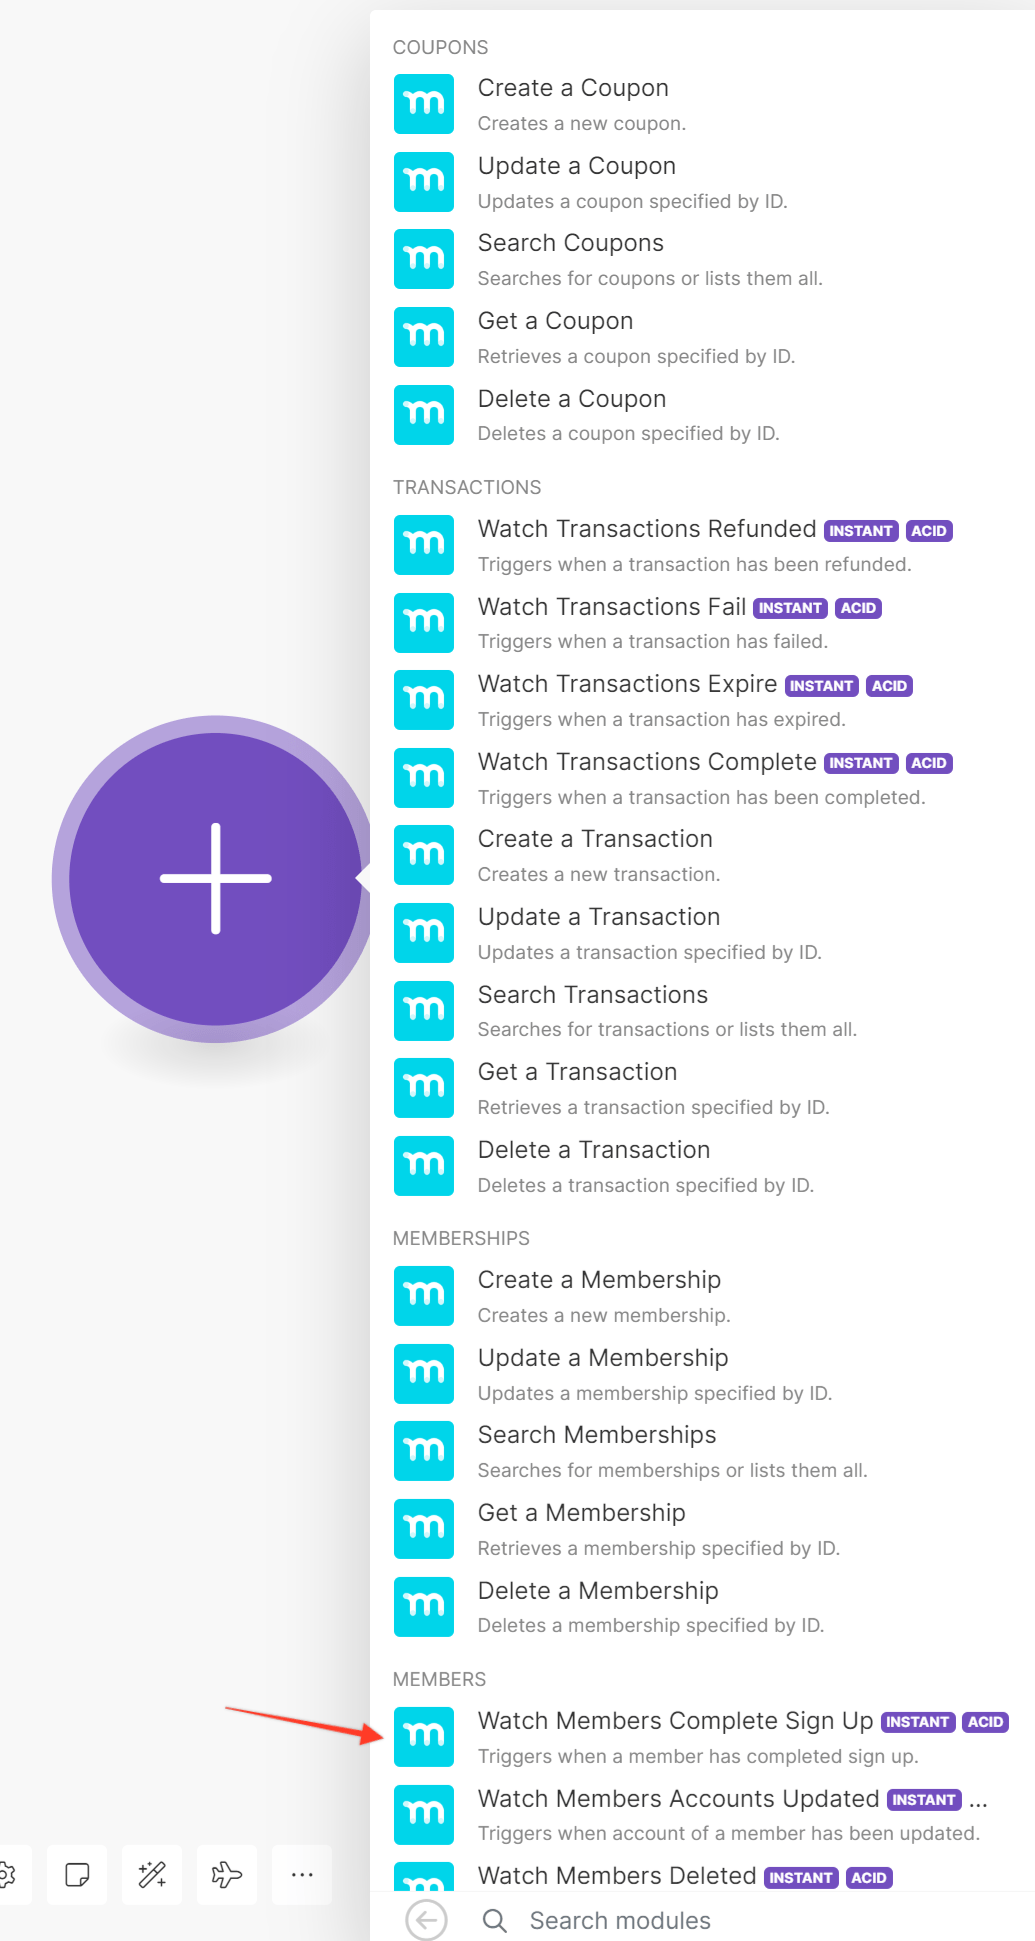
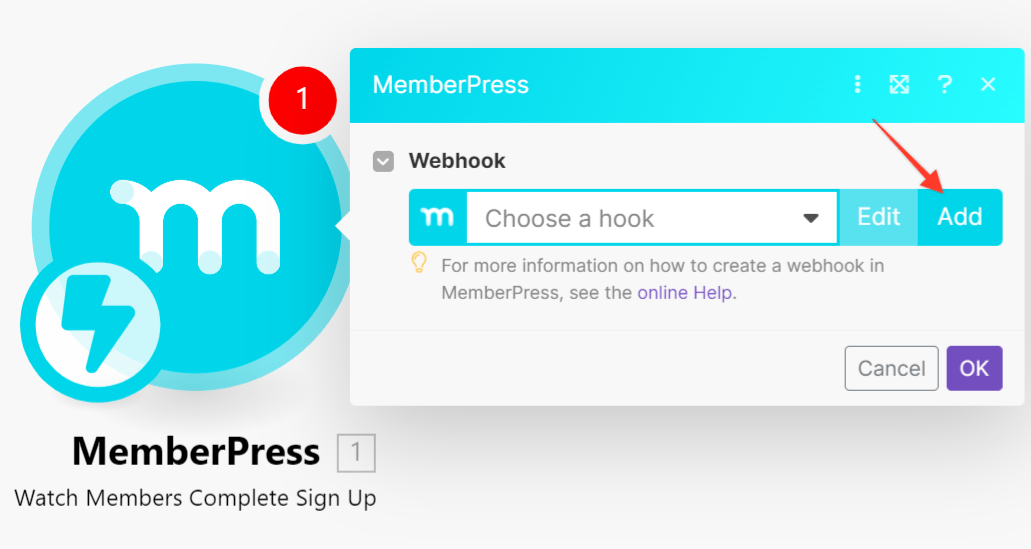
You will see the list of all actions and events provided by MemberPress. In my example, I select the Watch Members Complete Sign Up event.
Since you don't have any webhooks yet, you need to create a new one by clicking on the “Add” button in the Webhook field.
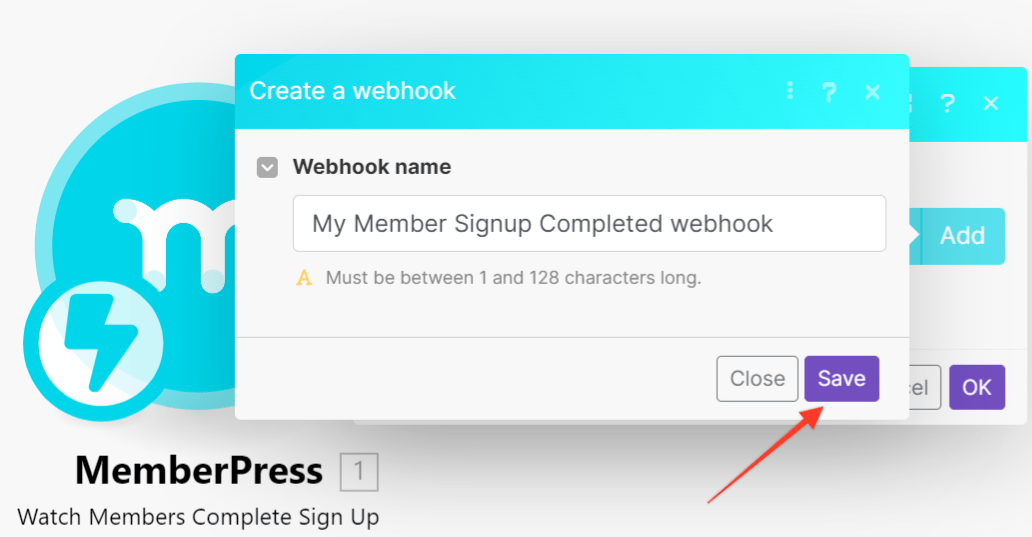
Change the webhook name or leave the default name and click the “Save” button.
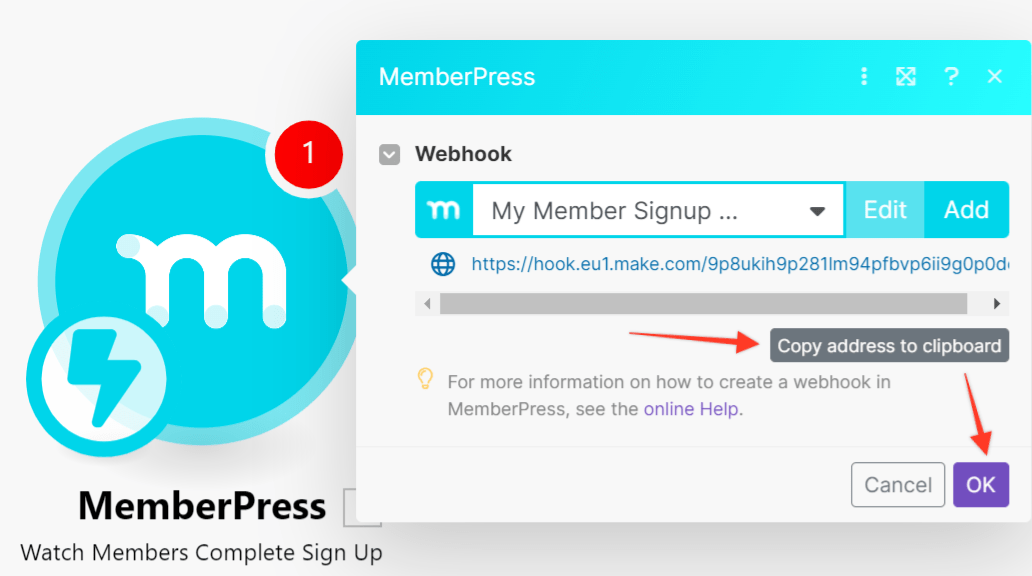
Below the webhook, you will see the webhook URL, so click on the “Copy address to clipboard” button to save the URL.
Step 3: Add new webhook in MemberPress
Go back to your WordPress Dashboard > MemberPress > Developer > Webhooks tab, click on the “Plus” icon and in the new webhook field, paste the webhook URL you copied in the last step.
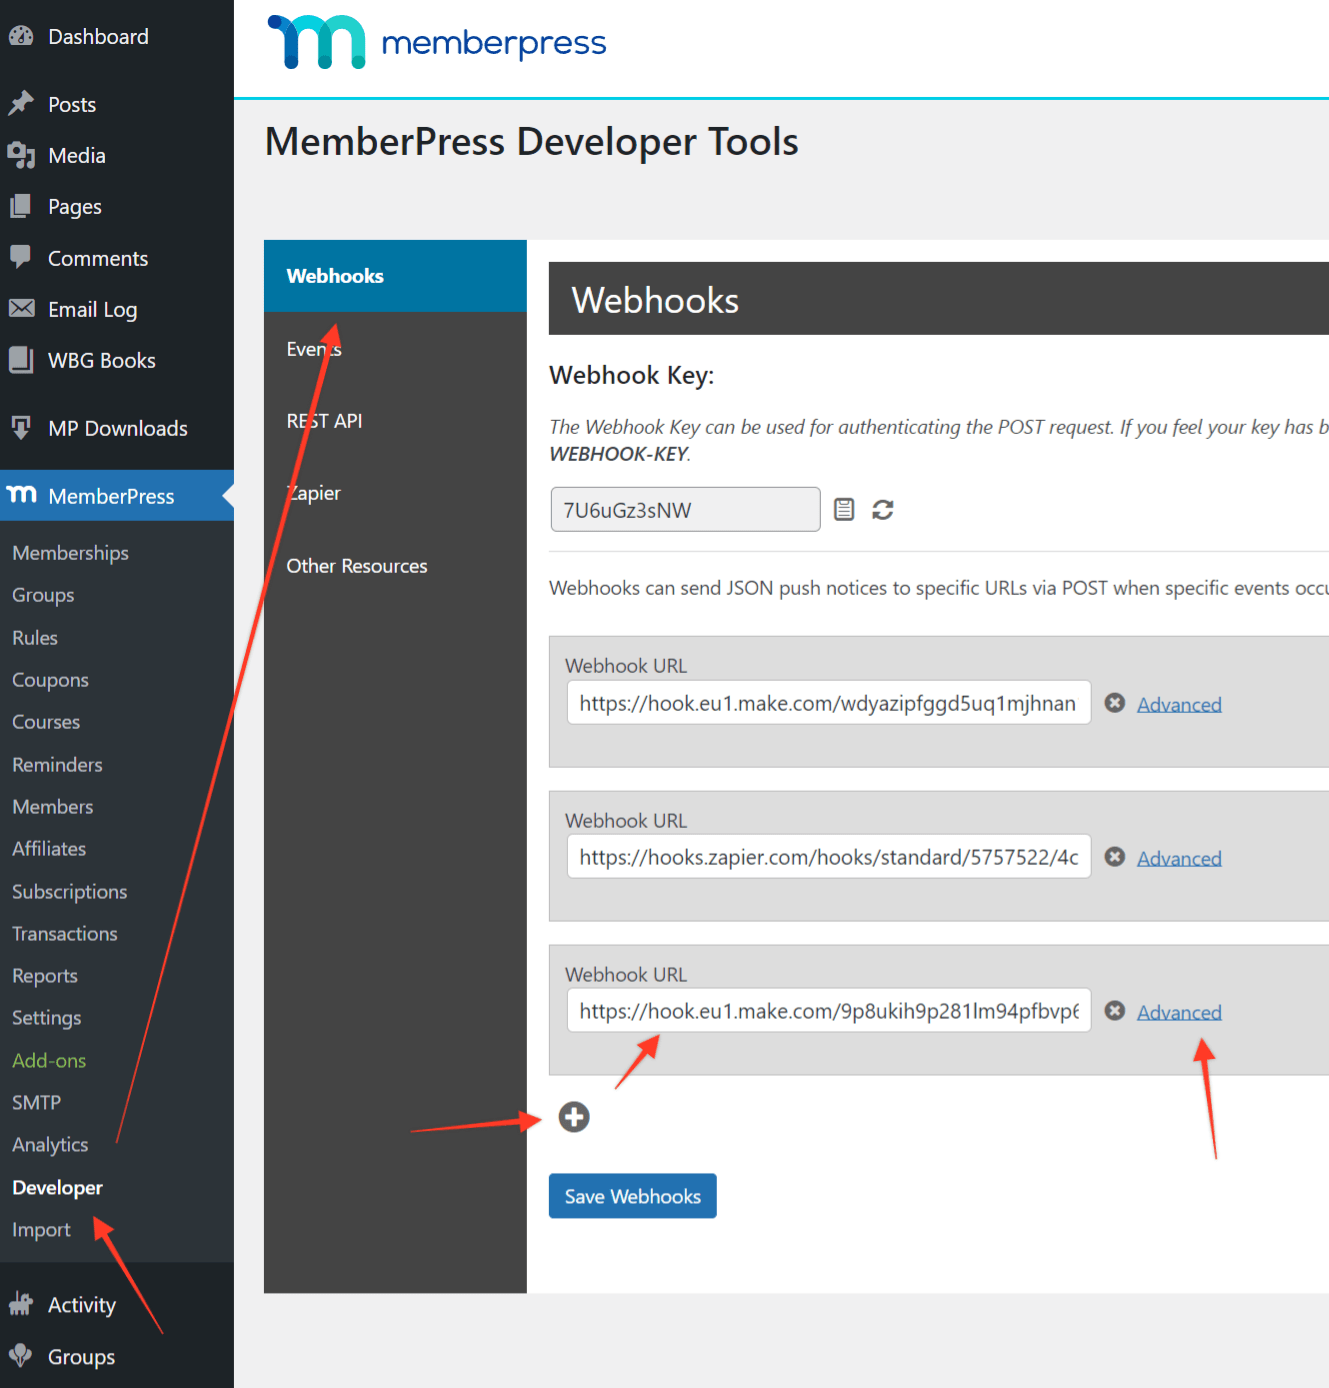
Click on the Advanced link next to your new webhook, uncheck the “All Events” option and check the one you used in the webhook in Make. For example, I used the Member Signup Completed event in my example, so I checked the same event in this step.
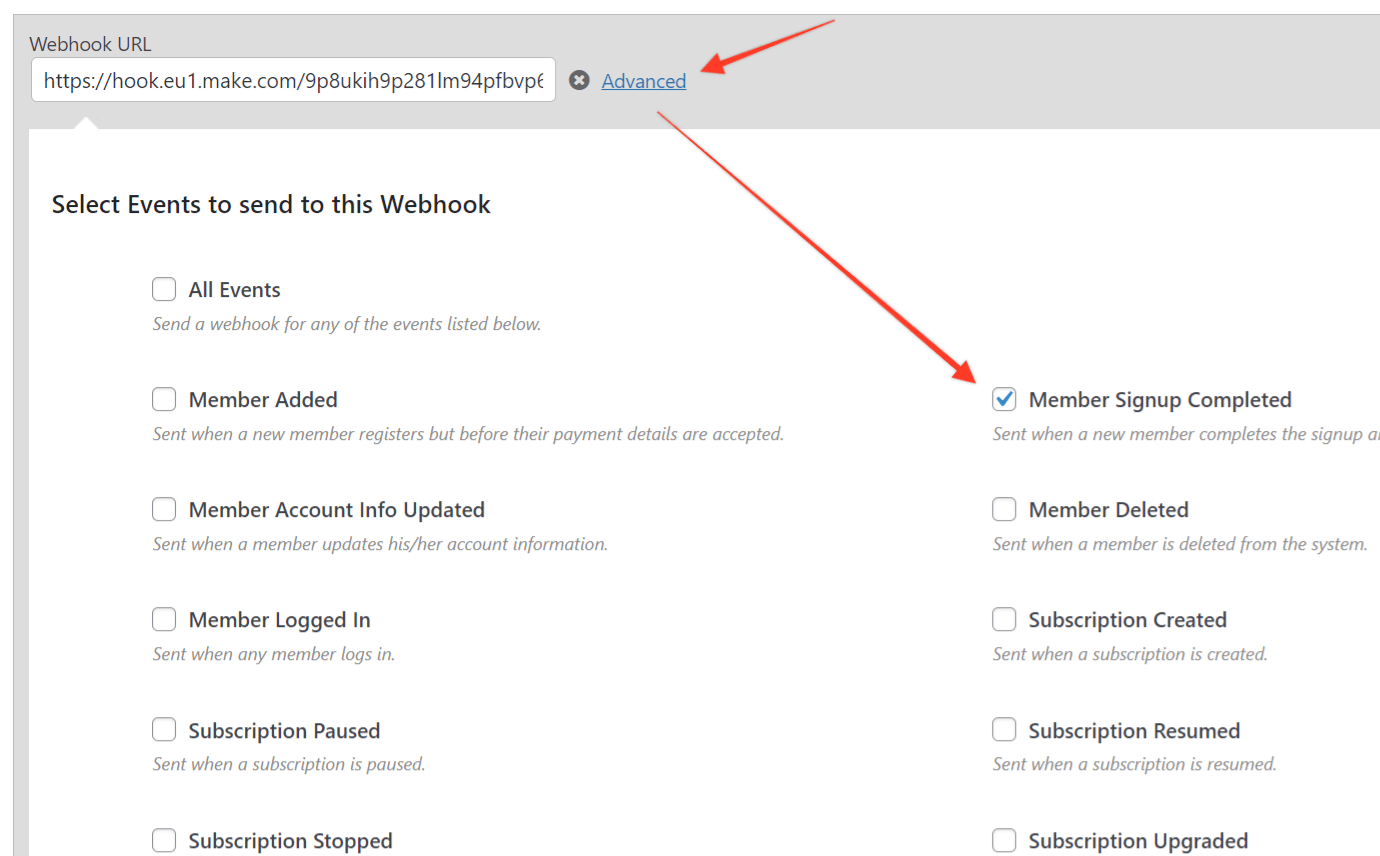
Once done, click the “Save Webhooks” button at the bottom.
If you select more events, MemberPress will send data to Make for each event you select in this step, but since you don't use any other events in Make, they won't be used. Therefore, it's recommended to use only events used in Make to minimize the number of connections and sending data.
Step 4: Connect MemberPress to Make
Go back to Make and your scenario. Hover over the first step, click the “Add another module” button, select MemberPress, and choose the action you want. In this example, I used MemberPress and selected Create Transaction in the second module, but you can connect any app available in Make.

You would be asked to connect to MemberPress if you didn't connect to MemberPress before.
Click Add button next to the Connection field.
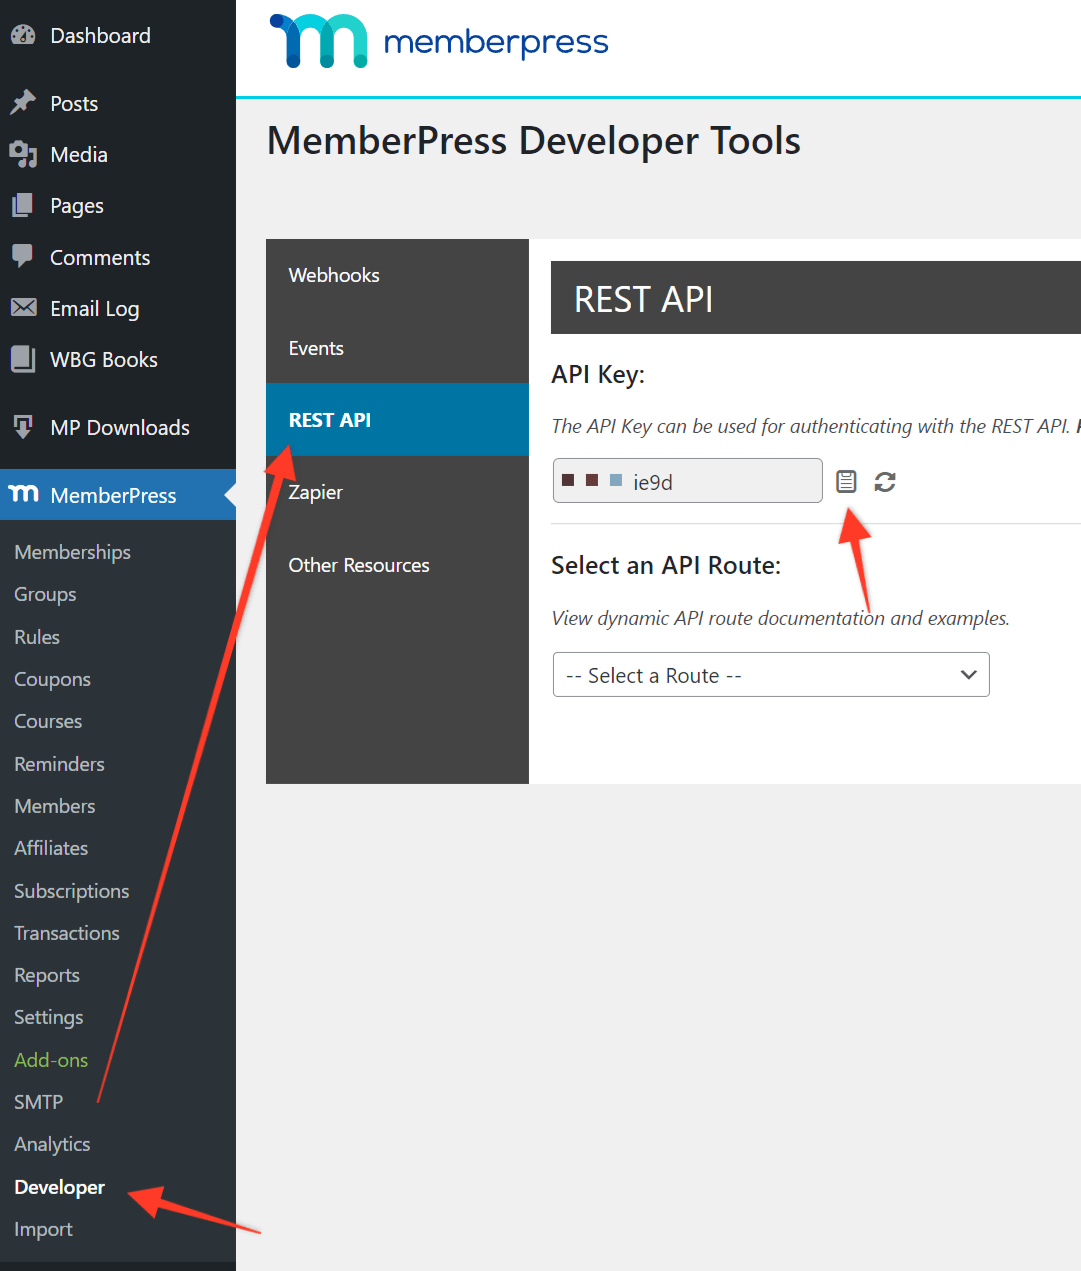
You will see the new popup window where you need to add the domain and API key (optional you can also change the name). Add domain to your site without http(s) and forward slash, so if your site is https://cool-domain.com, you need to add cool-domain.com. To get the API key, you need to go back to WordPress Dashboard > MemberPress > Developer, click on the REST API tab and click on the document icon to copy the API key.
Go back to your scenario in the Make and paste API Key you've just copied.
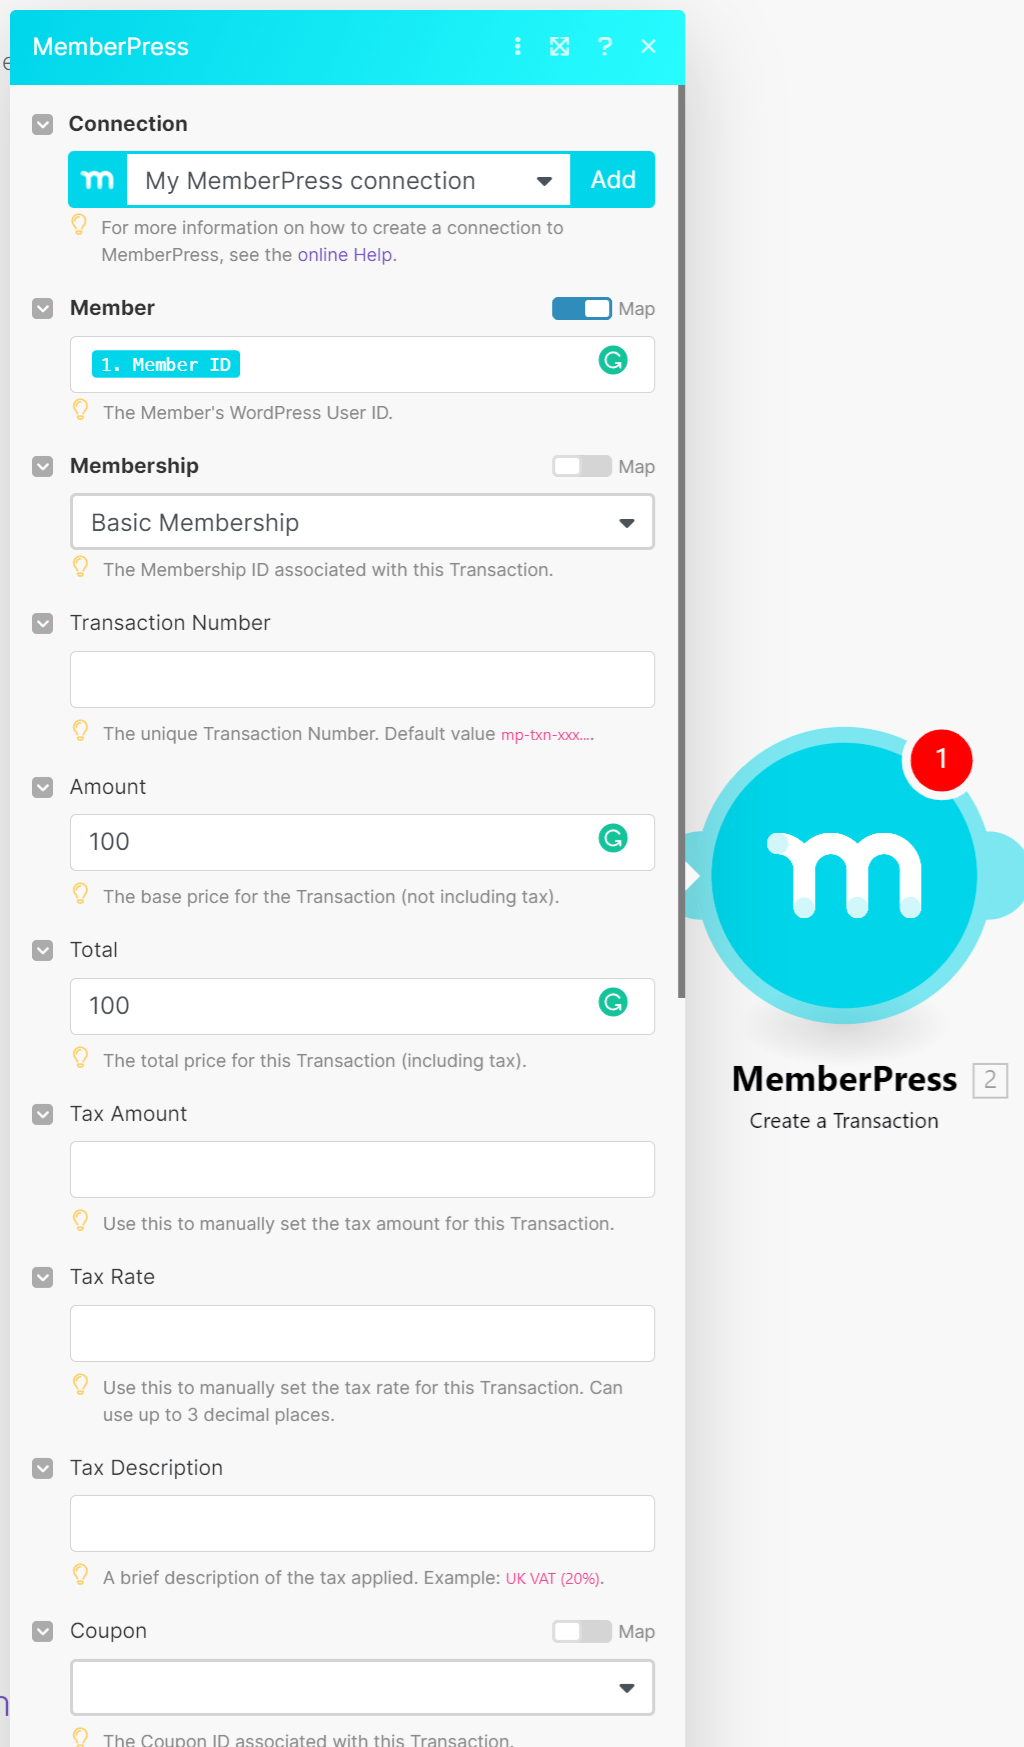
Once you click the “Save” button, Make will try connecting with MemberPress. If everything goes well, you should see all fields for the action you selected, so Create Transaction in my case. I selected membership and set the status to Complete. In the Member field, I checked the “Map” checkbox, so Make mapped all data received from the first module (Member Signup Completed event), and I could select the Member ID value from that event.
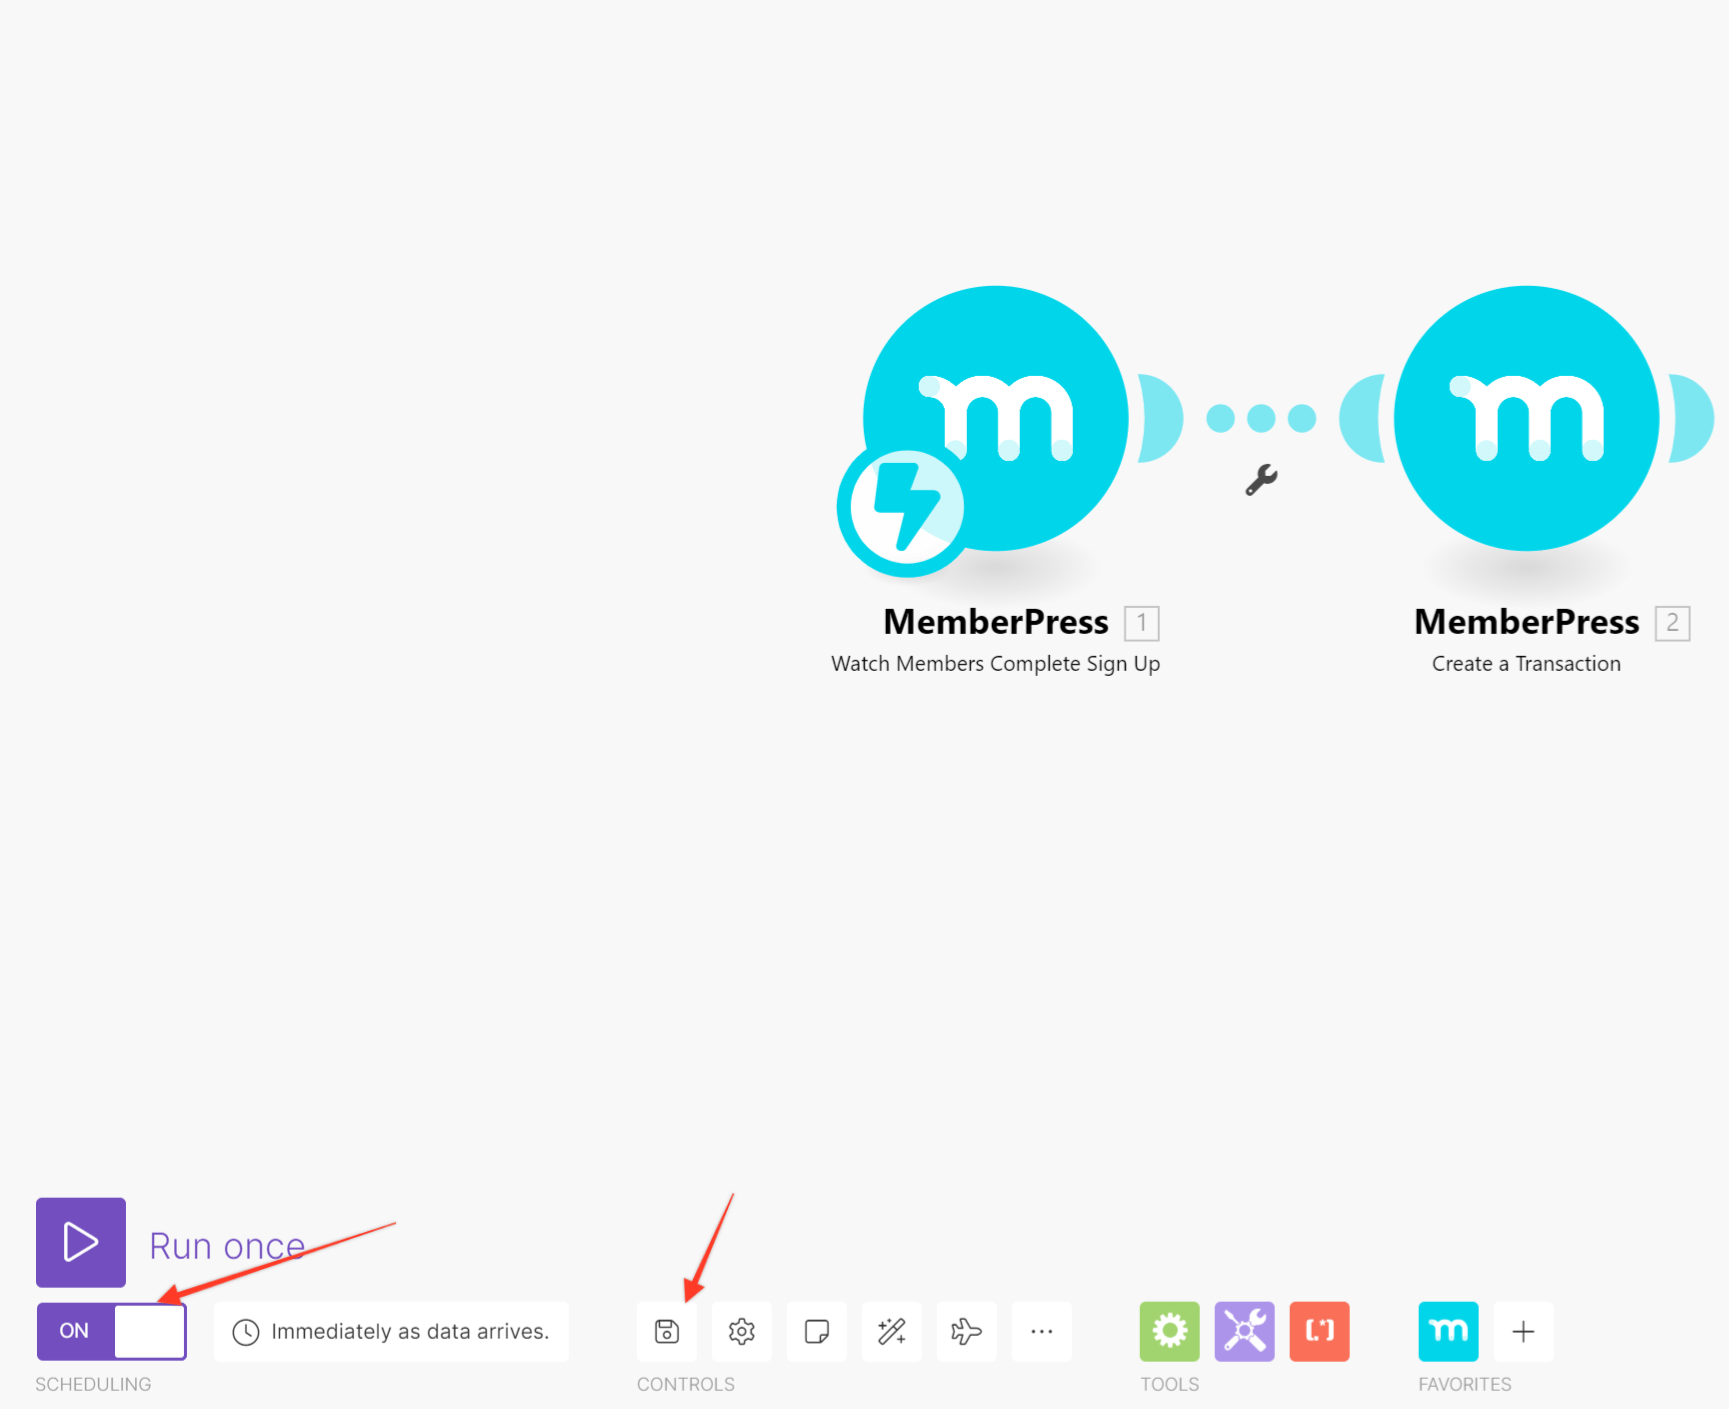
Click on the “OK” button to close the module. If you have finished your scenario, you need to remember to click on the “Save” icon and enable it.
It's just a simple example where I listened to new complete signups and created a new transaction each time a new member signed up for membership; however, you can connect MemberPress with any app you find in Make and create more complex scenarios.


