Uncanny Automator is a plugin that brings a huge number of integrations helping you add automation to your site.
It also comes with the Uncanny Automator integration for MemberPress. This integration will allow you to trigger actions in other plugins and services from MemberPress and vice versa. You can check the full list of available integrations through the Uncanny Automator on the MemberPress integration page.
In this article, we’ll show you how to install and connect Uncanny Automator with your site. Further, as an example, we’ll show you how you can create the Automator “recipe” that will send a custom email to a user upon membership registration.
To make this integration work, you will need the following:
- MemberPress Plus or Pro plugin installed and activated on your site;
- Uncanny Automator account (Free or Pro);
- Uncanny Automator plugin (Free or Pro);
Setup Uncanny Automator
The Uncanny Automator plugin has a free Pro version. In this article, we’ll be using the free version.
To start, we’ll need to install and activate the Uncanny Automator on your site:
- Navigate to Dashboard > Plugins > Add New;
Search for “Uncanny Automator”;
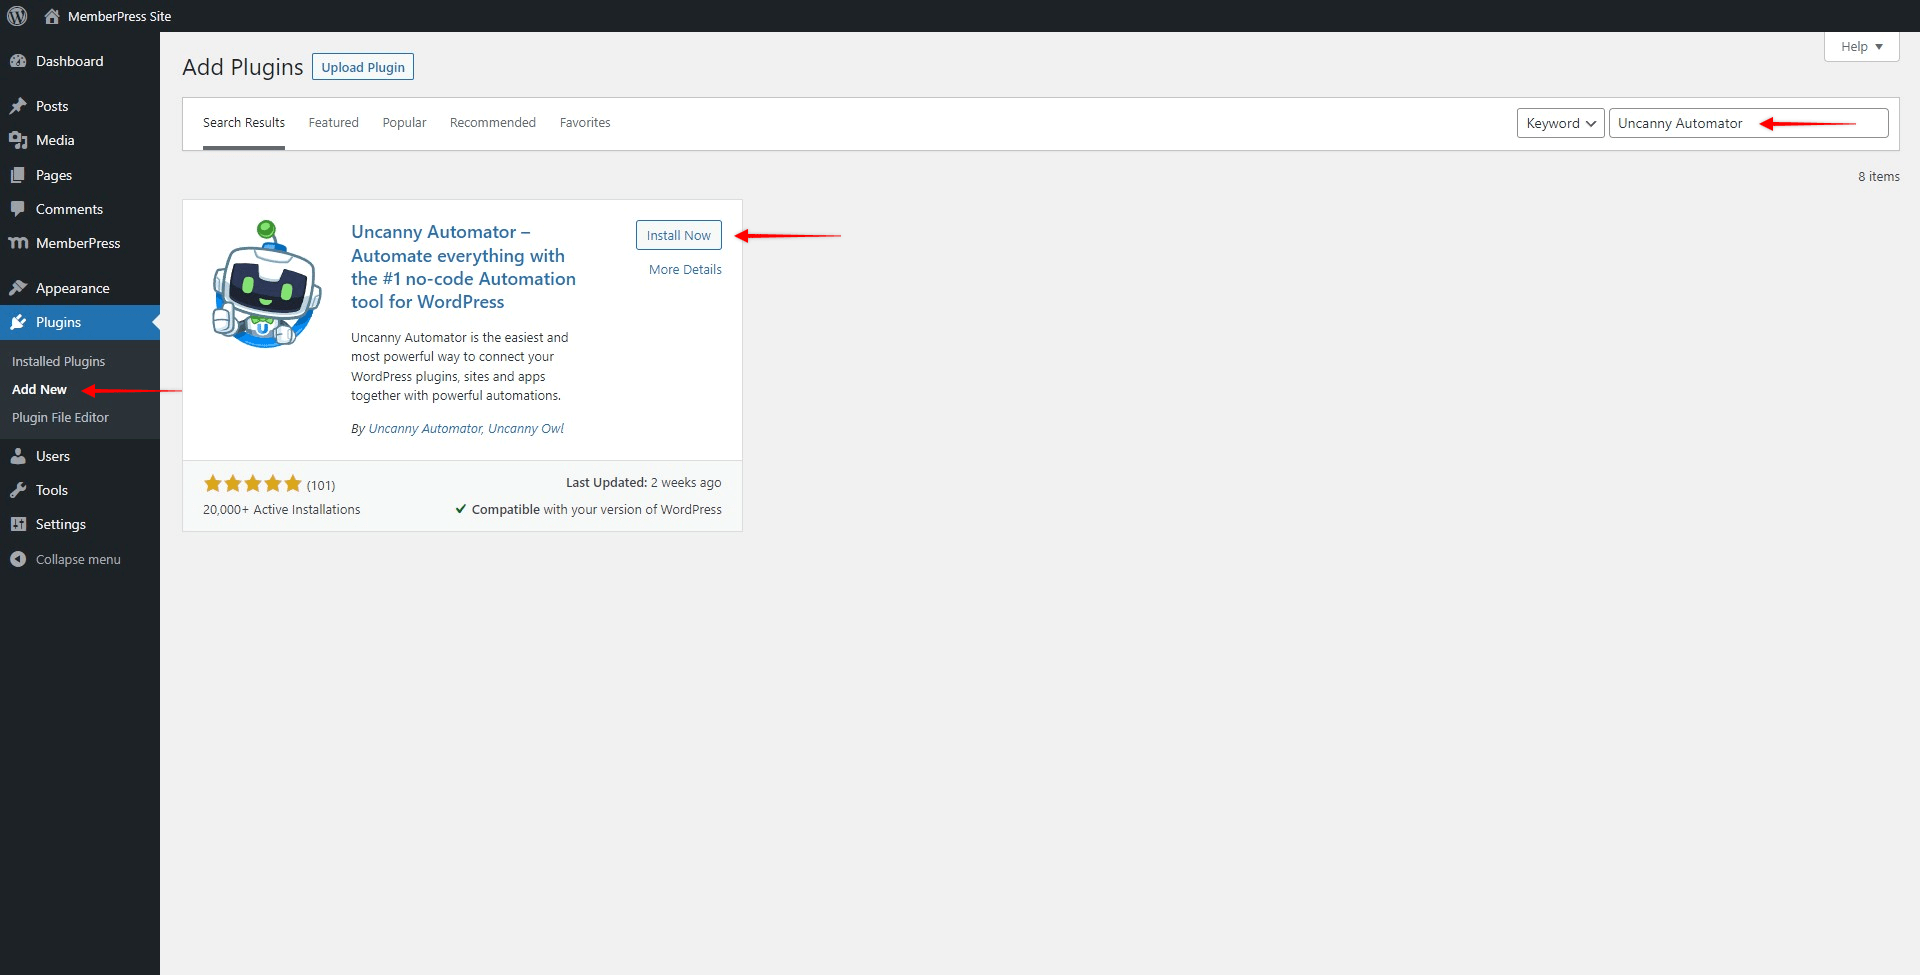
- Click the “Install” button to install the plugin, and then “Activate”.
Once you activated the Uncanny Automator on your site, you will be prompted to connect the plugin to your Uncanny Automator account through the Setup Wizard:
Step 1: Click on the “Connect your free account” button if you want to use the plugin with a free account;
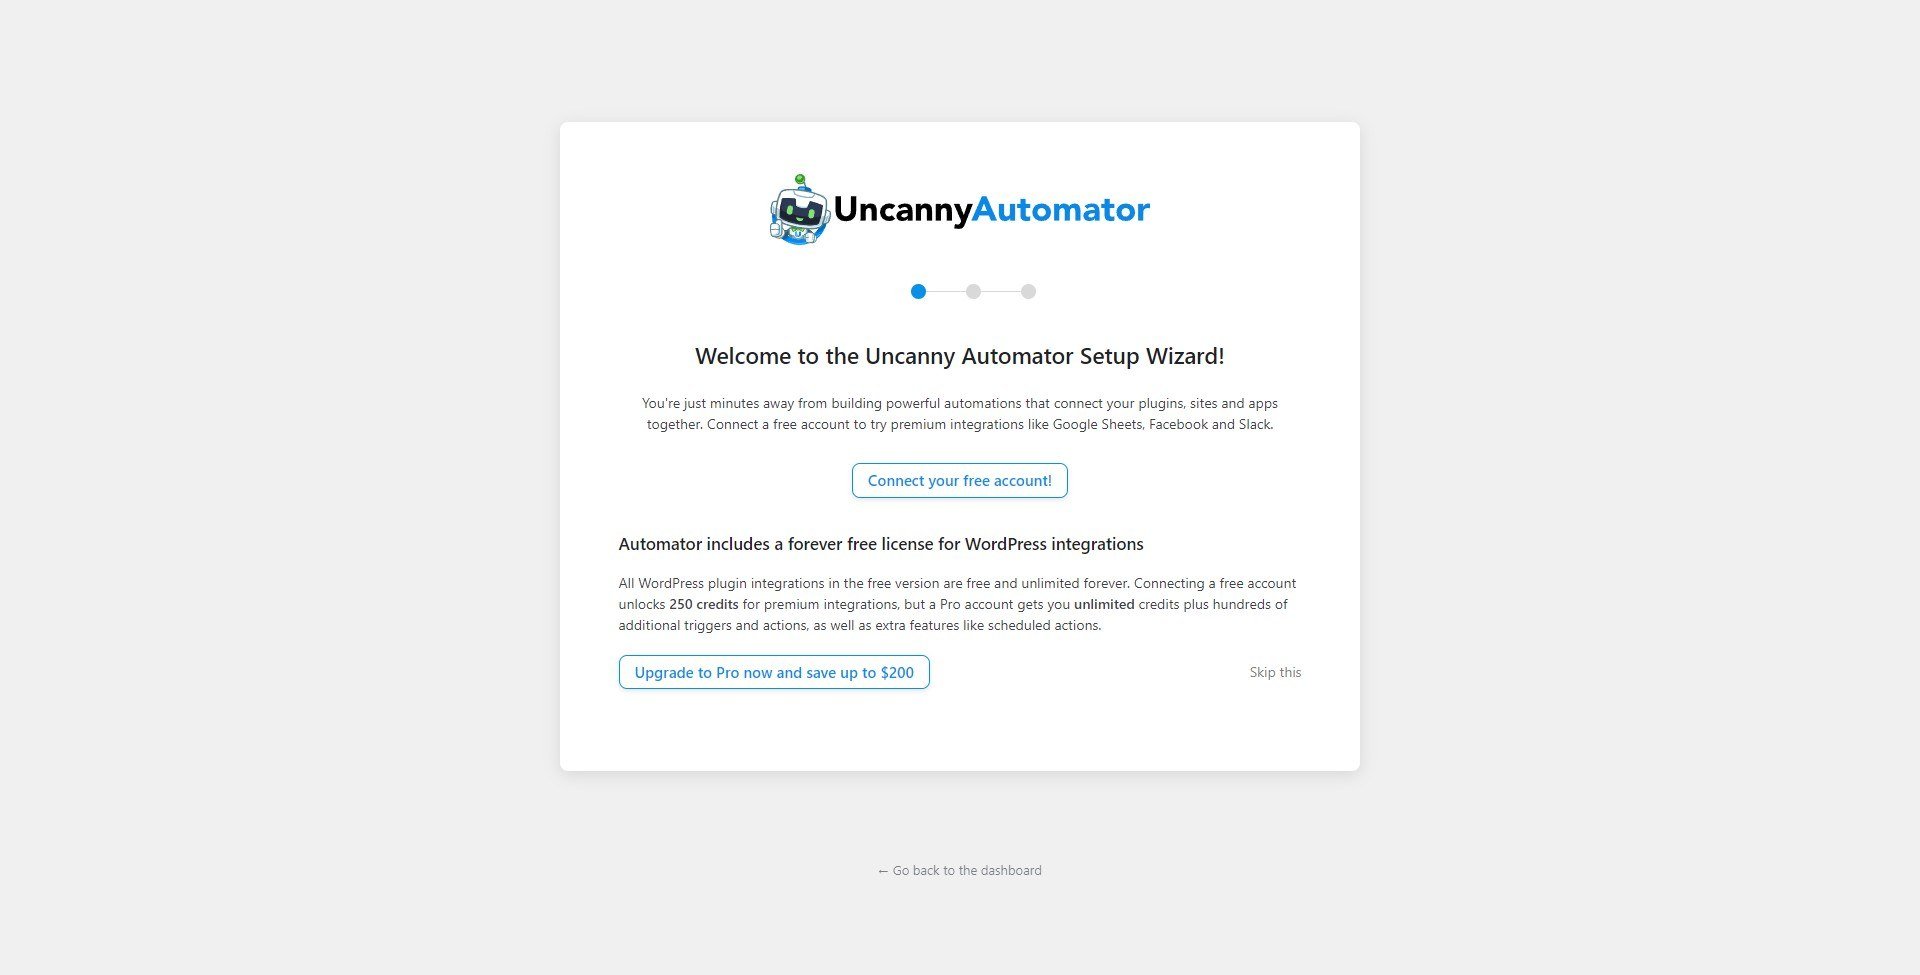
- Step 2: Here, you can create a new free account or log in to your existing one;
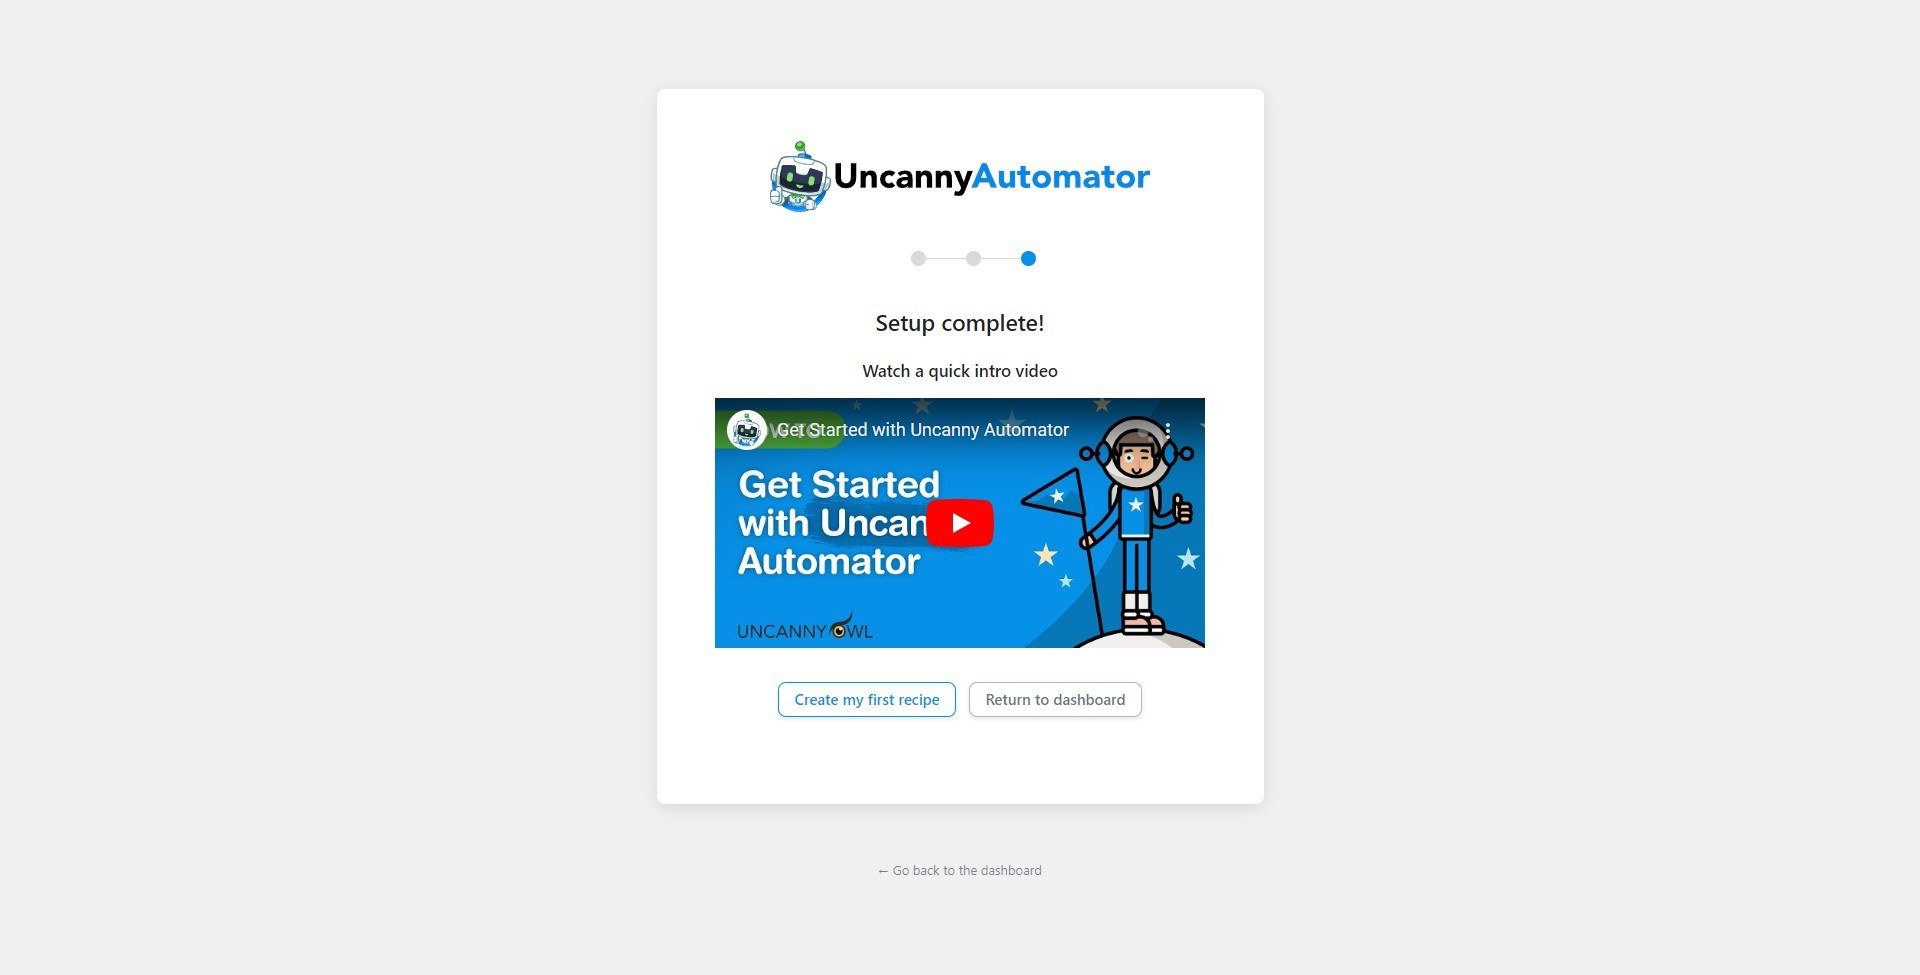
Step 3: Fill in our details and submit the sign-up/sign-in form. You should see the message that the setup was successful. Click the “Return to Dashboard” button to exit the setup wizard.
Now that you have the Uncanny Automator installed, you will notice a new “Automator” item in your dashboard menu. Here, you can manage the plugin and create integrations called “recipes”.
How Does Uncanny Automator Integration Work?
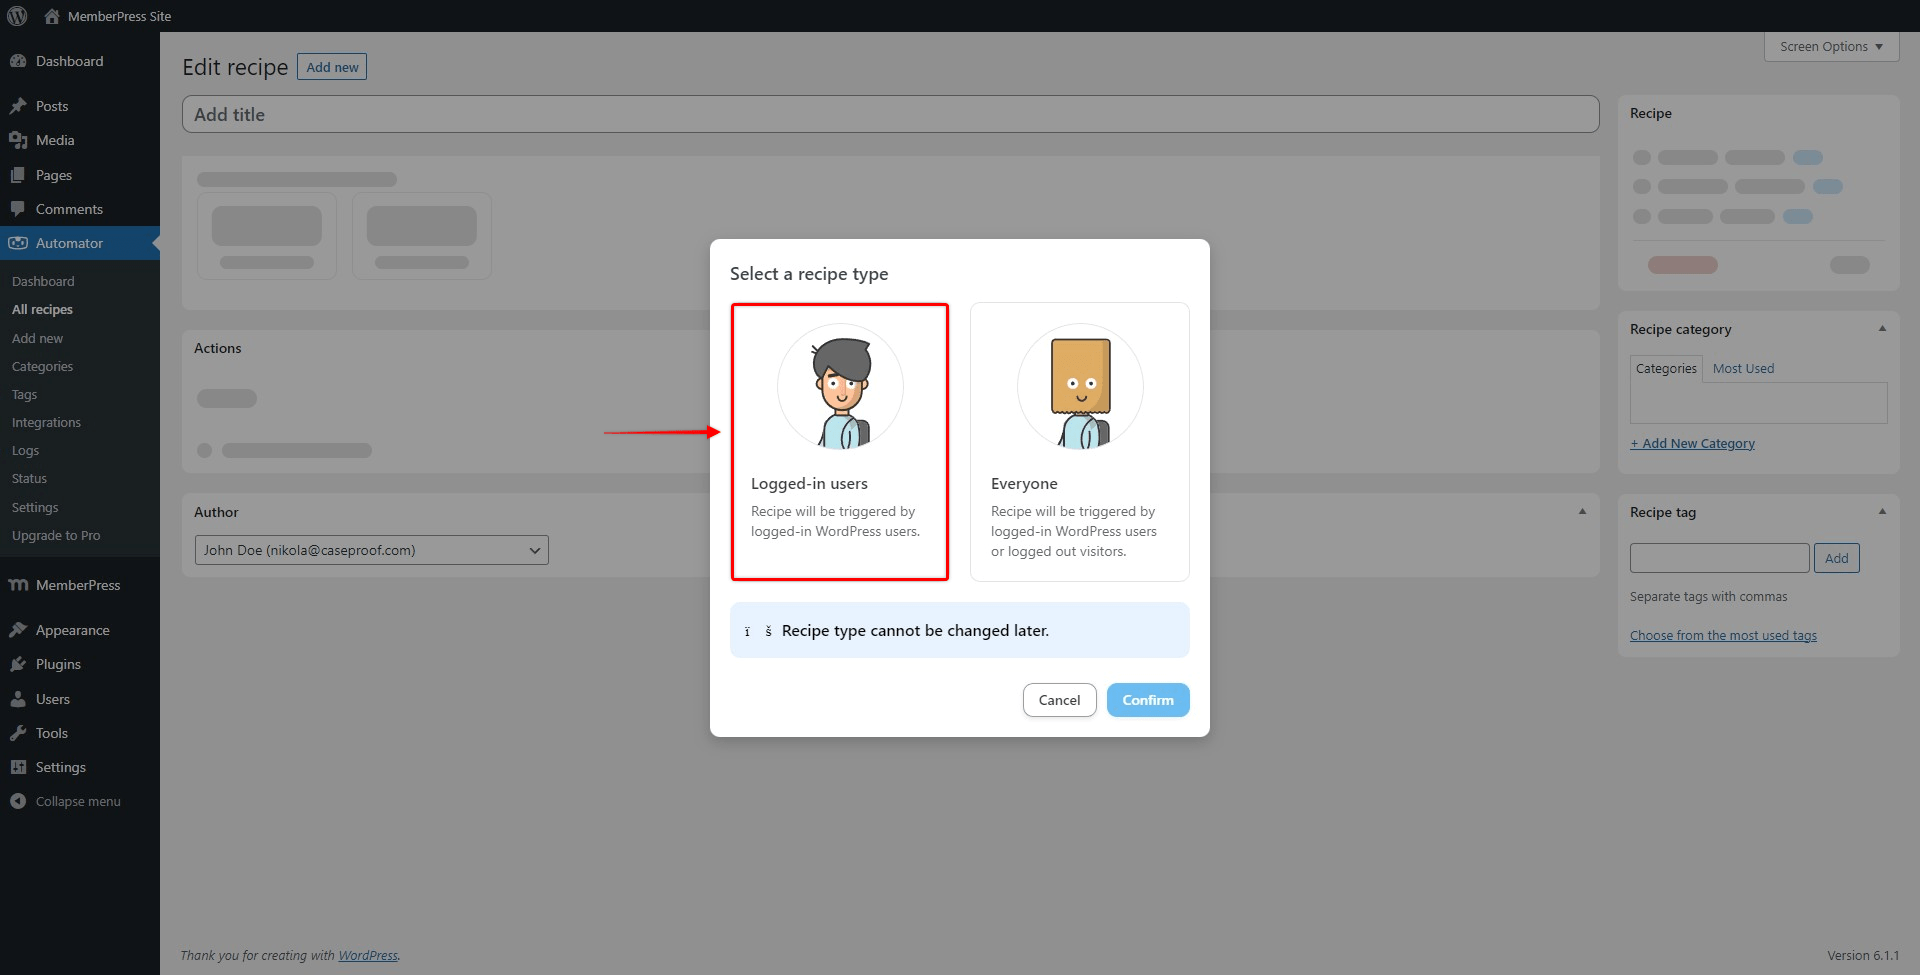
You can create as many Automator recipes as you need. For each recipe, you must choose if it should be triggered only by logged-in users, or by both logged-in users and visitors.

Also, each recipe must have at least one trigger and at least one action. Basically, these terms describe themselves – a trigger is a certain event happening on your site, and an action is a process or a function that should be triggered by that event.
You can use MemberPress triggers with your free plugin and free account, and in this case, you can choose from several available triggers:
- A user purchases a one-time subscription product
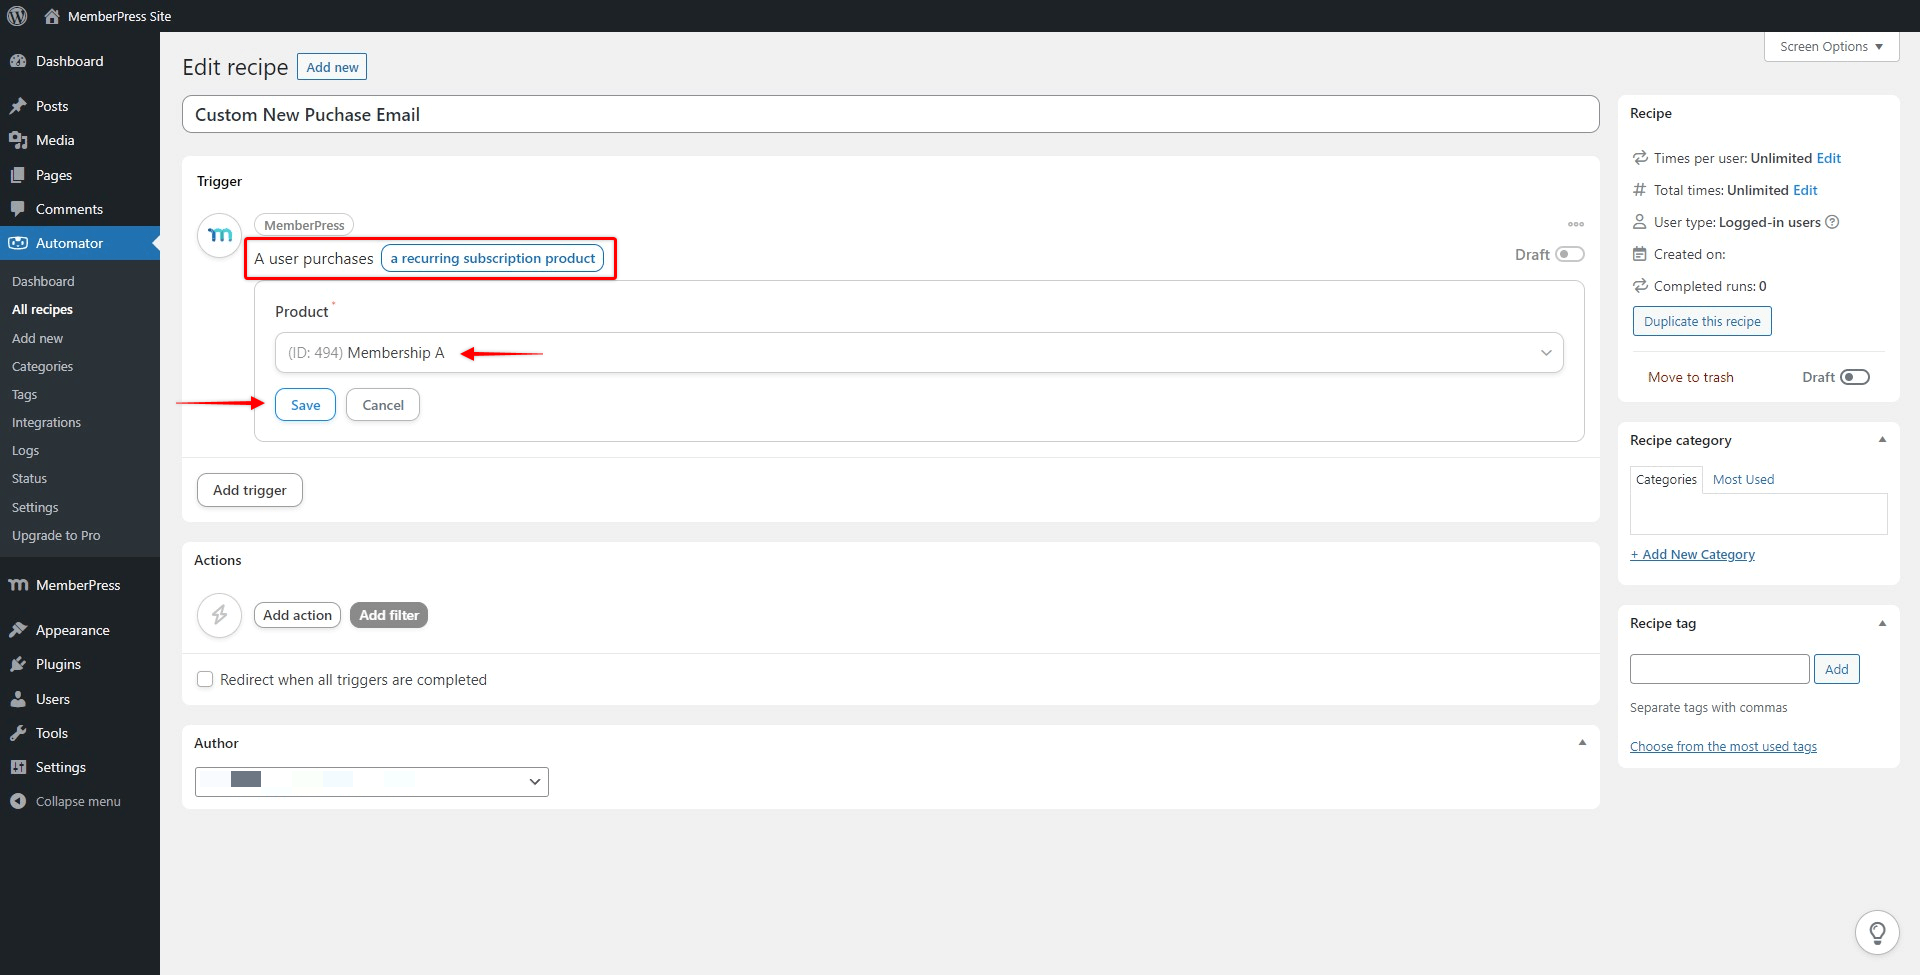
- A user purchases a recurring subscription product
Once you select the trigger you need, you should select which membership is this trigger related to. For example, you can run the same action for multiple memberships – in this case, you would set one trigger for each of the memberships in the same recipe.
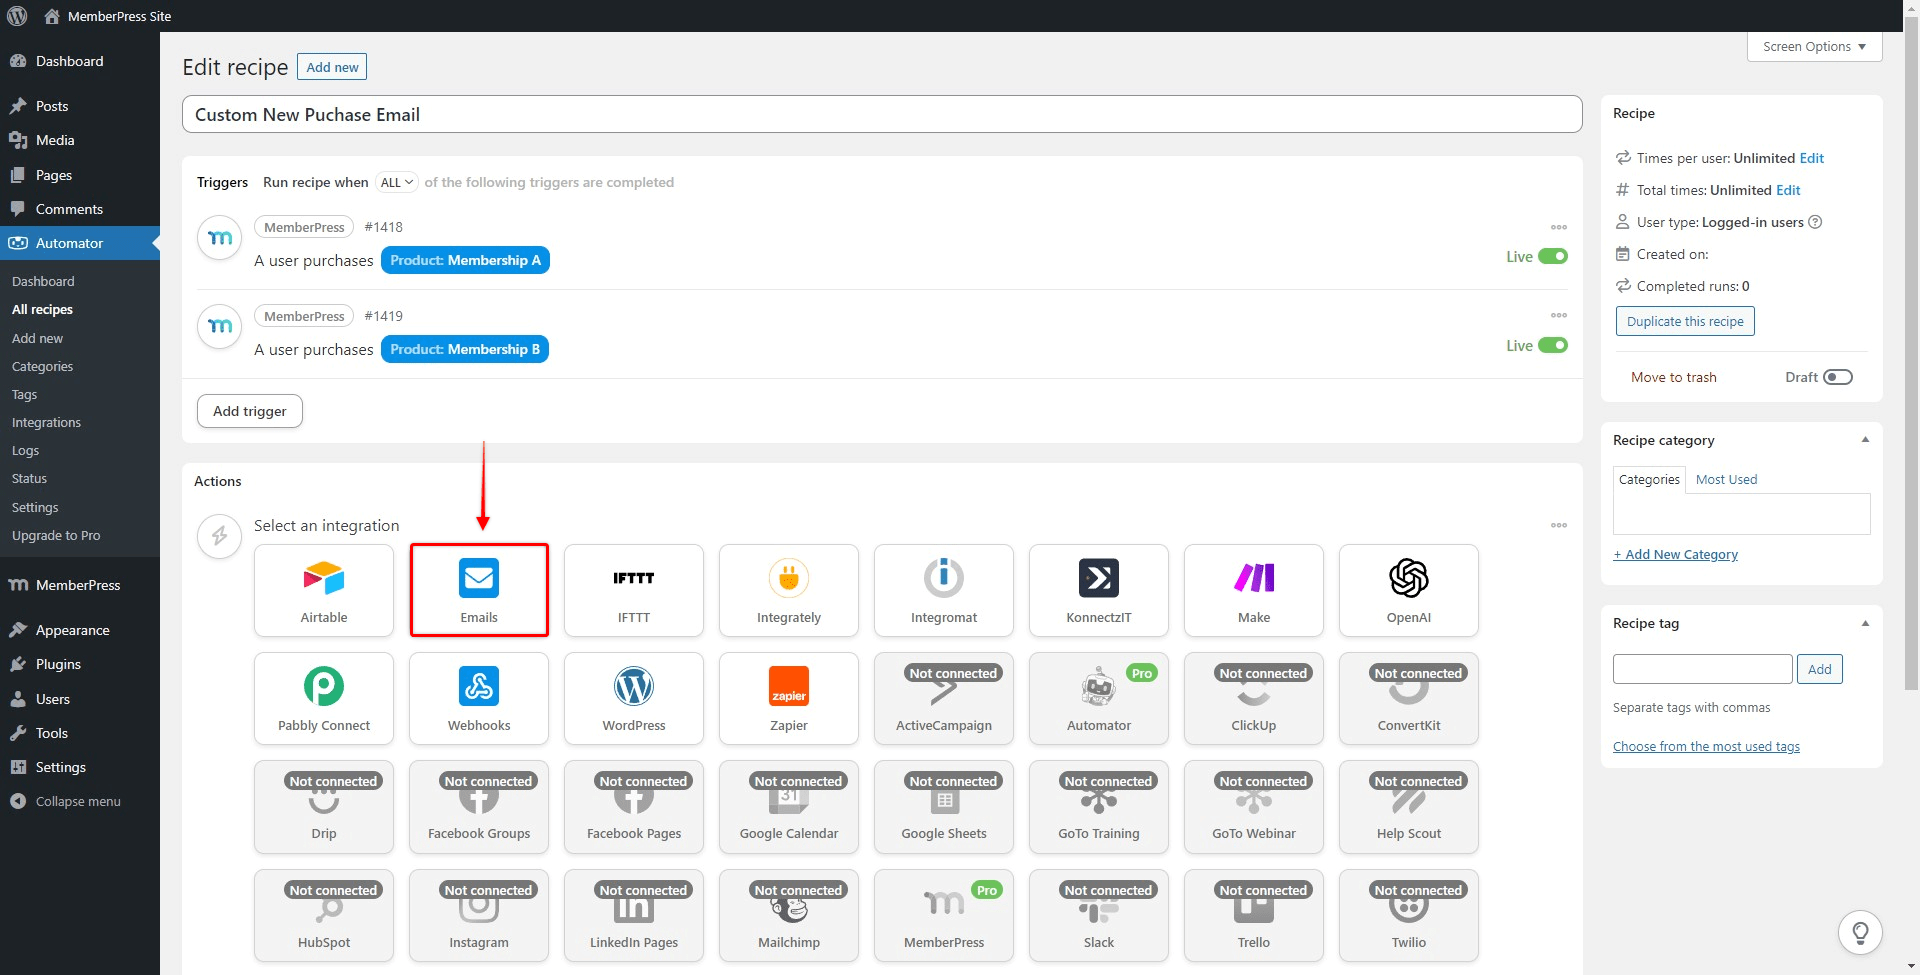
Next, on the Action side of the recipe, you need to select the integration with a plugin or service. Once you select the desired option, you will be presented with the available actions for that integration.
Once you select the needed action(s), you can simply save the recipe, and your integration is set.
Uncanny Automator Pro Options for MemberPress
As mentioned, MemberPress integration with the free Uncanny Automator version comes with two triggers. On the other hand, if you use Uncanny Automator Pro, you will be able to use additional triggers:
- A sub-account is added to a parent account
- Requires Corporate Accounts Add-on
- A user's membership to a specific product expires
- A user's membership to a specific product is canceled
- A user's membership to a specific product is paused
- A user's transaction for a membership is set to a status
In addition, with Uncanny Automator Pro, you will also be able to use MemberPress actions which are not available with the free version:
- Add the user to a membership
- Remove the user from a membership
Further, next to actions the Pro version comes with conditions that will allow you to further filter when your integration will be triggered:
- The user is an active member of a membership
- The user is not an active member of a membership
Example: Send A Custom Email When Users Register
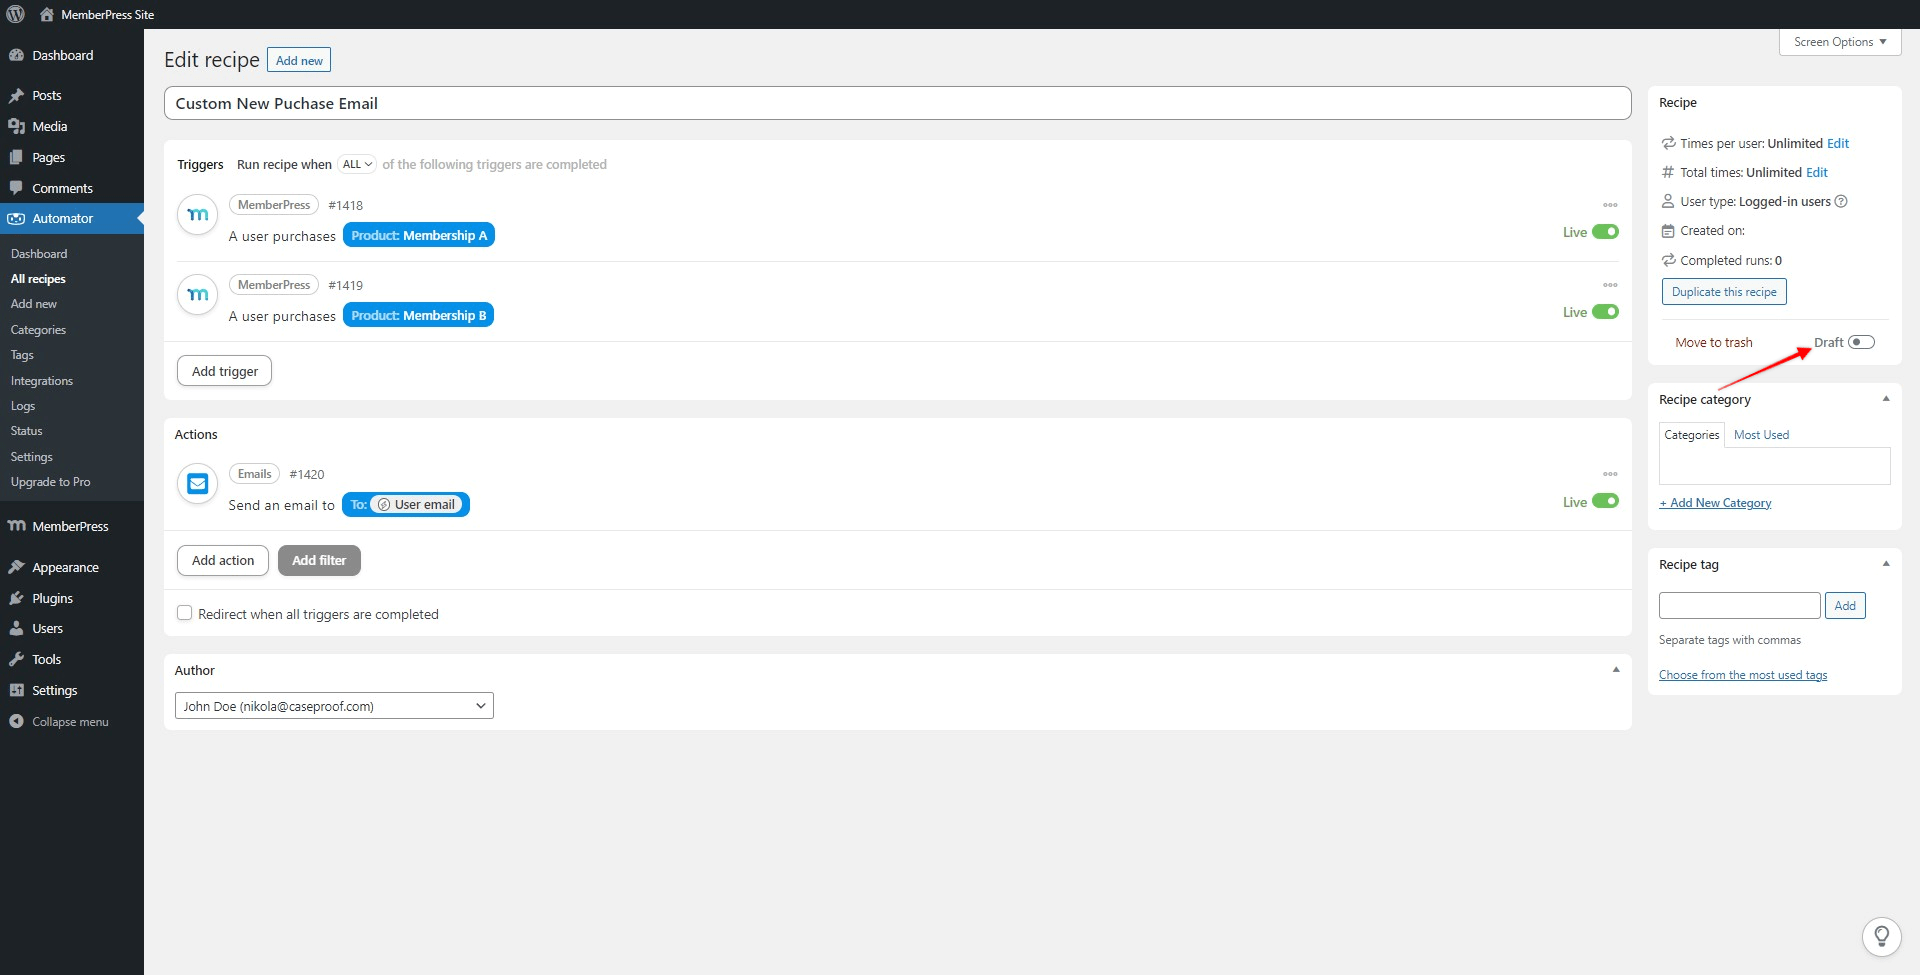
In this example, we’ll show you steps to create a recipe that will send a custom email to your users, any time they purchase a specific membership:
- Navigate to Dashboard > Automator > Add New to create a new recipe;
Choose the “Logged-in users” type of recipe, and give it a name;
- Next, in the Trigger section, choose the “MemberPress” integration, to open the list of available triggers;
Select the trigger you need, select the membership, and click the “Save” button. Since in our example, both memberships are recurring, we used the “A user purchases a recurring subscription product” triggers;
- You can click the “Add trigger” button to set an additional trigger. Repeat this step until you add all your triggers;
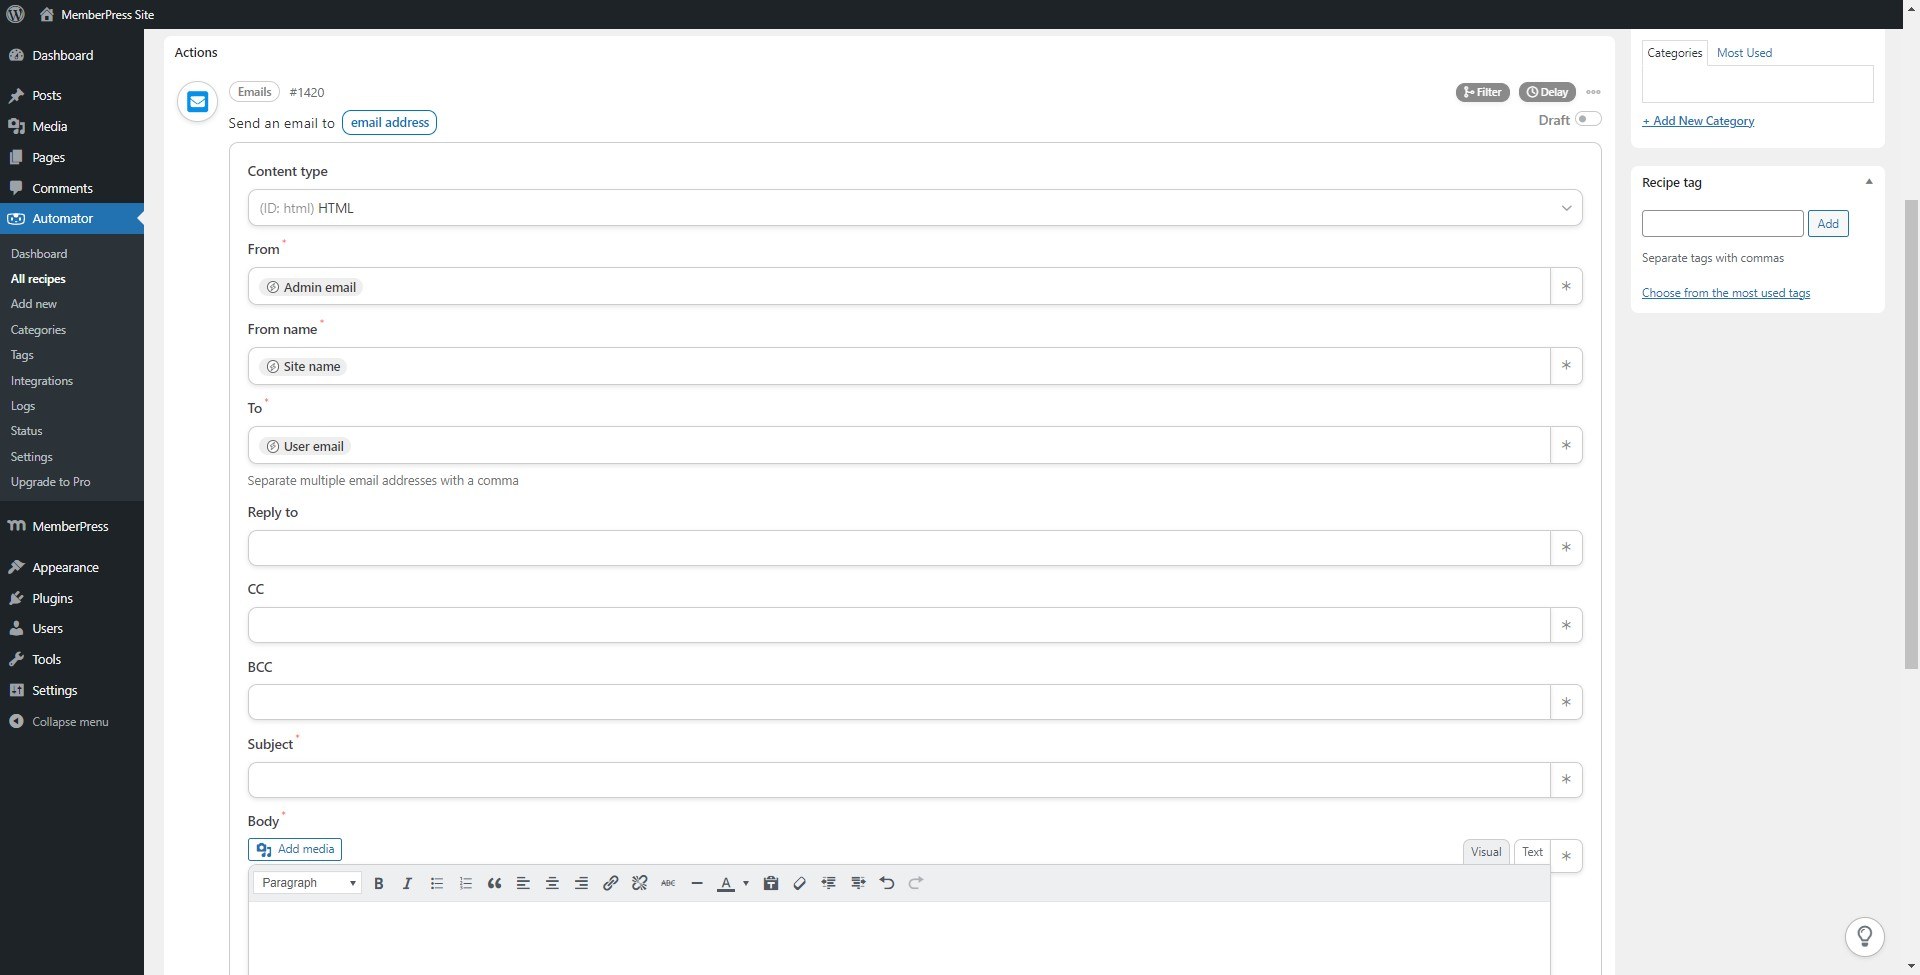
Now, in the Actions section, you need to click the “Add actions” button to select integration and add actions. For our example, we will select the “Emails” integration;
In this case, we have only one available action – “Send email”:
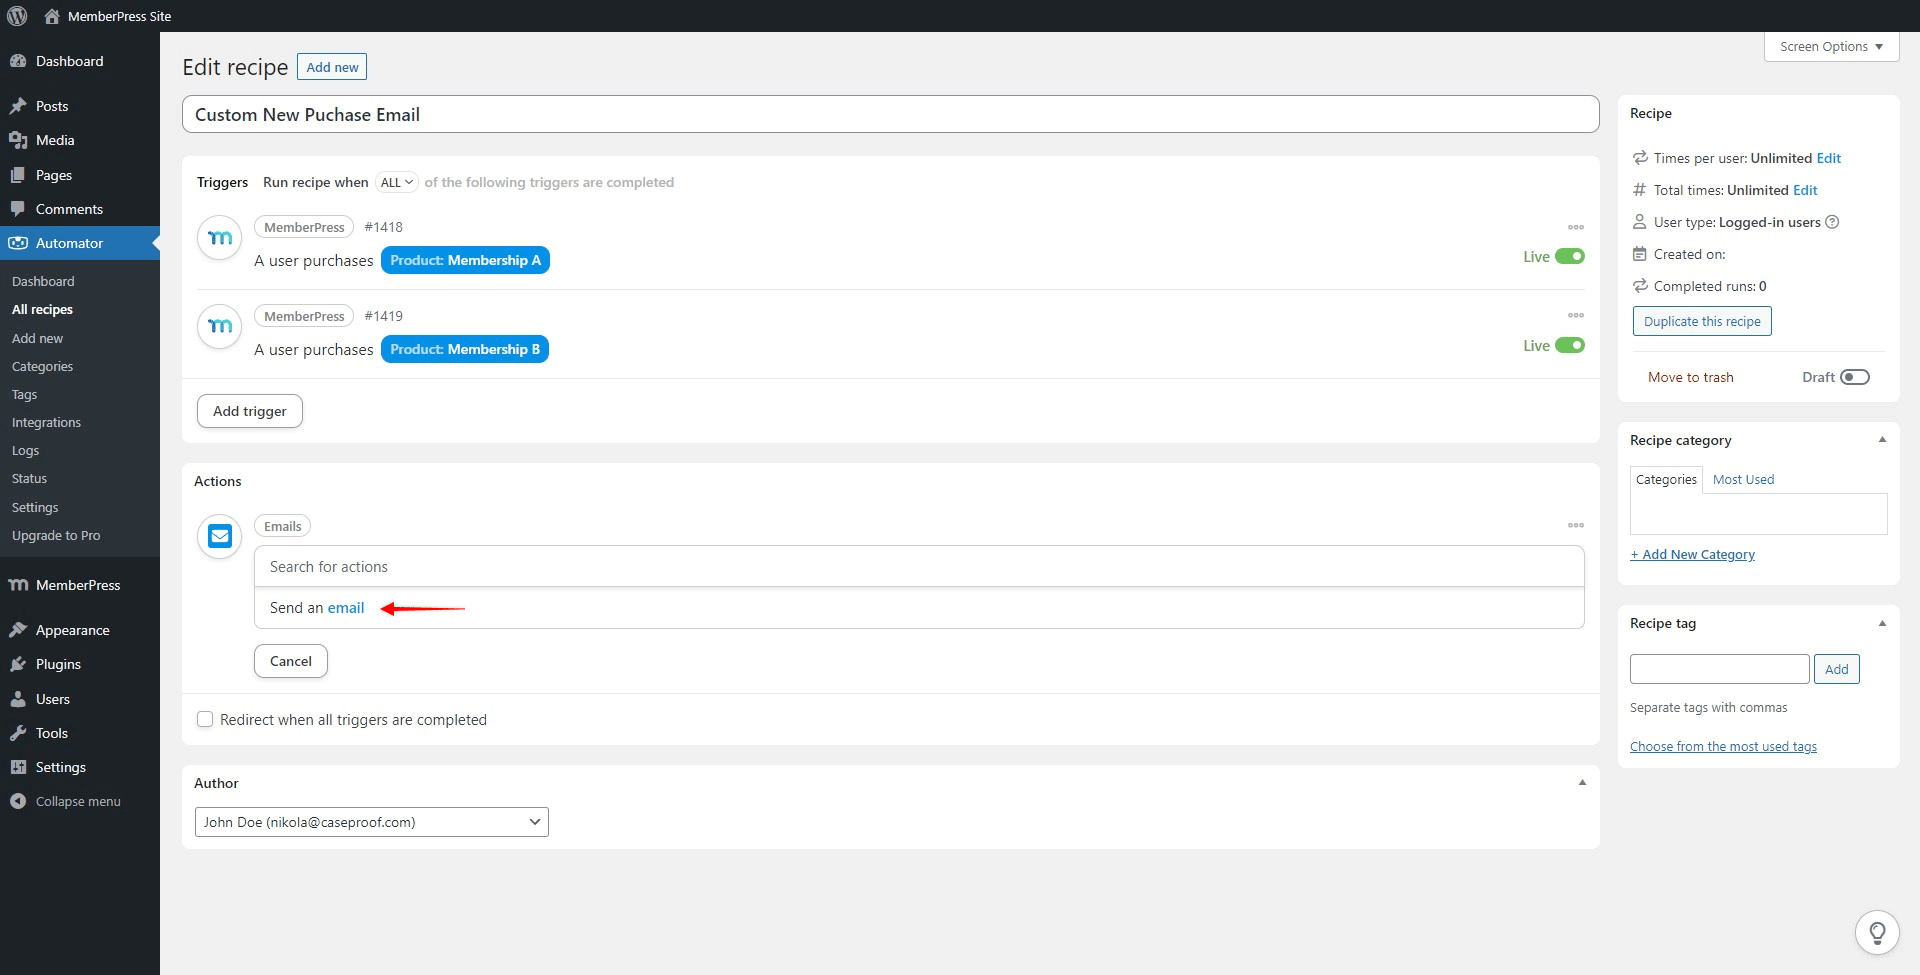
Once selected, you will be presented with the email form where you can set sender, receiver (admin or user email), additional receivers, the email subject, and add the HTML or text content of your email. Add your settings, and content, and click “Save” to save the action;
Once your triggers and actions are set, toggle the “Draft” switch to “Live” to make your recipe active.