If you want to customize the way that your menu interacts with your users, based on if they are logged in or not, or if they are actively subscribed to one of your memberships or not, then look no further than the
If Menu – Visibility control for Menu Items plugin.
Video Tutorial
Installation Instructions
Please follow the steps below to install the plugin on your site.
Important Note: to be able to see all the options available for your menu, you'll need to check those options in your Screen Options tab shown here.
- Navigate to your WordPress Dashboard > Plugins > Add New, and search for “If Menu – Visibility control for Menu Items. It is the one developed by Layered.
- Go to the WordPress Dashboard > Appearance > Menus page.
- Create your new menu or select the menu you want the item to appear on.
- Creating a new menu – if you need to create a new menu, under the Menu Structure option, enter the name for the menu and then click the blue Create Menu button to get started.
- Find your menu to edit – to edit an existing menu, use the Select a menu to edit drop-down and click Select.
- Within the Menu Settings for your selected menu, select the locations of your menu. Most prefer using Desktop Horizontal Menu.
- With the Add Menu Items option on the left-hand side, add the menu items you need.
Using If Menu with MemberPress
With the plugin installed and active on your site and your menu created, you can now begin using the logic created by the If Menu plugin. Here we will be focusing on what our plugin can do with the If Menu plugin, but for an outline of what it's base features and controls are, please see
their page here.
Accessing If Menu's Logic
To access the logic, please see this brief GIF or view the written instructions below:
- Go to the WordPress Dashboard > Appearance > Menus page.
- In the Menu structure section, find the menu item you would like to add conditional logic to.
- Click the down arrow on the right-hand side of the option.
- Check the Enable visibility rules checkbox.
- Add the conditional statement(s) that you want, then click the blue Save Menu button.
MemberPress Specific Logic
The If Menu plugin will have the additional condition of Active on Membership available to you when you meet these two conditions:
- MemberPress is installed and active.
- You have created at least one Membership in MemberPress.
To use this condition, simply select — Any Membership — or the name of one of your active memberships to set up the condition.
Since MemberPress version 1.8.8, you can also select a rule from the Active Membership Rule group.
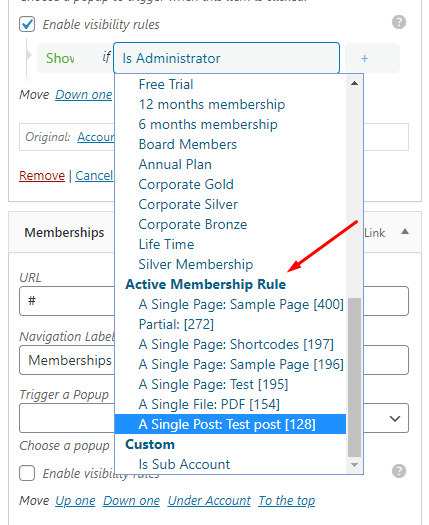
This way, you can display menu item for users who fulfills access conditions of the selected rule without checking many memberships one by one.
You may also find that by using the If Menu's and/or options for the condition
as outlined on the plugin page will you help you to add customization to which users can and cannot see your menu items.


