The MemberPress OpenAI integration will allow you to use ChatGPT to generate all your courses directly on your site by simply filling in the form. Further down, we’ll show you how to do this step by step and get your courses ready in no time.
Integration Requirements
To make this integration work, you will need the following:
- MemberPress Plus or Pro plugin installed and activated on your site;
- MemberPress Courses add-on plugin installed and activated on your site;
- WP Forms Lite plugin;
- Uncanny Automator account (Free or Pro);
- OpenAi (ChatGPT) account.
Also, you'll need the Free or Pro versions of the Uncanny Automator plugin plugin installed and activated on your site. Once activated, you'll need to connect it to the MemberPress plugin using the Uncanny Automator add-on.
Create a Form to Submit Requests to OpenAI
Since ChatGPT is an artificial intelligence chatbot, you need to post your question(s) for it to generate your content.
In order for you to do this, we will use the WP Forms Lite plugin. To start, please install and activate the plugin on your site.
Next, we need to create the form which will be used to submit requests to ChatGPT. When setting up your form you should set at least set two textual fields:
- Course Title – text added to this field will be used as your course (post) title
- Prompt – this field allows you to add a description of your course and send it as a request to ChatGPT. Your course content will be generated based on the description you provide here.
There are also some additional options for this integration that you can include in your form:
- Temperature – this option sets the level of randomness and creativity ChatGPT should use when creating your content. You can use values between 0 and 0.9, where 0 represents more precise data, and 0.9 a high level of freedom and creativity.
- Maximum length – this will limit the length of the generated content. The length here is not defined in characters or words, but in the number of OpenAI tokens. Based on the OpenAI pricing, 100 tokens is approximately 75 words. Feel free to check the “What are tokens and how to count them?” article for more details explanations of the tokens and OpenAI pricing.
In this example, our form will contain three text fields: Course Title, Temperature, and Prompt.
Please follow these steps to create the form:
- Navigate to Dashboard > WPForms > Add New, and select the “Blank Form” option;
- Add your fields to the form, by dragging the field type and dropping it into the form area. In our case, we will use the “Single Line Text” and “Paragraph text” fields;

- Name your form and edit your field labels. Optionally you can also add placeholder text with some basic instructions;
- Click “Save”.

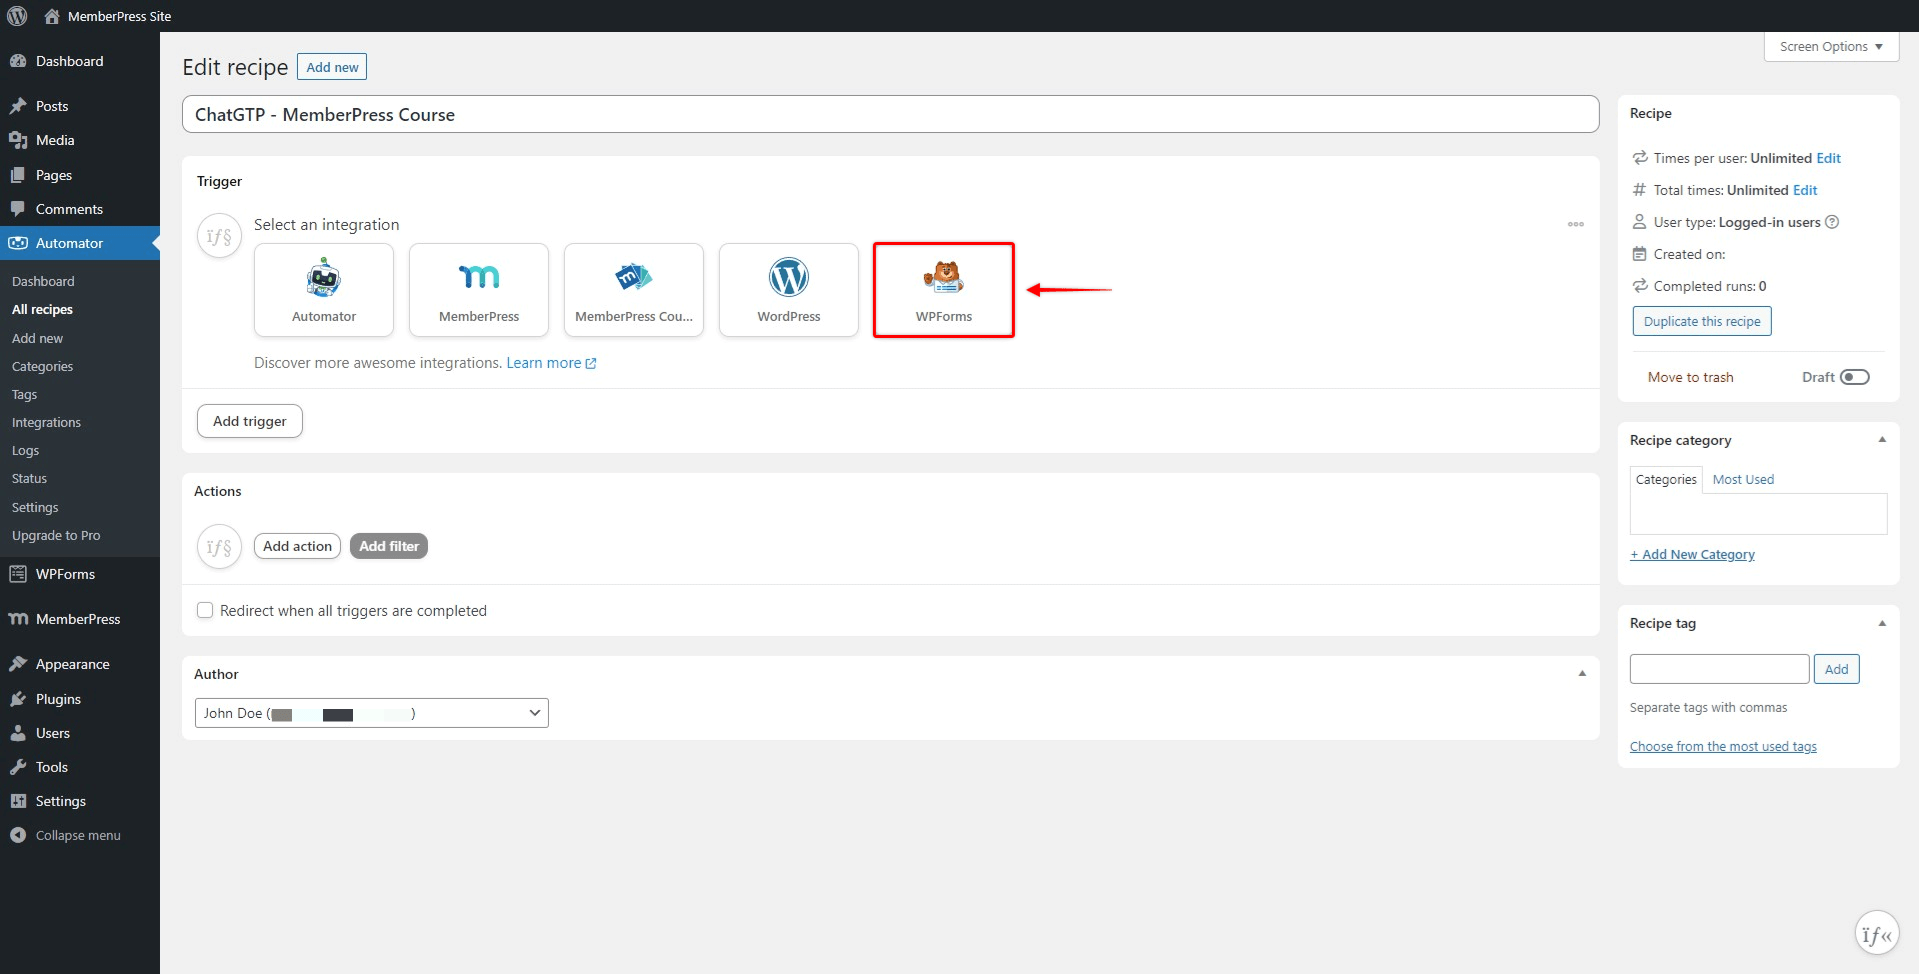
Create a Trigger
Next, we need to set our trigger. Triggers are events that will trigger the recipe when. In this case, submitting the form for generating the course is the event we want to use. Please follow these steps to set your form as a trigger:
- Select WP Forms integration;

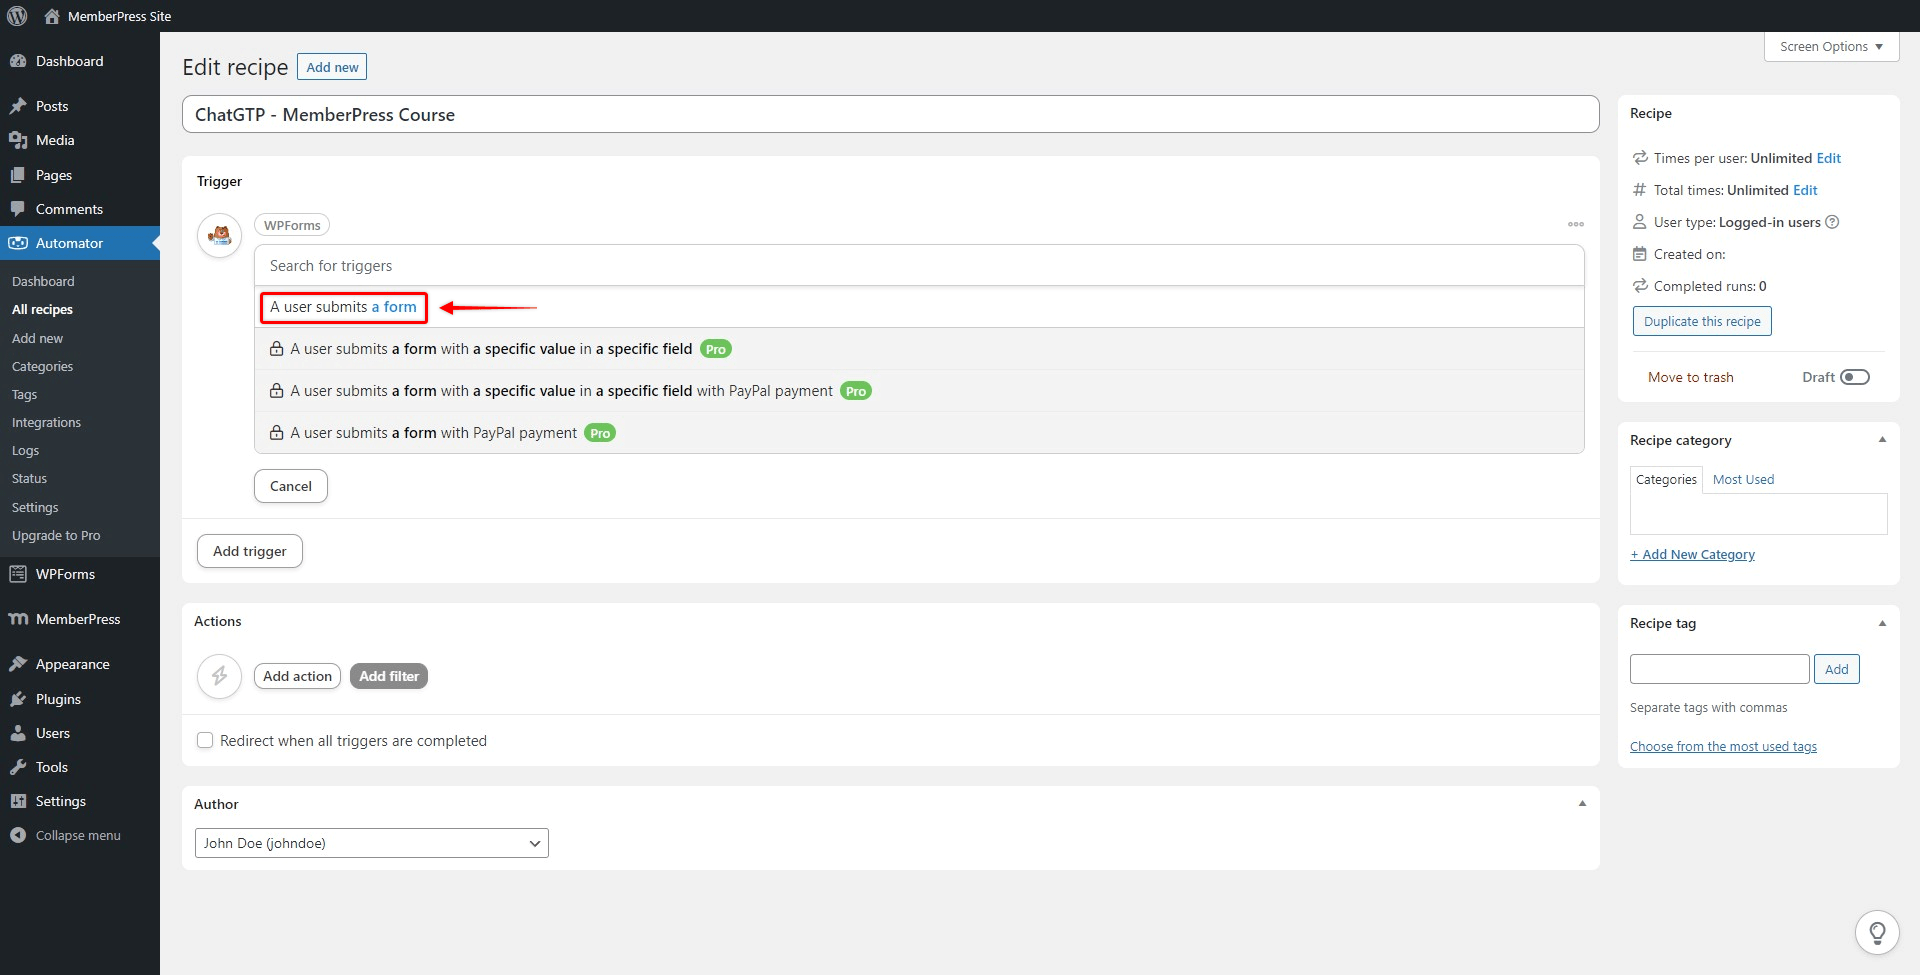
- Select the “A user submits a form” trigger;

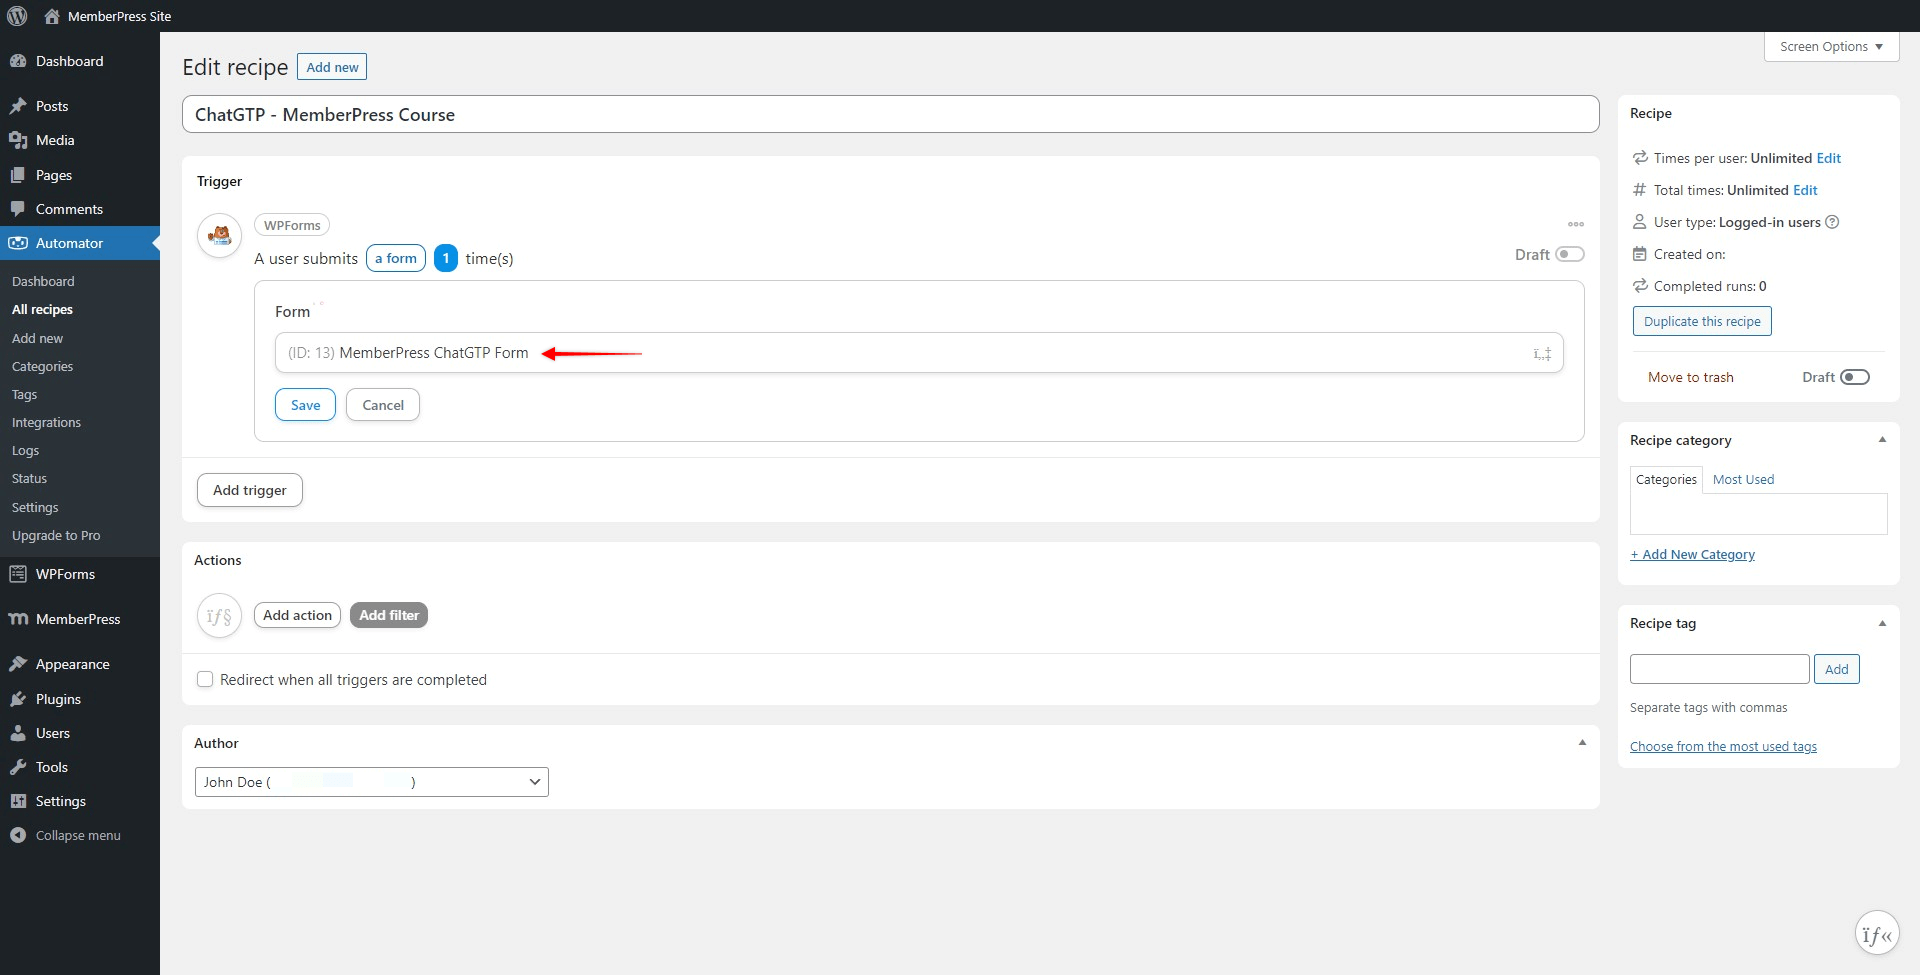
- Choose the form you previously created and click “Save”.

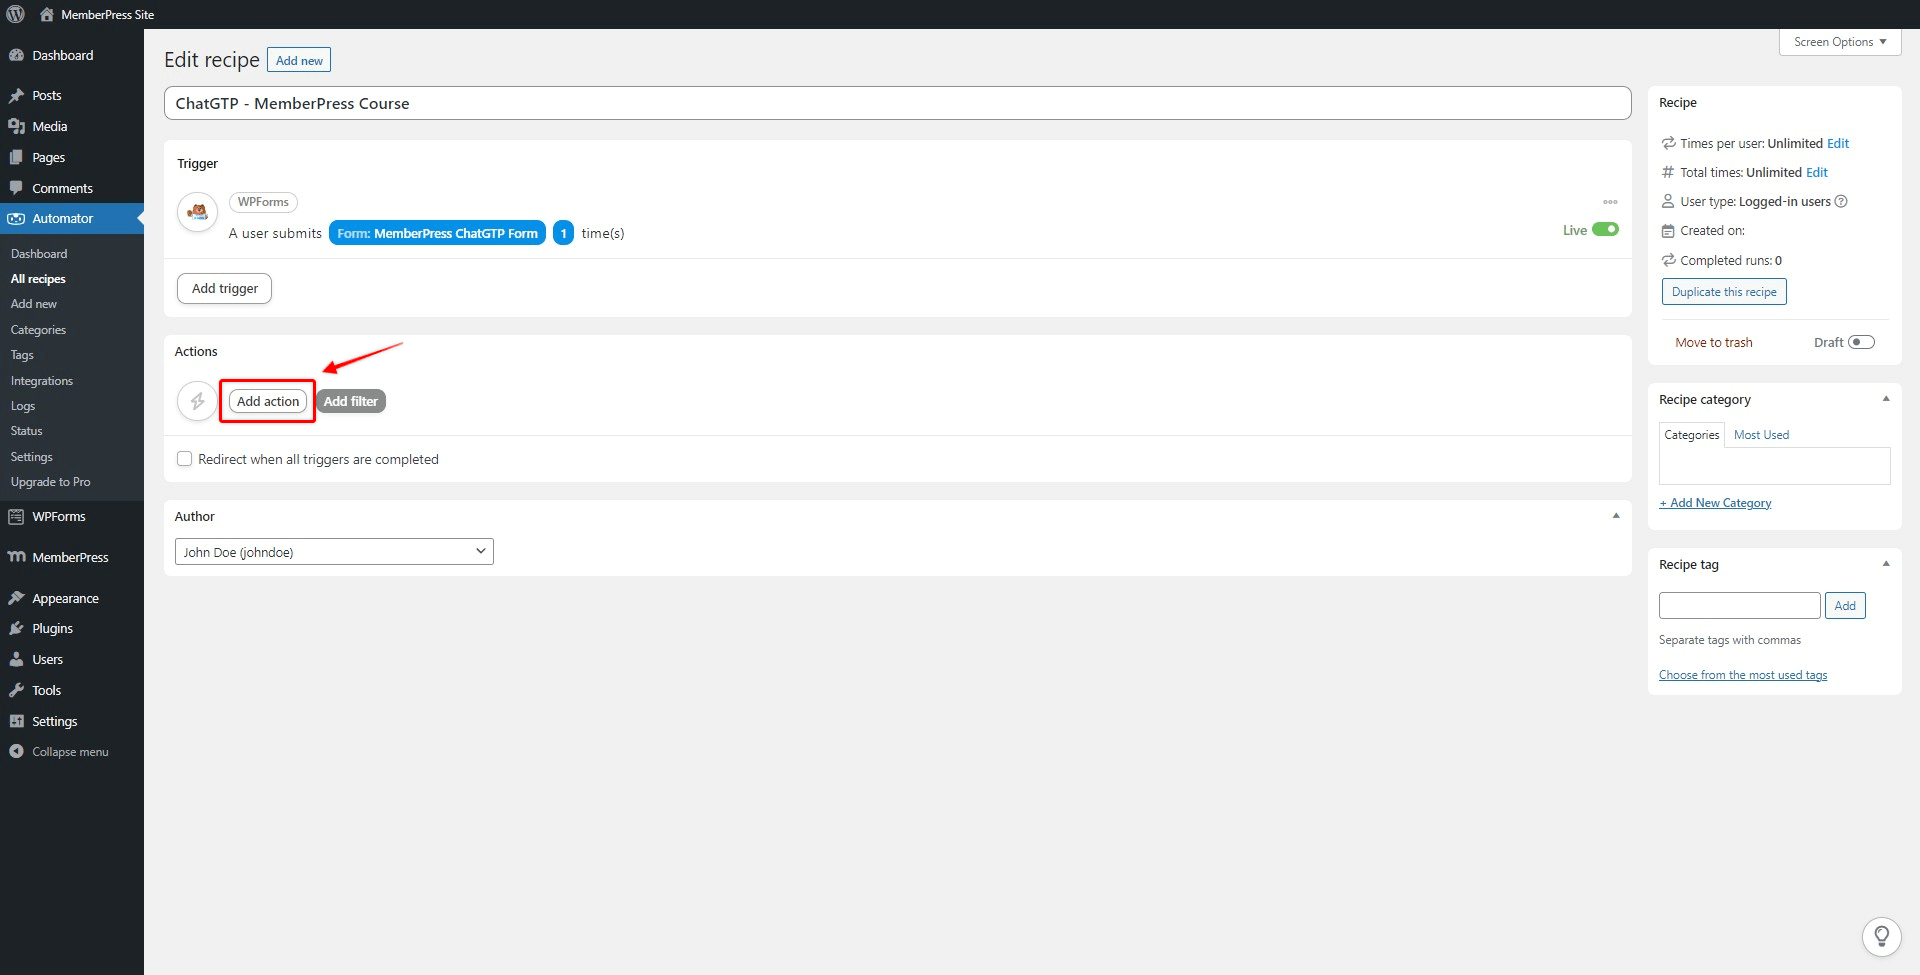
Create an Action
Once our trigger is set, we will add actions that will run once the recipe is triggered. Here, we will set two actions – one for ChatGPT to generate course content, and the second for WordPress to create a course with the generated content.
If this is the first time you’re setting up the OpenAI integration, you will need to connect your OpenAI account first to Uncanny Automator. If you already did this, you can skip this step.
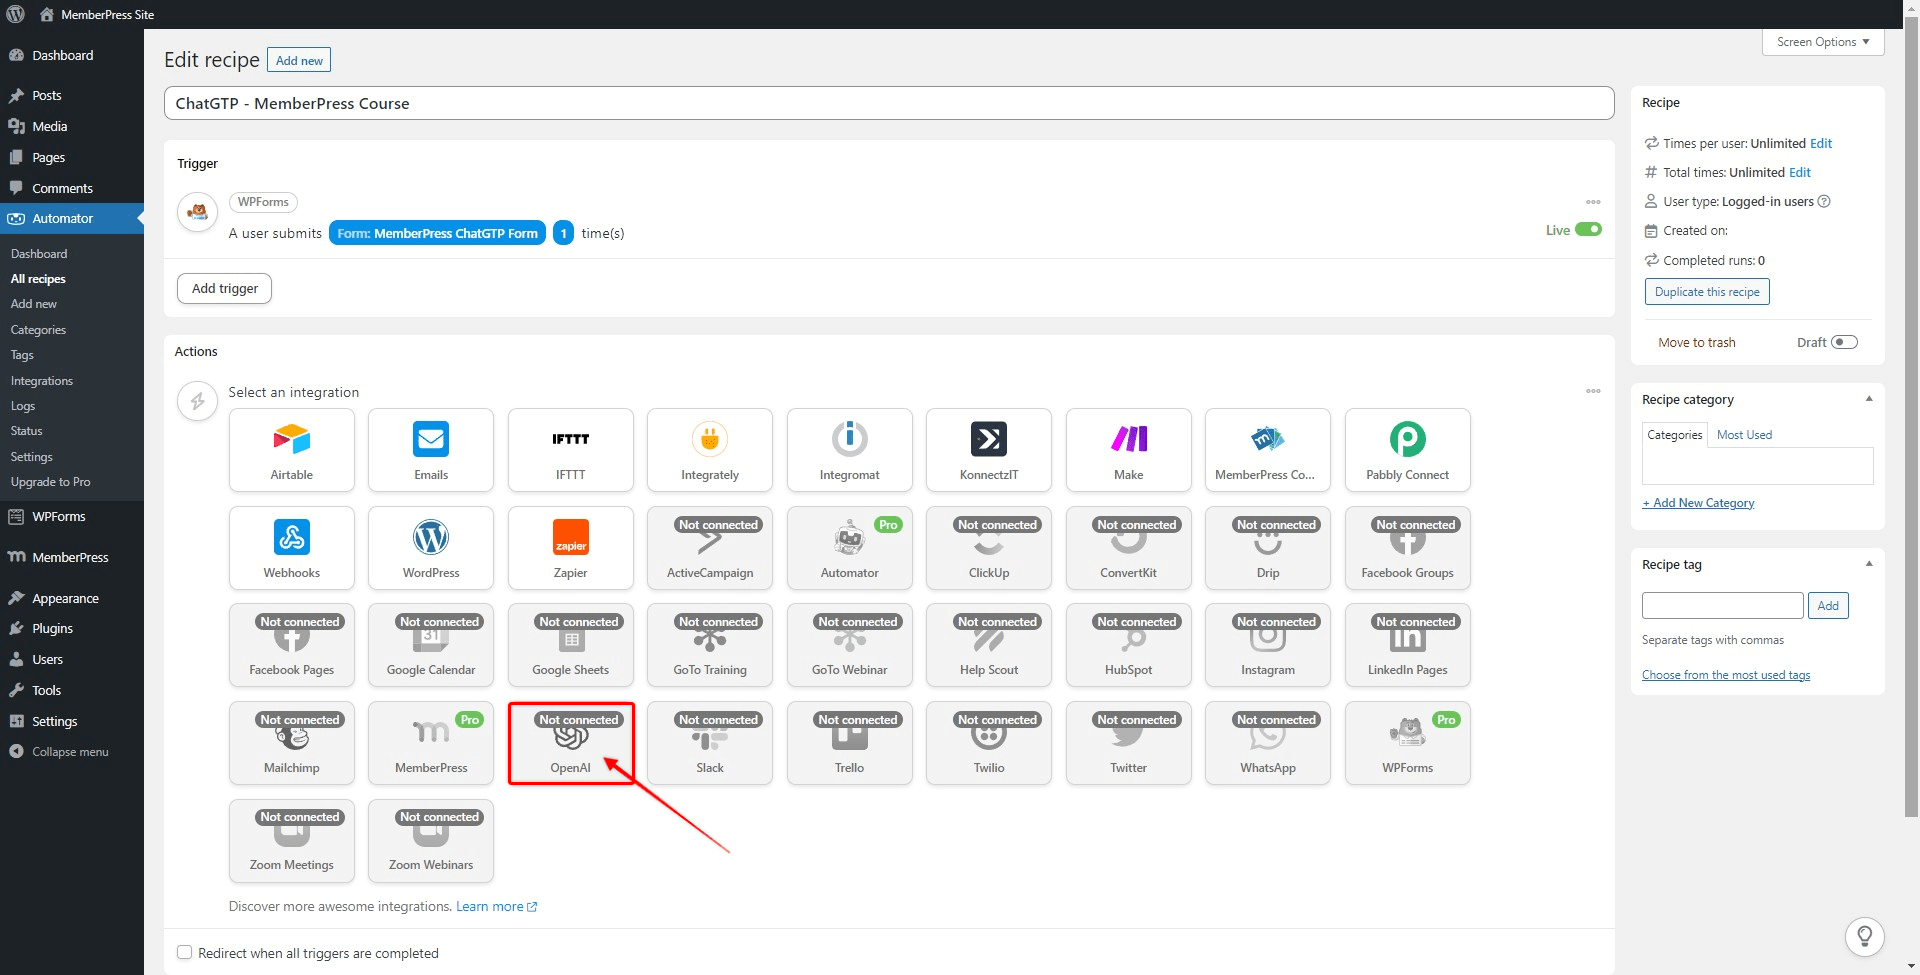
- Click “Add action”;

- Select the OpenAI integration;

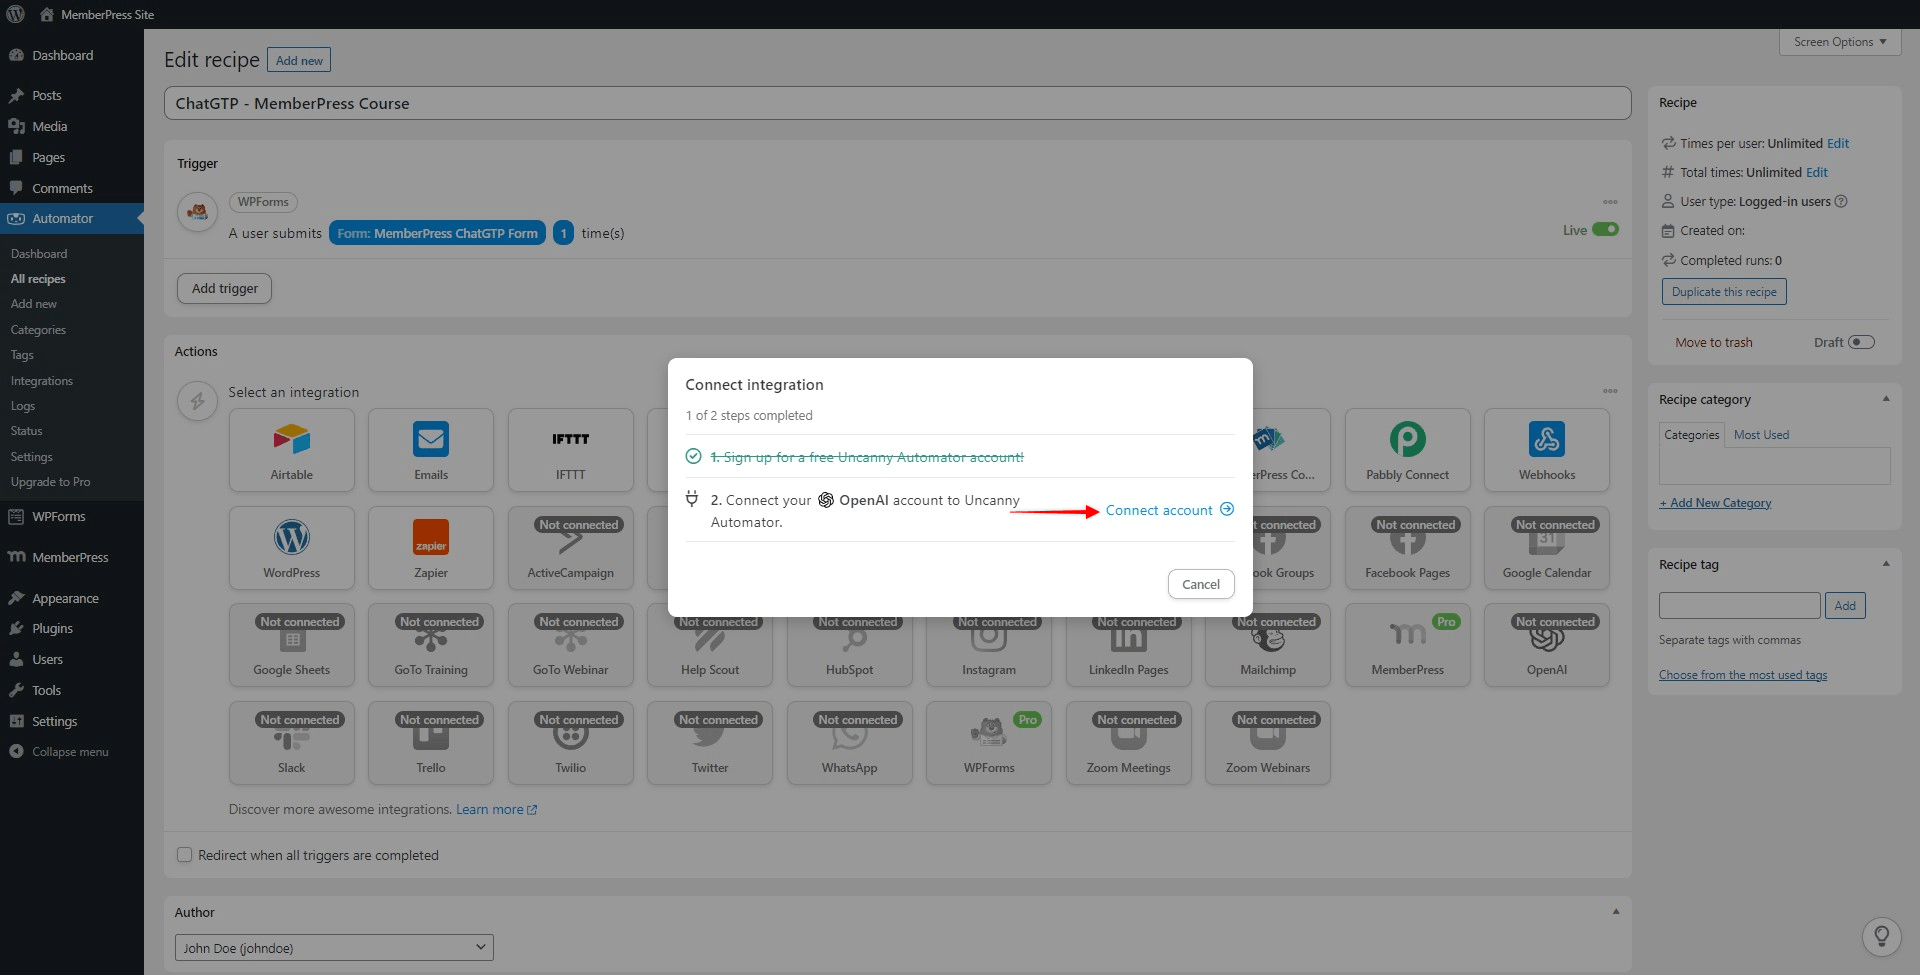
- Select “Connect account”;

- Open another browser tab and Login to your OpenAI account;
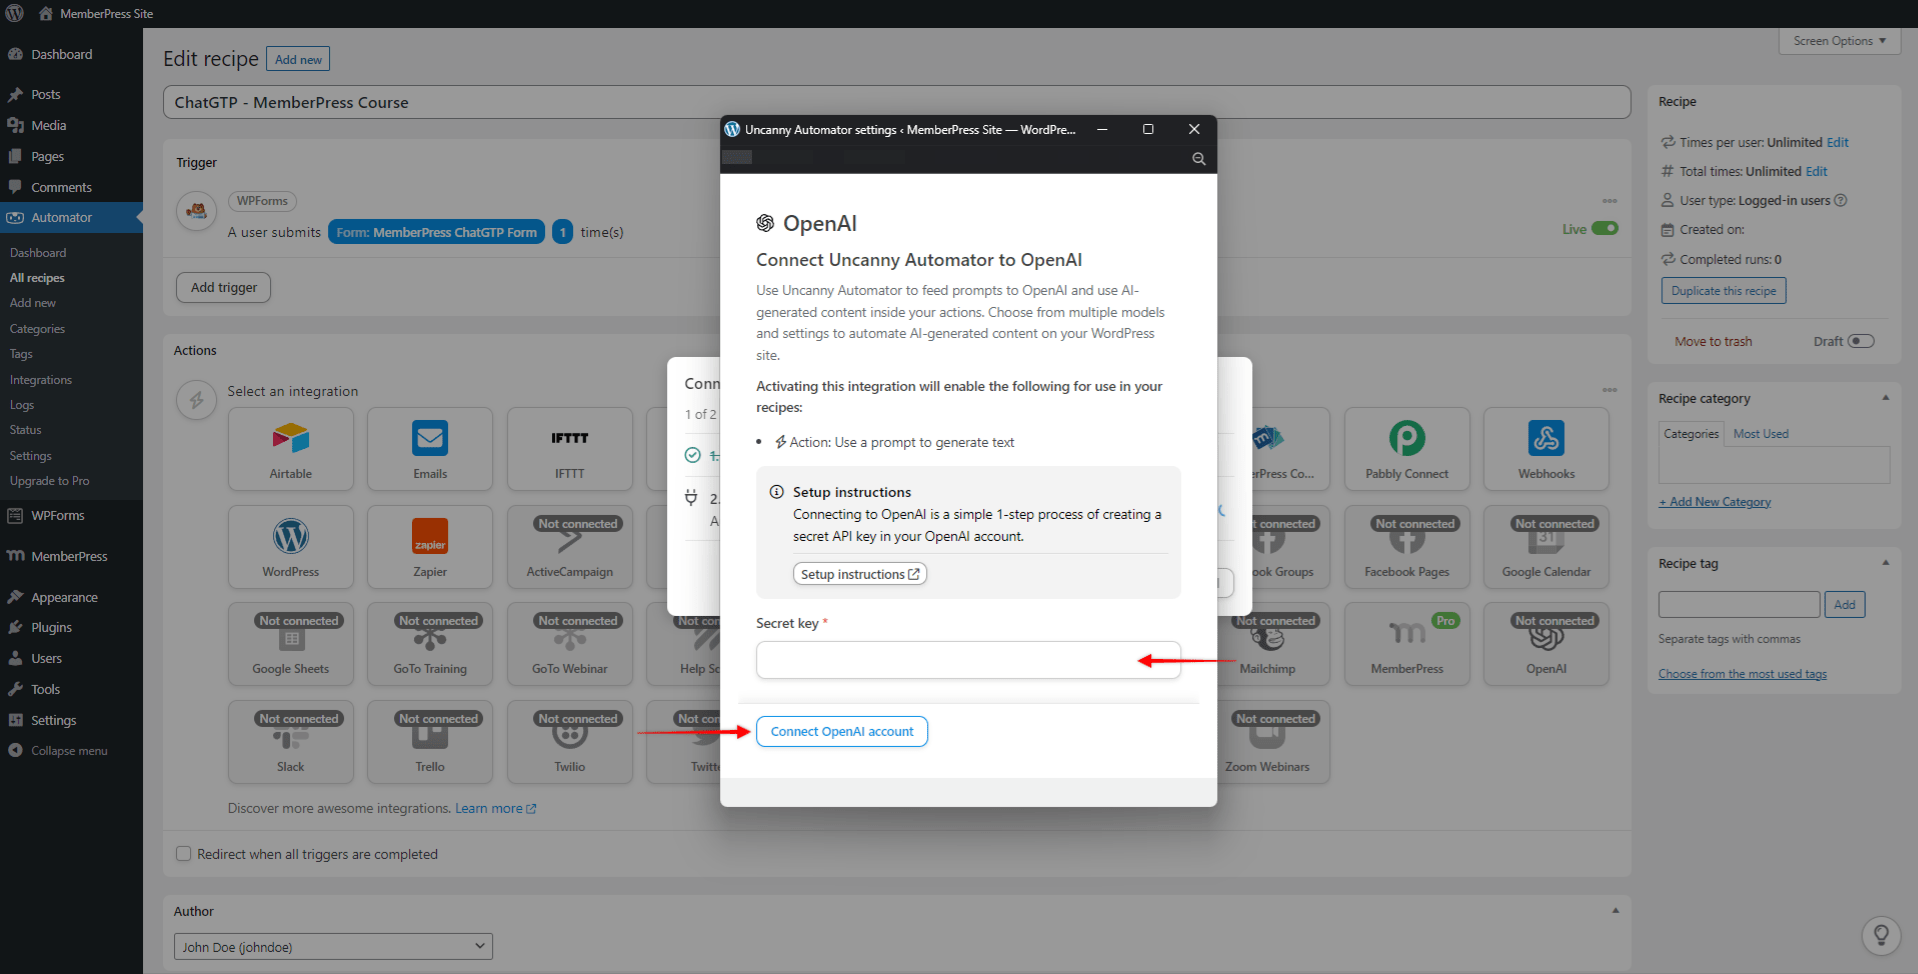
- Navigate to Account > Manage Account > API keys (or click here);
- Create a new secret key;
- Copy the secret key you just generated to the Unacanny Automator on your site, and click the “Connect OpenAI account” button;
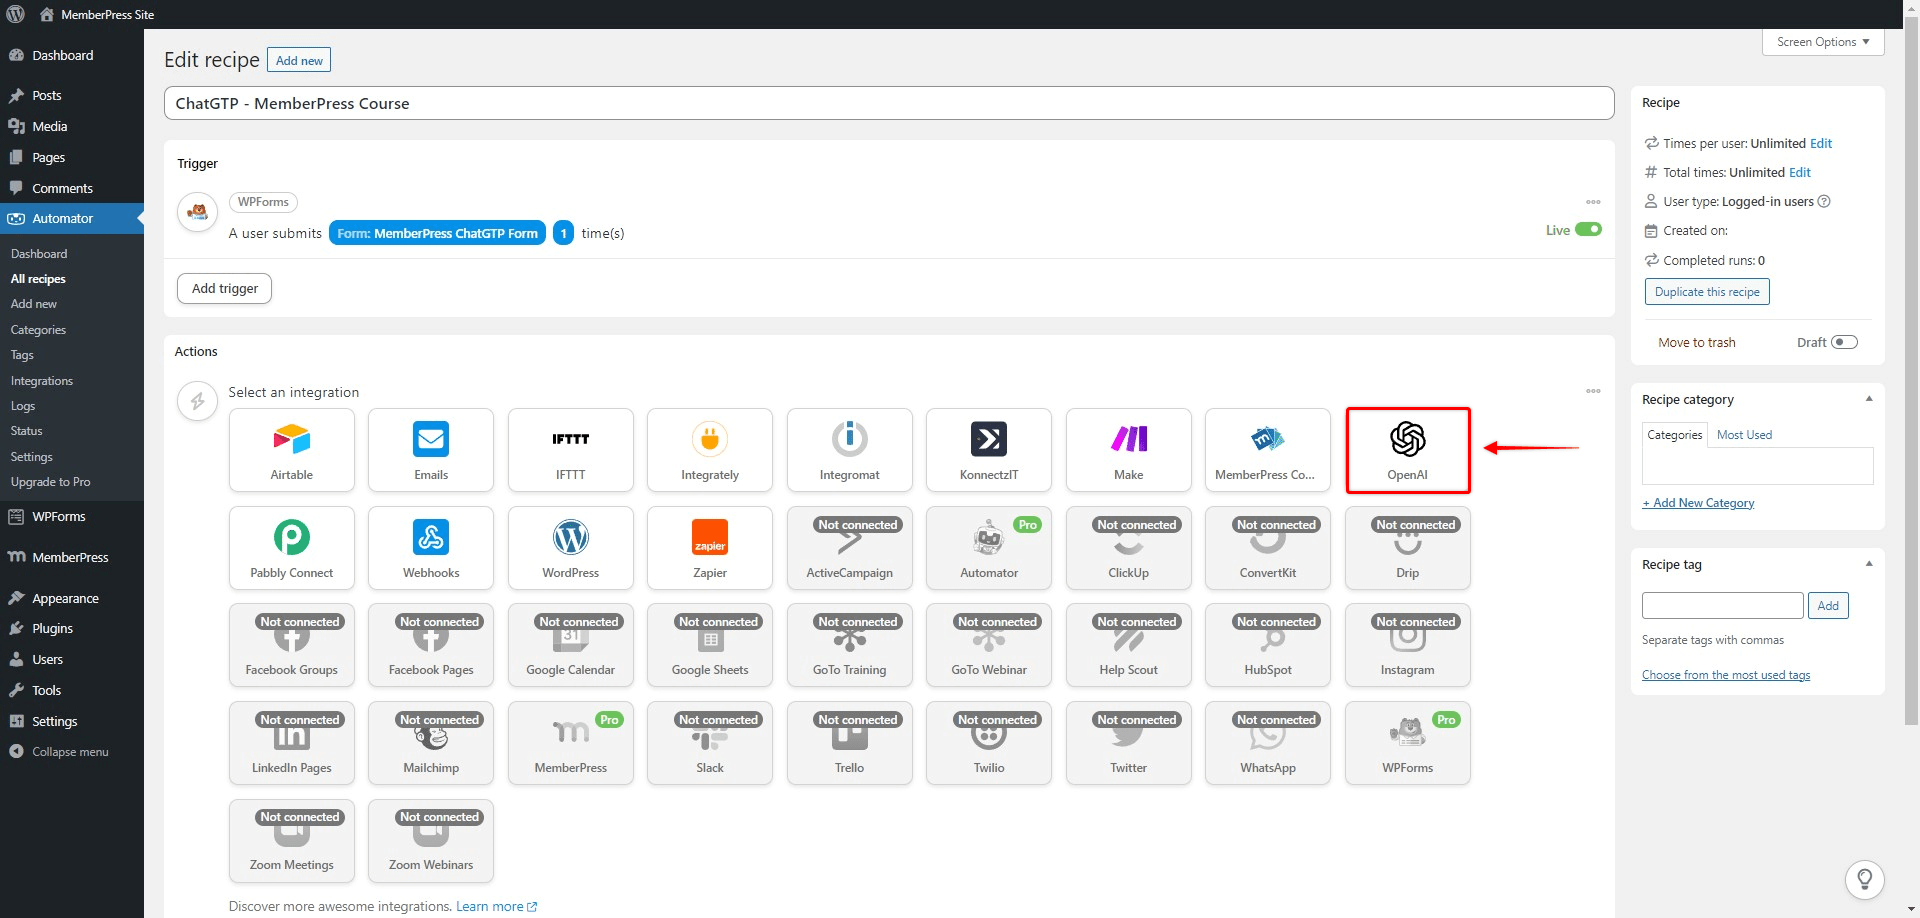
 You should see the “Your account has been connected successfully” notification;
- Click “Save”
 You should see the “Your account has been connected successfully” notification;
With your OpenAI integrations set, you can continue adding your action:
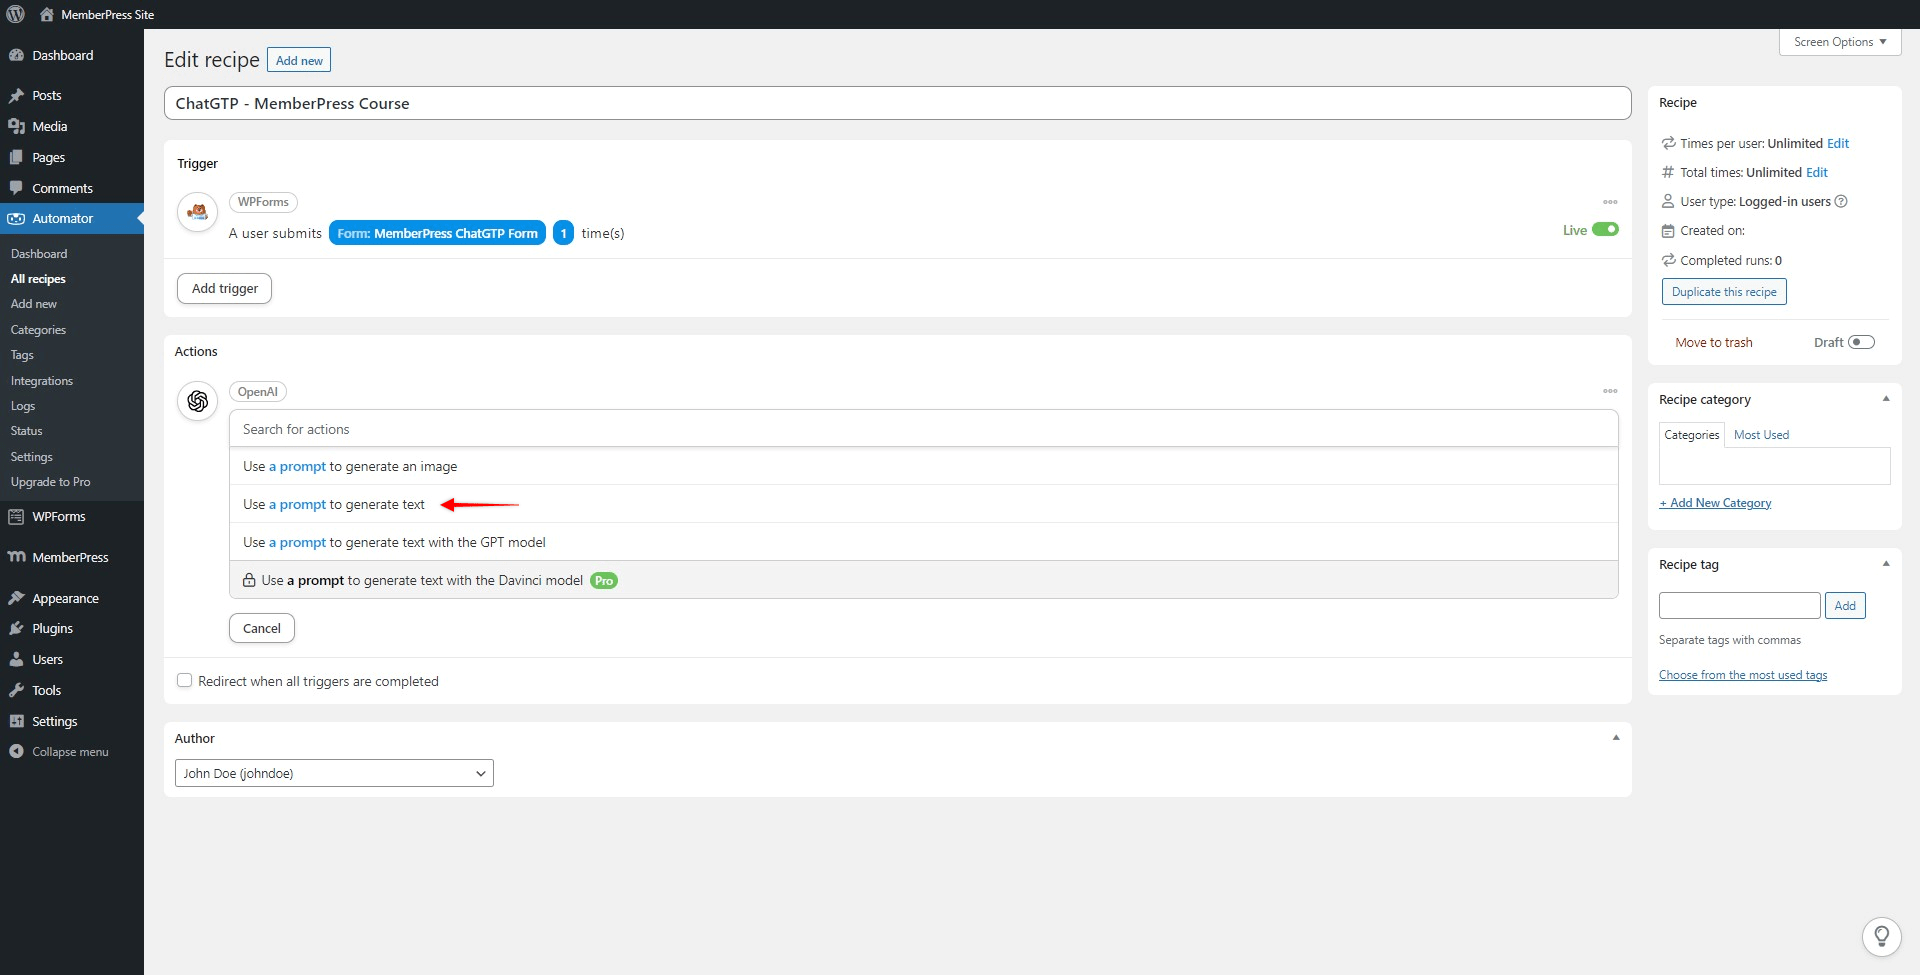
- Select the OpenAI integration;

- Select “Use a prompt to generate text”. This is the option we’ll be using for our example. In case you have the Uncanny Automator Pro, feel free to select the “Use a prompt to generate text with the Davinci model” option instead as it should provide you with even better results;

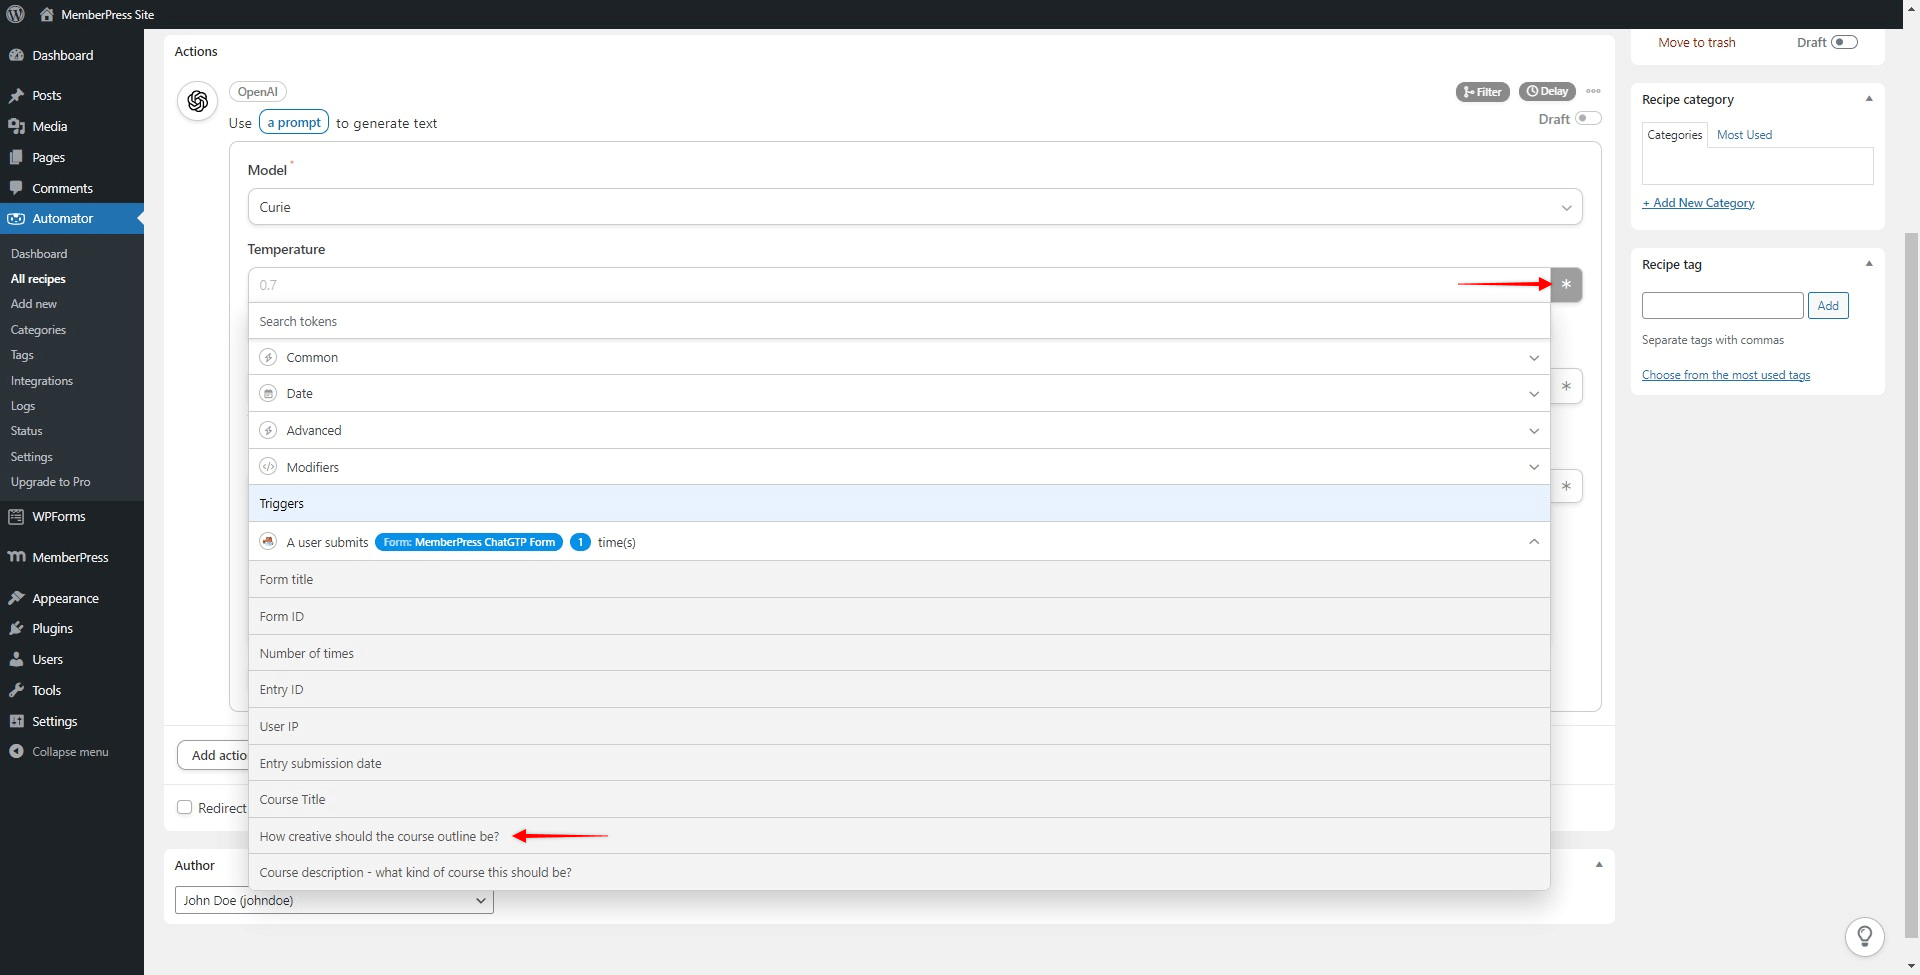
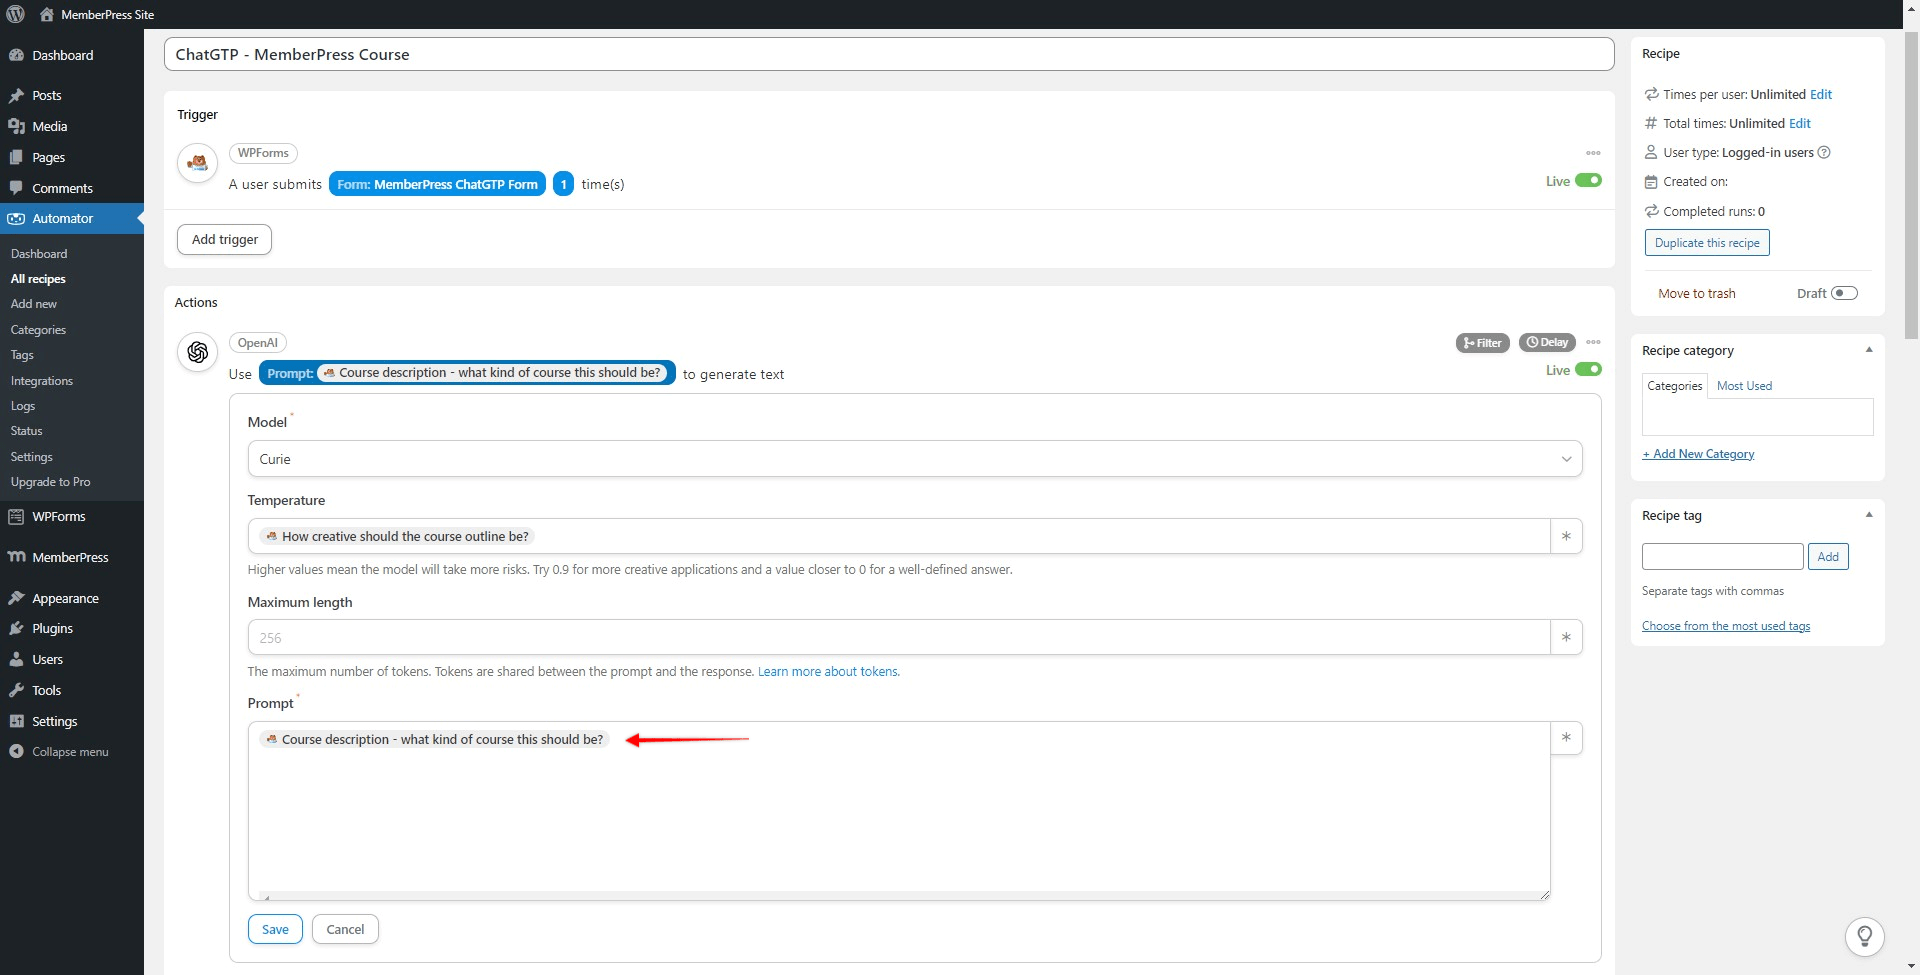
- Select “Curie” in the Model dropdown menu;
- Since we added the Temperature field to our form, we want to link the form field to the OpenAI action. To do this, click on the asterisk icon, and select the field from the form trigger;

- Do the same for the prompt field to finish setting up the action;

- Click “Save”
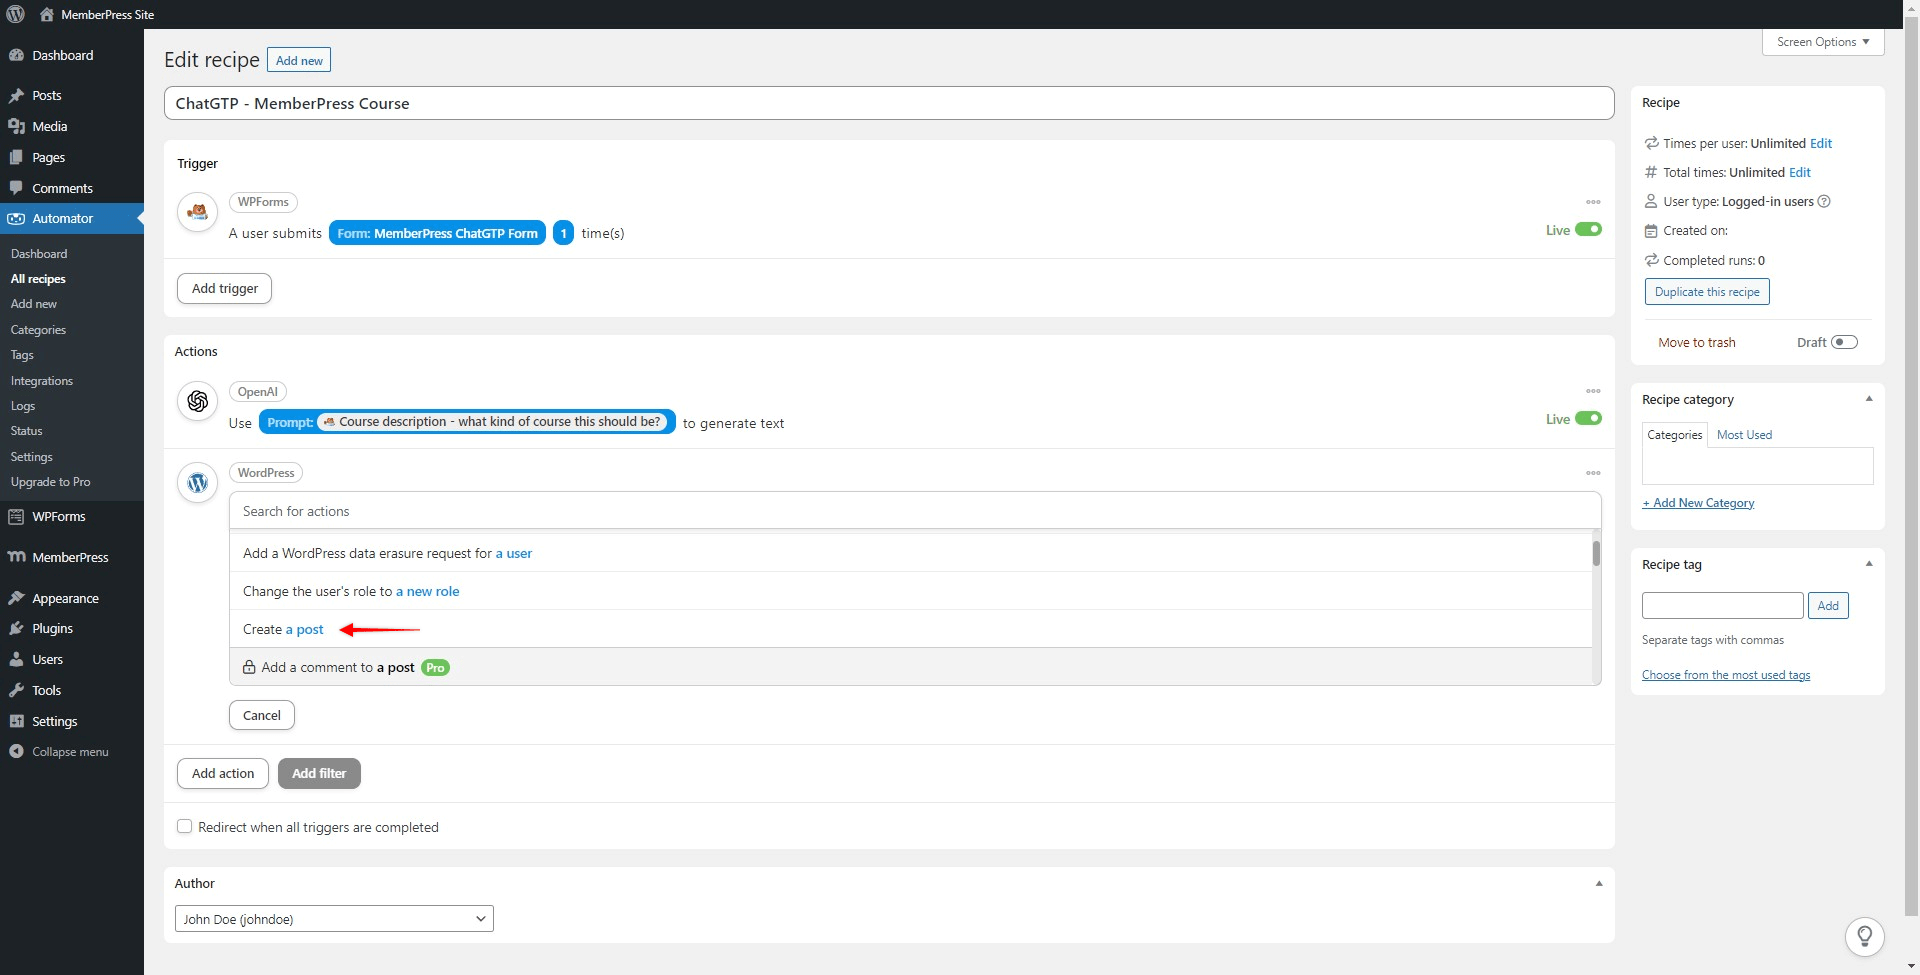
Now, we need to add a second action, that will create a new course post using the content ChatGPT generated with our first action. Please follow these steps:
- Click “Add action”;
- Select the WordPress integration;
- Select the “Create a Post” action;
- Now apply these settings:
- Choose the “Course” option in the Type dropdown;
- Set the post status (“Draft” or “Published”);
- Add Title source by selecting the Course Title field from the form
- For the content, click on the asterisk icon, and select the Response option from the Open AI action.
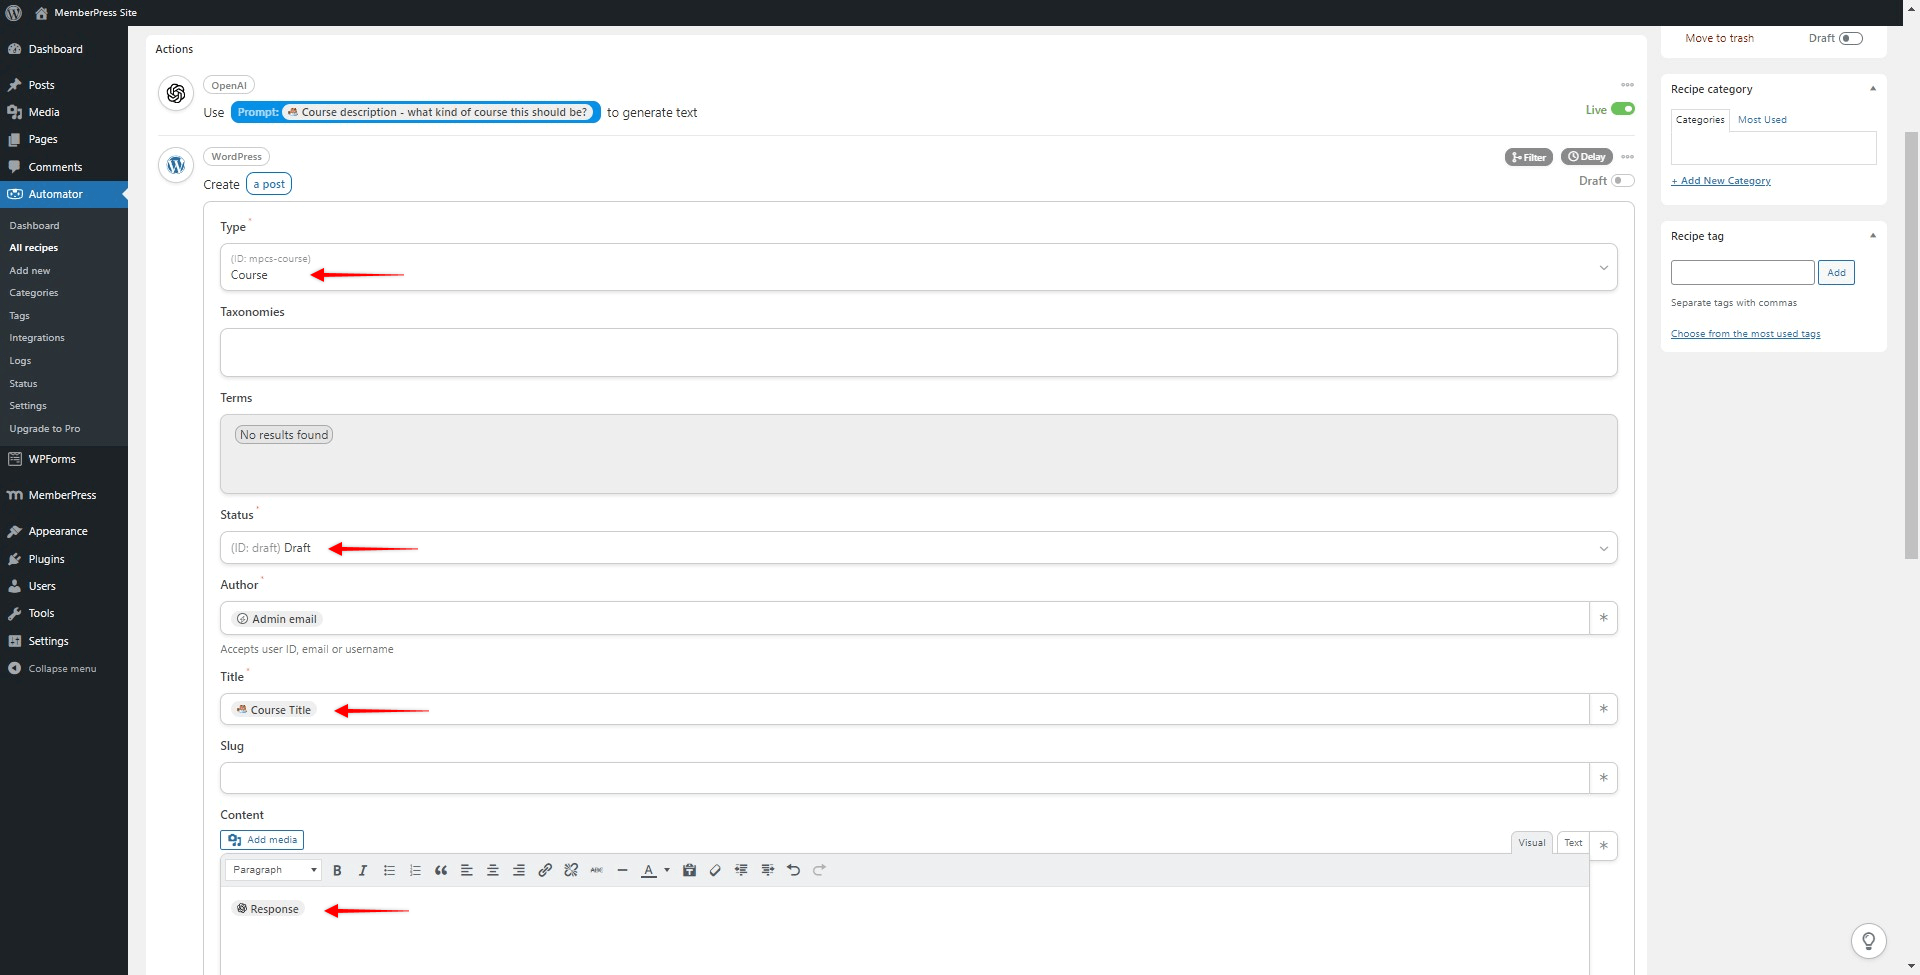
- Click “Save”
Once your triggers and actions are set, toggle the “Draft” switch to “Live” to make your recipe active
Create Automator Recipe for Lessons or Quizzes
You can create your lessons and quizzes in a similar way by creating additional submission forms and recipes.
These recipes will be very similar to the course recipe, with the difference only in the post type used with the WordPress “Create a post” action. Here, instead of using the “Course” (ID: mpcs-course) type, you would use “Lesson” (ID: mpcs-lesson) or “Quiz” (ID: mpcs-quiz), depending on what you want to create.
How To Get It Working?
Now that you have your Automator recipe set and live, it’s time to create your courses.
To create a course, please follow these steps:
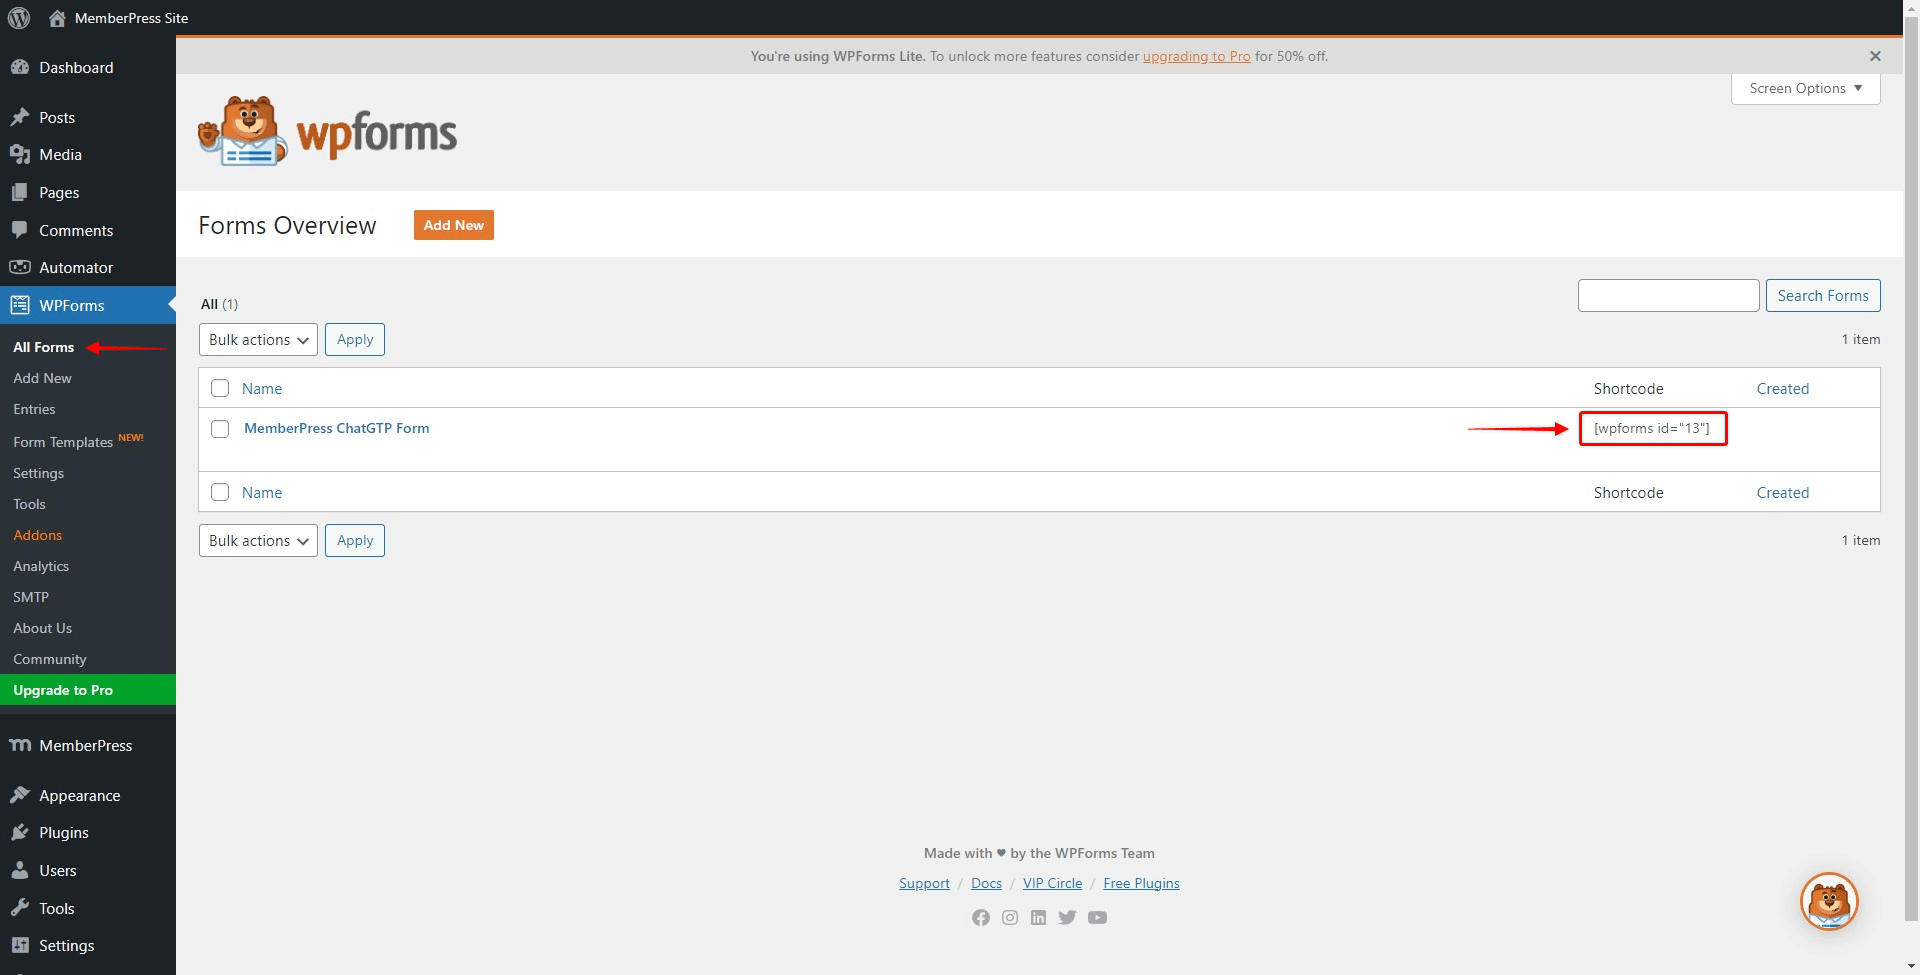
- Navigate to Dashboard > WPForms > All Forms to find the form you previously created, and copy the form shortcode;

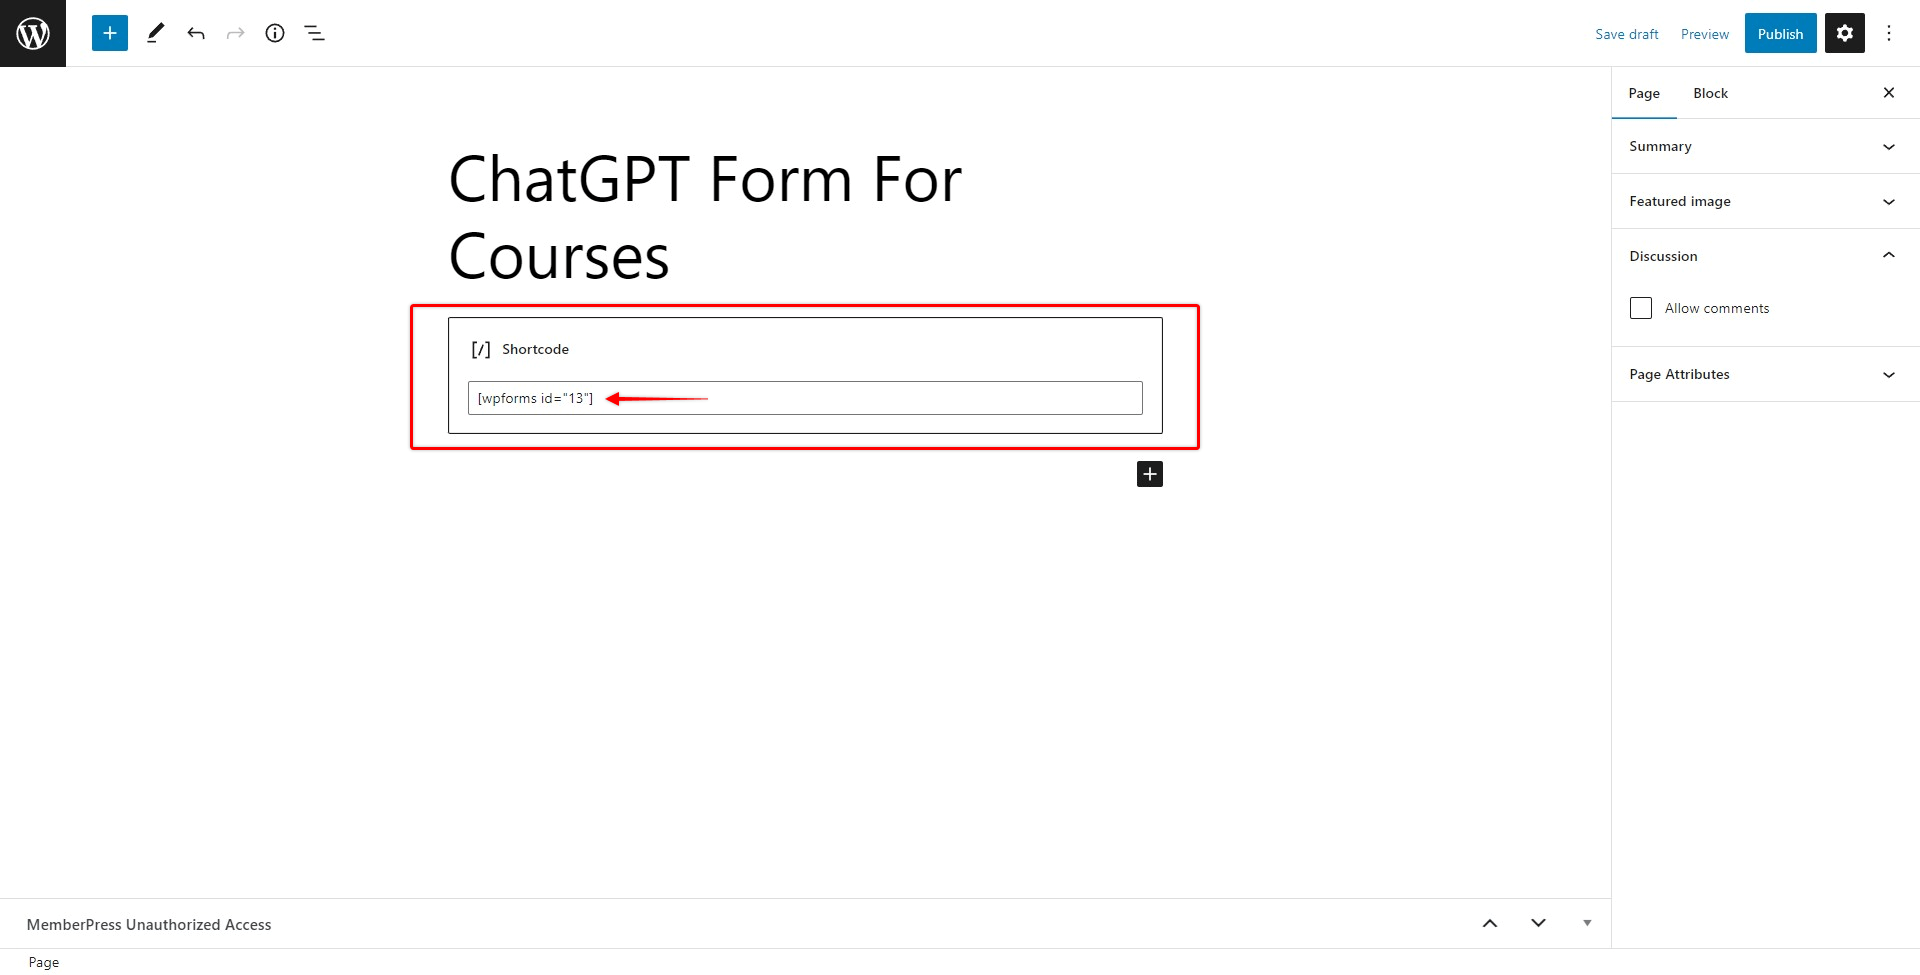
- Create a new post or page, and add the form shortcode there. You can do this using the default Block editor, or some page builder, depending on your preferences;

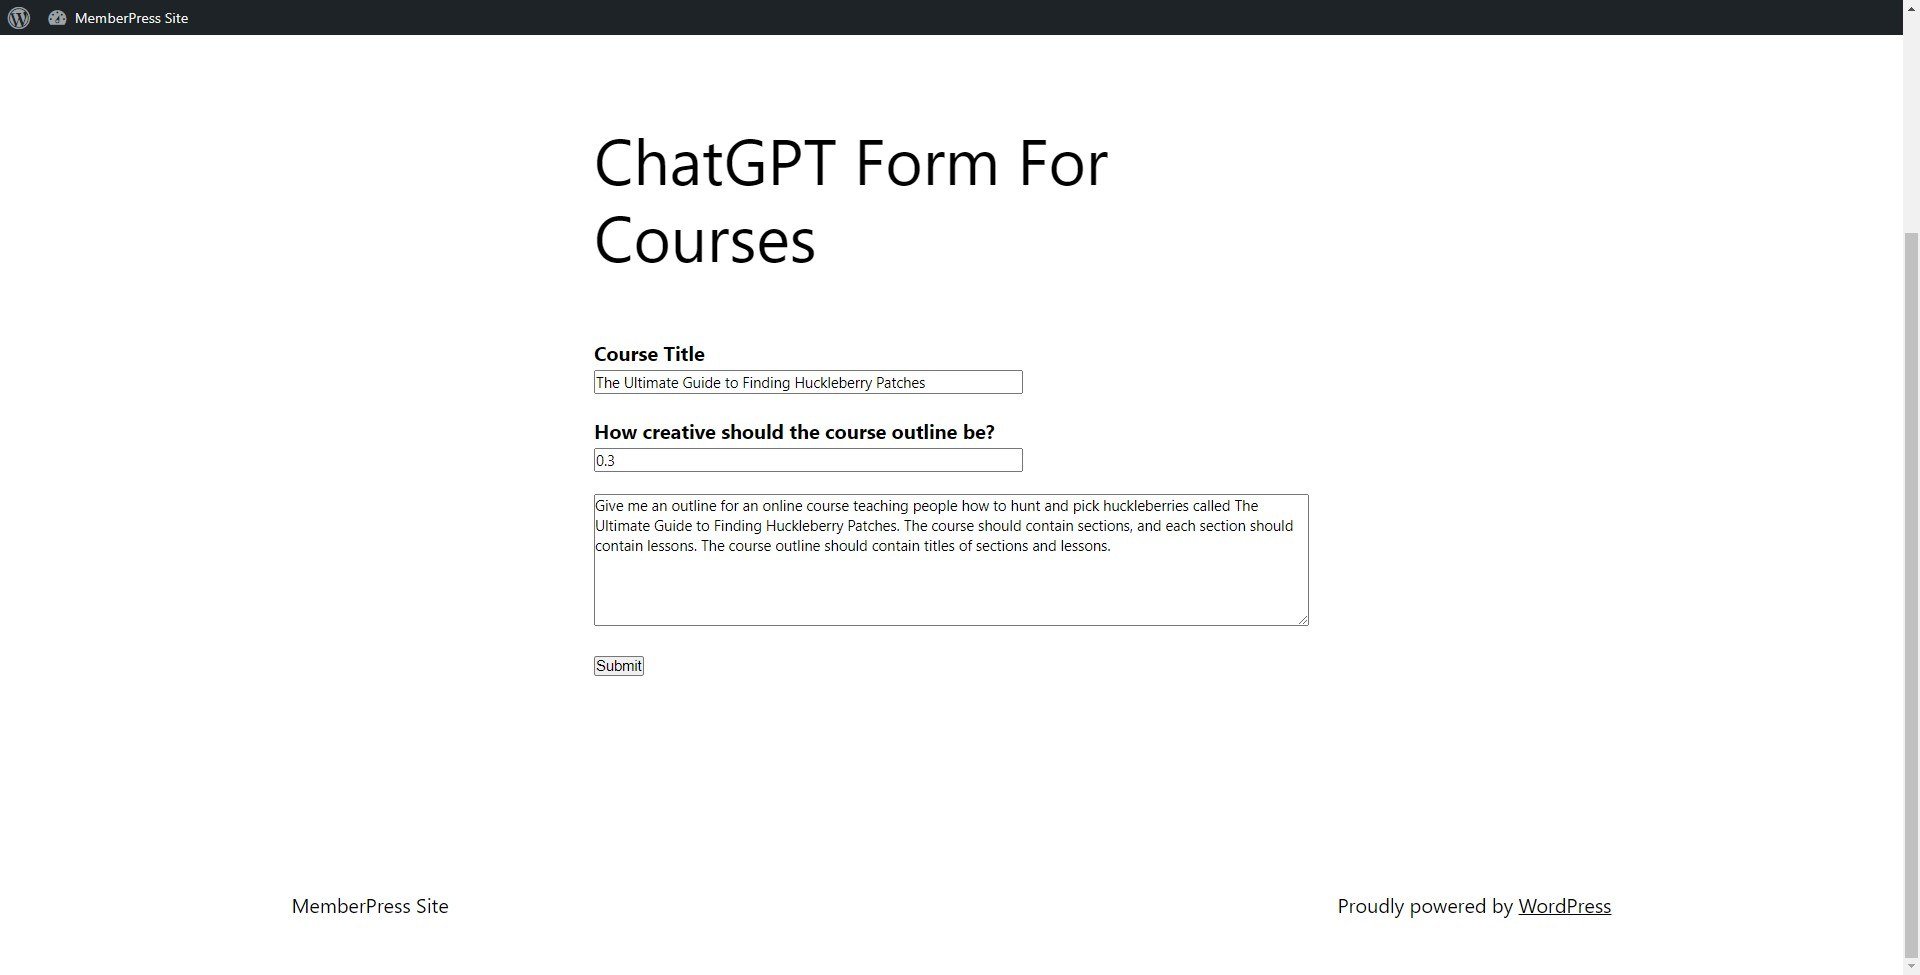
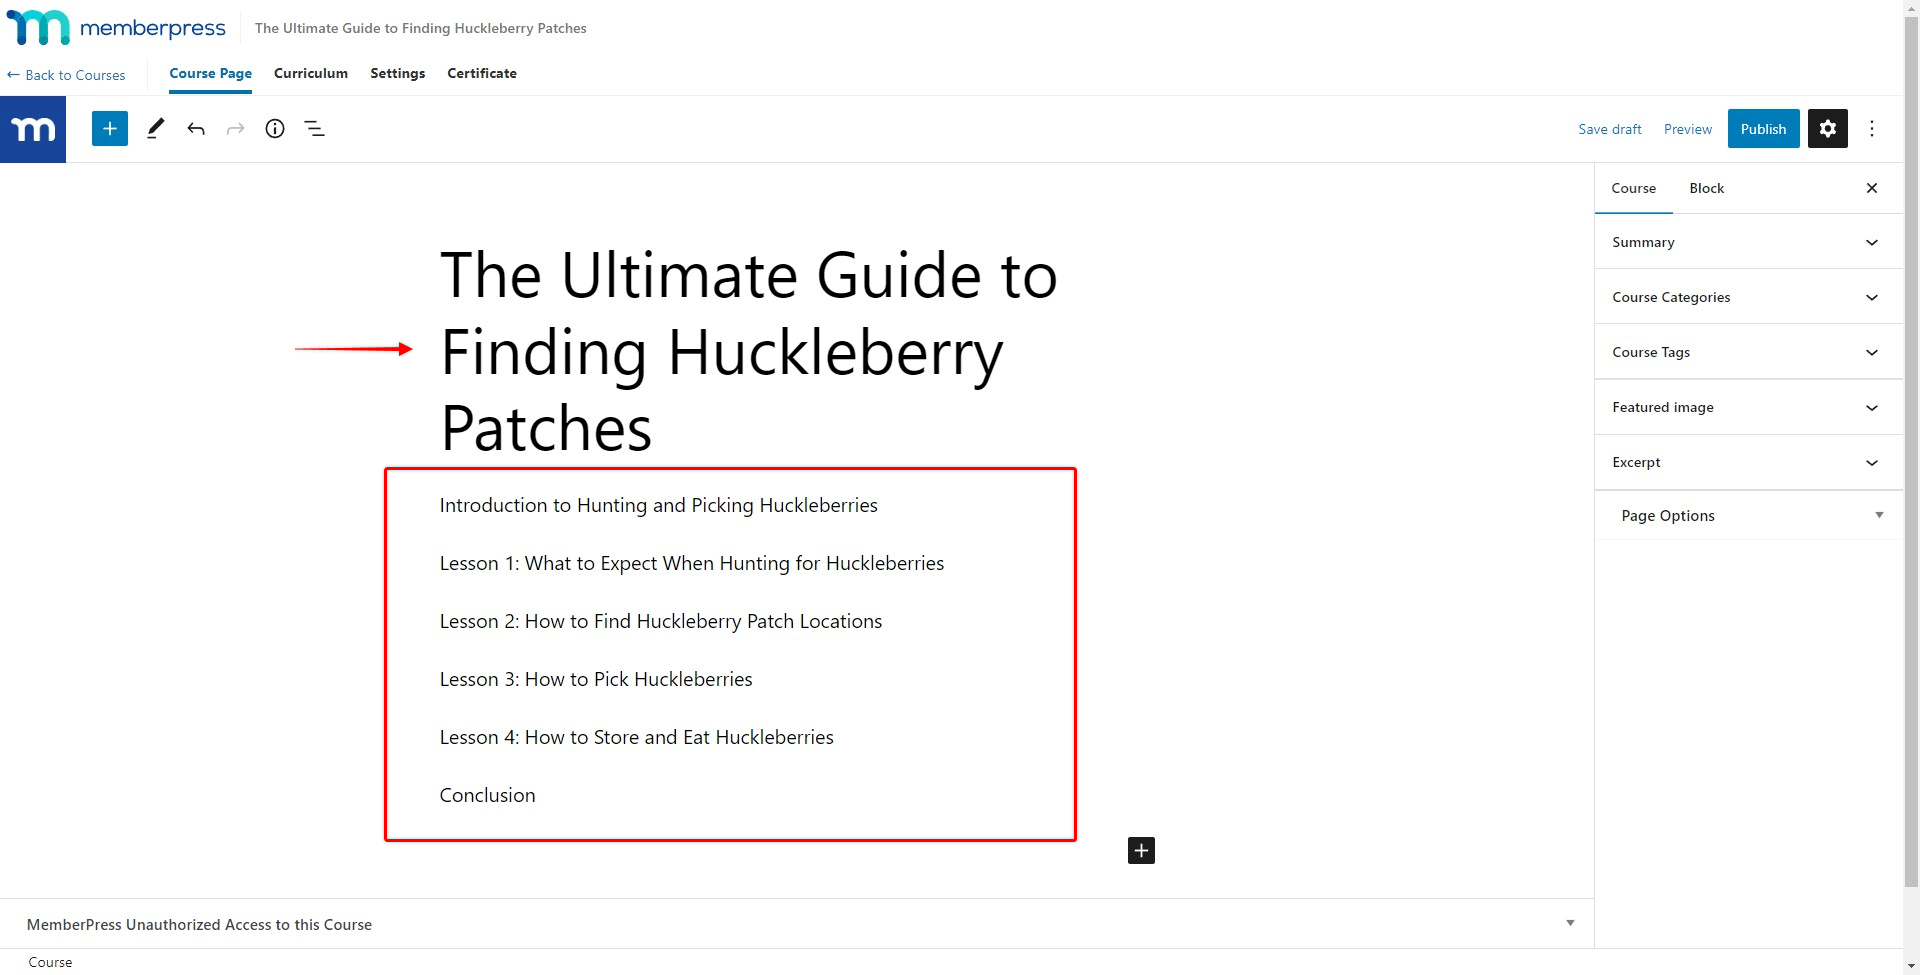
- Next, navigate to this new page, and simply fill in the form data. As an example, we asked for the course outline on the topic of finding and picking huckleberry patches;

As a result, you will see a new course created in your course list at
Dashboard > MemberPress > Courses. This is the course with the outline created in our example:
Further, you can make your requests more elaborate, expand recipes, add additional ones, and adjust the setup in any way you want so it fits your needs perfectly.


