The MemberPress CoachKit™ add-on gives you all the tools you need to run a successful coaching site. Combine it with MemberPress Courses to turn your website into a fully functional online school.
This document shows you how to create and run an online school with the MemberPress Courses and CoachKit™ add-ons.
Online School Setup
Online school sites usually require user and membership management, protected content, and a learning management system (LMS).
Also, most often, these sites require a system for curriculum delivery. With MemberPress, this feature is provided by the CoachKit add-on.
To effectively set up these elements, follow these steps:
- Install MemberPress and activate it on your site. This will allow you to enroll clients (students), manage payments, and manage access to protected content.
- Activate and configure the MemberPress Courses add-on to create your courses and certificates.
- Activate and set the MemberPress CoachKit™ add-on activated and set.
- Add your coaching programs – the central element for curriculum delivery.
Understanding The CoachKit™ Basics
- Programs – as mentioned above, coaching programs are the backbone of your curriculum delivery. These are elements that hold your entire curriculum track (e.g. a learning track of a single subject, boot camp, etc.).
- Milestones – your curriculum is delivered through program milestones. Milestones can represent single lessons or individual topics that need to be covered to complete the program.
- Cohorts – each group of clients is organized into a cohort within your program. Cohorts can be used to, for example, separate different enrollment periods (one group per period). Also, you can separate clients into groups with a limited number of seats (e.g. 20 clients per group). Each cohort is assigned a coach (e.g. teacher or lecturer, trainer, coach, instructor, etc.).
- Clients and Coaches – Clients are users enrolling in cohorts of your programs. Coaches are users leading cohorts. In addition, as an online school, you can rename Clients to Students, and Coaches to Professors. Also, you can use any other labels you might need. To rename labels, navigate to Dashboard > MemberPress > Settings > CoachKit™ > Label Customizations.
- Habits, Messaging, and Appointments – next to milestones, programs include habits, which are recurring tasks clients should go through. Further, the messaging and appointment features allow for learning support and guidance.
- Administrators – site administrators are responsible for creating and managing programs and coaches, as well as courses and memberships. They can also manage clients and their subscriptions to memberships. Other user roles on your site do not have access to these options.
Adding Courses To Your CoachKit™ Programs
You can add courses created with the MemberPress Courses add-on to your milestones to include them in your program.
As mentioned, milestones are elements that represent single lessons or individual topics. They allow you to organize your course content into a logical flow of progression.
Bear this in mind when creating courses for your programs. Your content should be adequately distributed into multiple courses, matching your program milestones.
Once courses are created, you can add a course (or multiple courses) to each milestone by following these steps:
- Navigate to Dashboard > CoachKit™ > Programs. Click Edit under the name of the program you wish to add courses to.
- This will direct you to the Edit Program page with the Milestones tab open. Here, you will find the program's existing milestones (if any).
- Click Add New and select the Course option. This opens a popup.
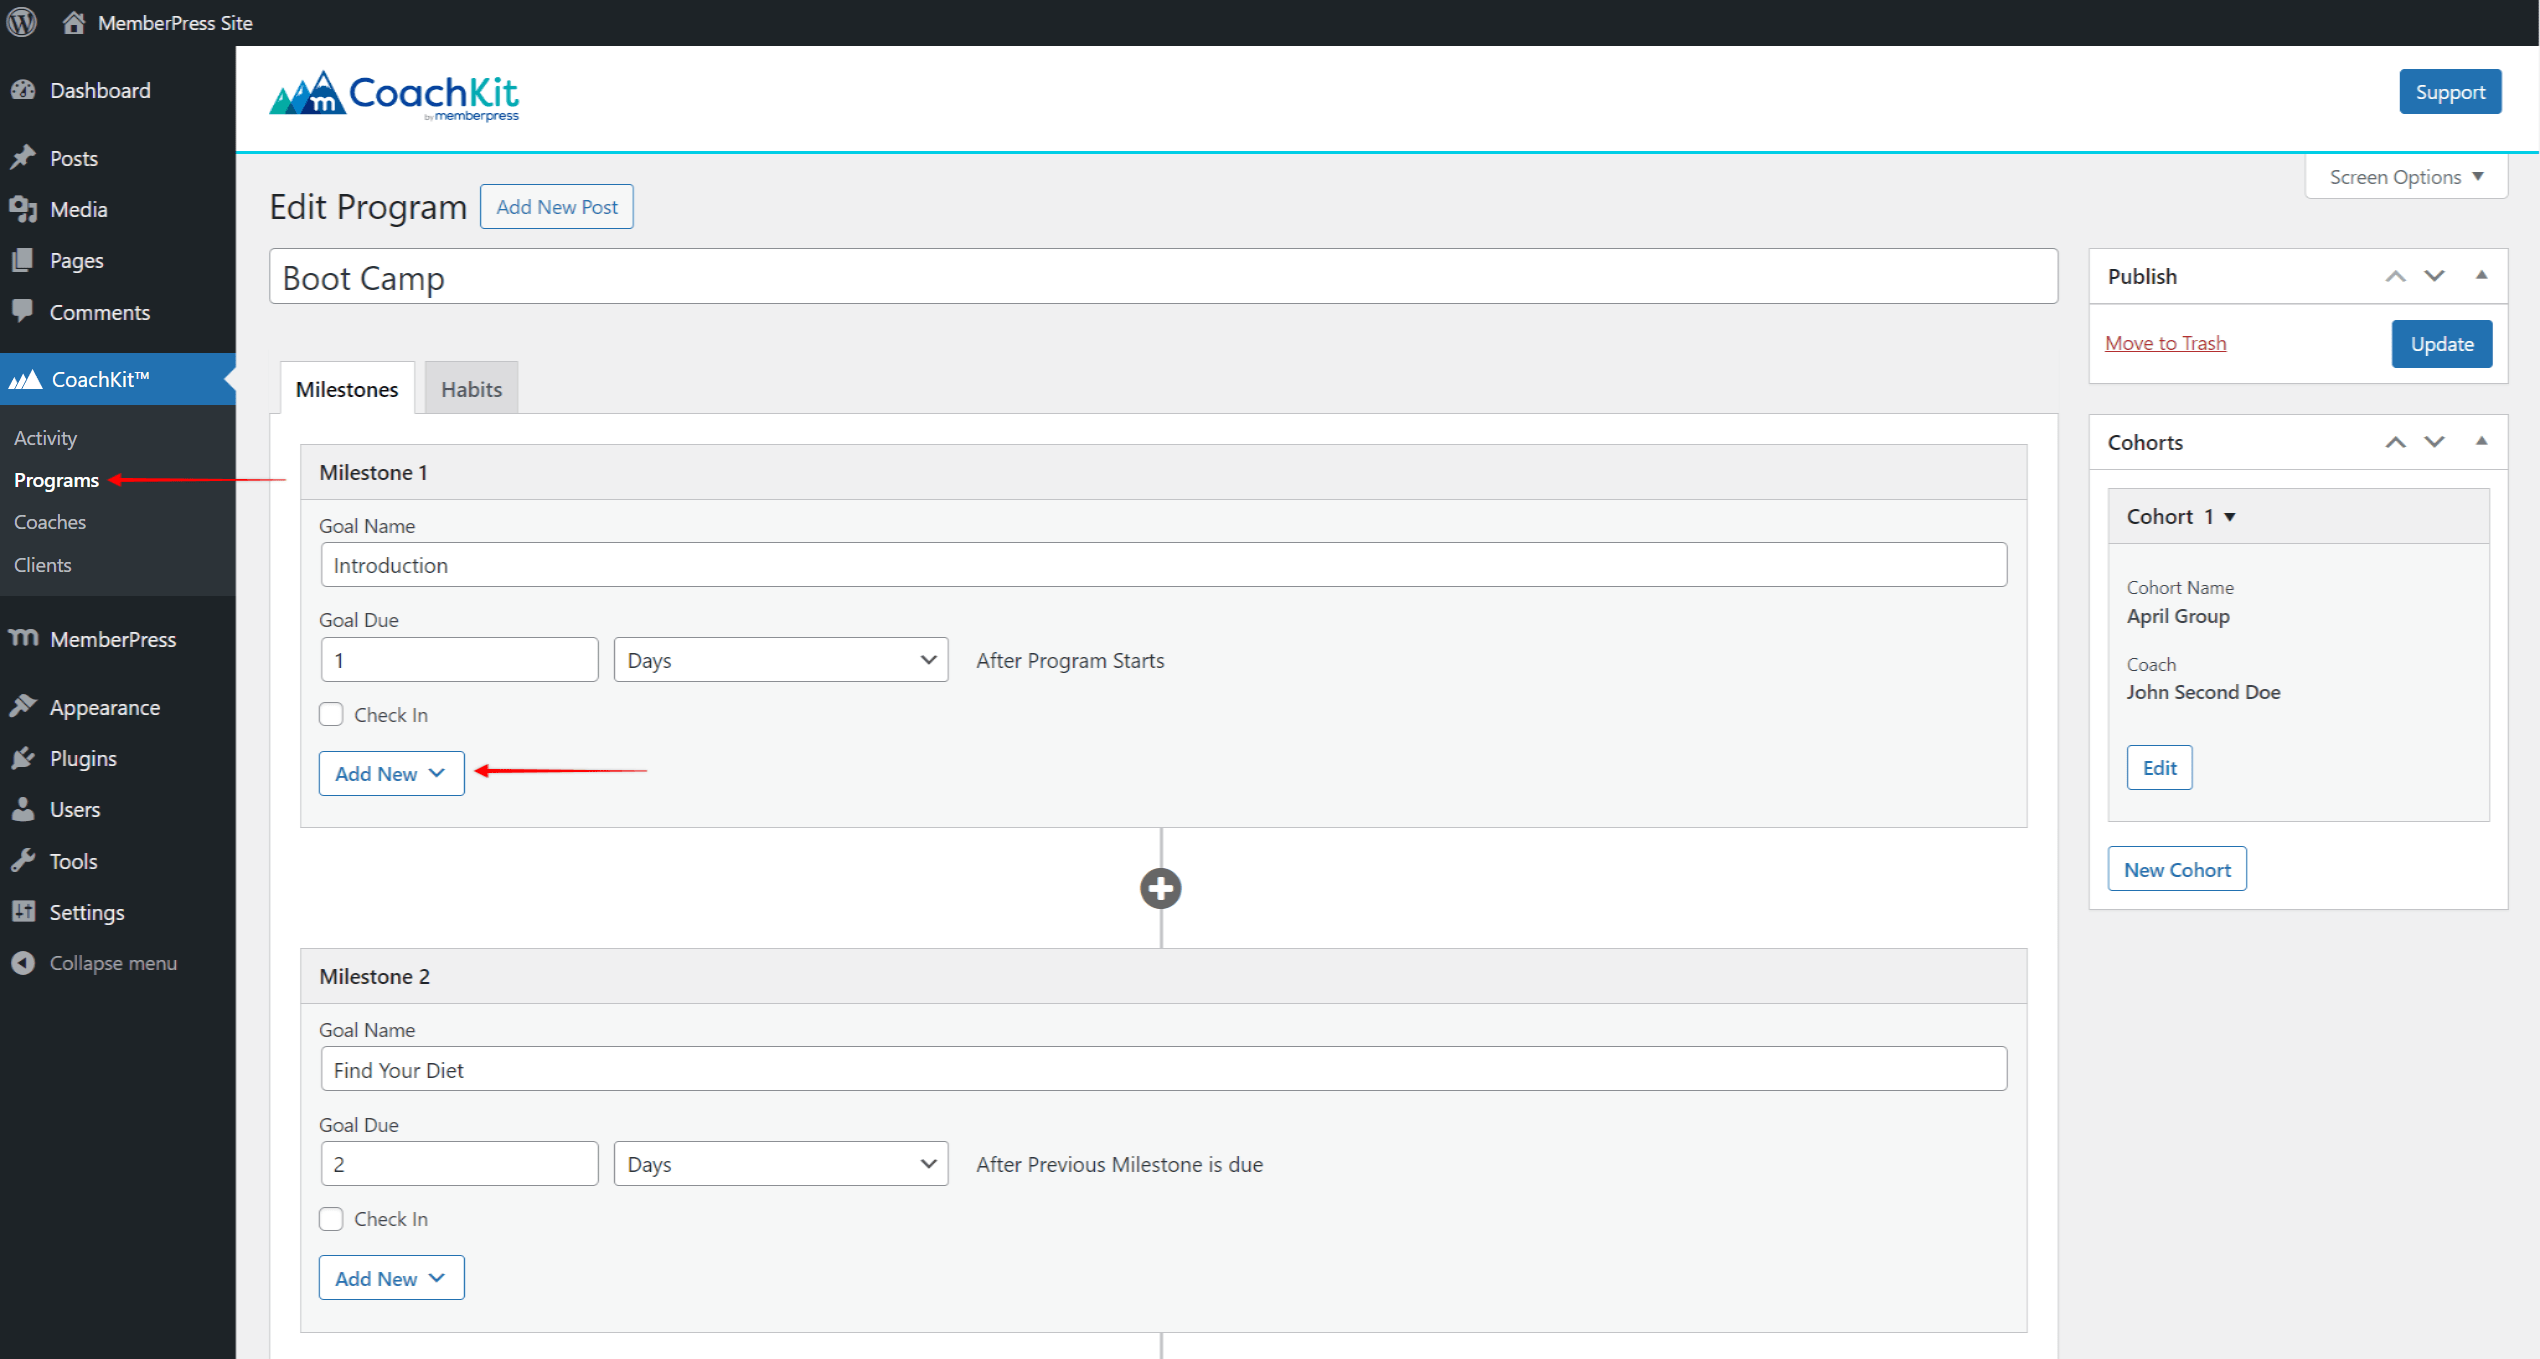
- The popup shows you the list of all the courses you created on your site. Scroll down the list, select the course(s) you want to add, and click the Add Course button.
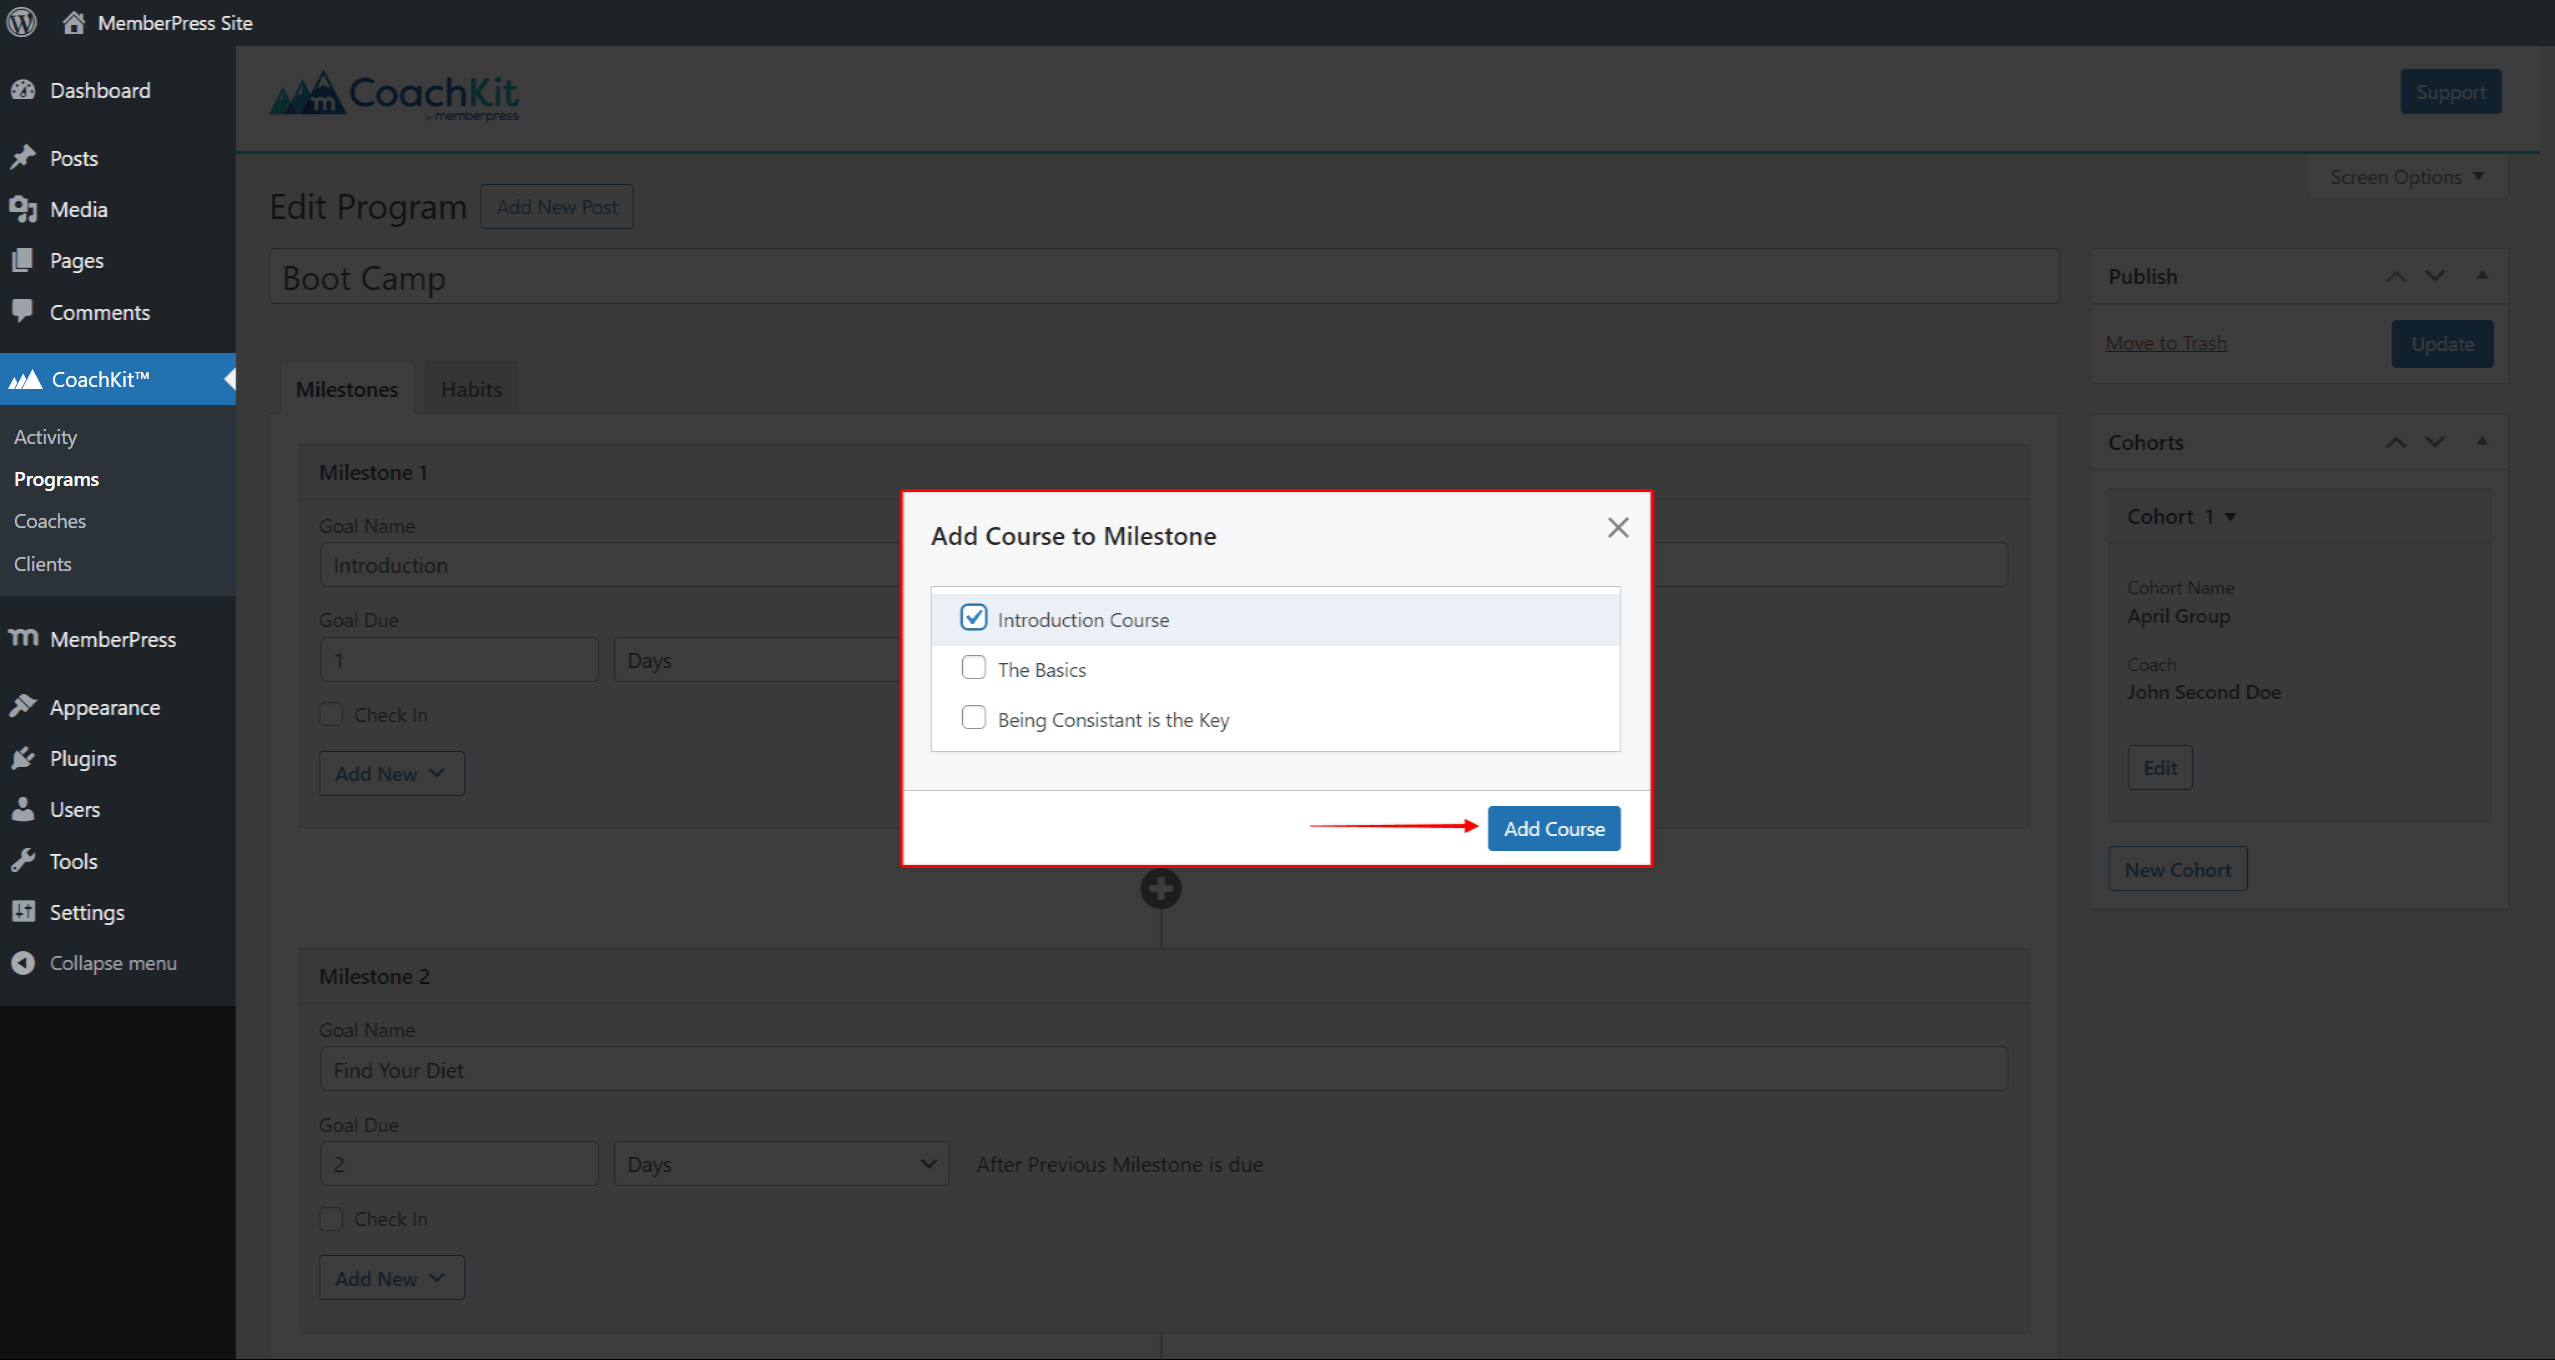
- Click Update to save changes.
Quizzes And Certifications
Online schools often require features to test students' knowledge and deliver certificates to students who successfully pass the exams.
Thus, in addition to using courses to deliver learning content, you can create courses specifically for testing purposes using quizzes. With MemberPress quizzes you can easily deliver your mid-term exams, finals, assignments, etc.
Depending on your Program organization, you can also add a final examination course. You could add this as a last milestone of your program, and enable certificates for that last course.
Accordingly, with this program setup, your clients will be automatically issued a certificate of completion once they've completed the program.
Complementing Courses With Downloads
CoachKit™ comes with the MemberPress Downloads add-on integration. Hence, you can add files uploaded with this add-on to milestones and habits, the same as you would add courses.
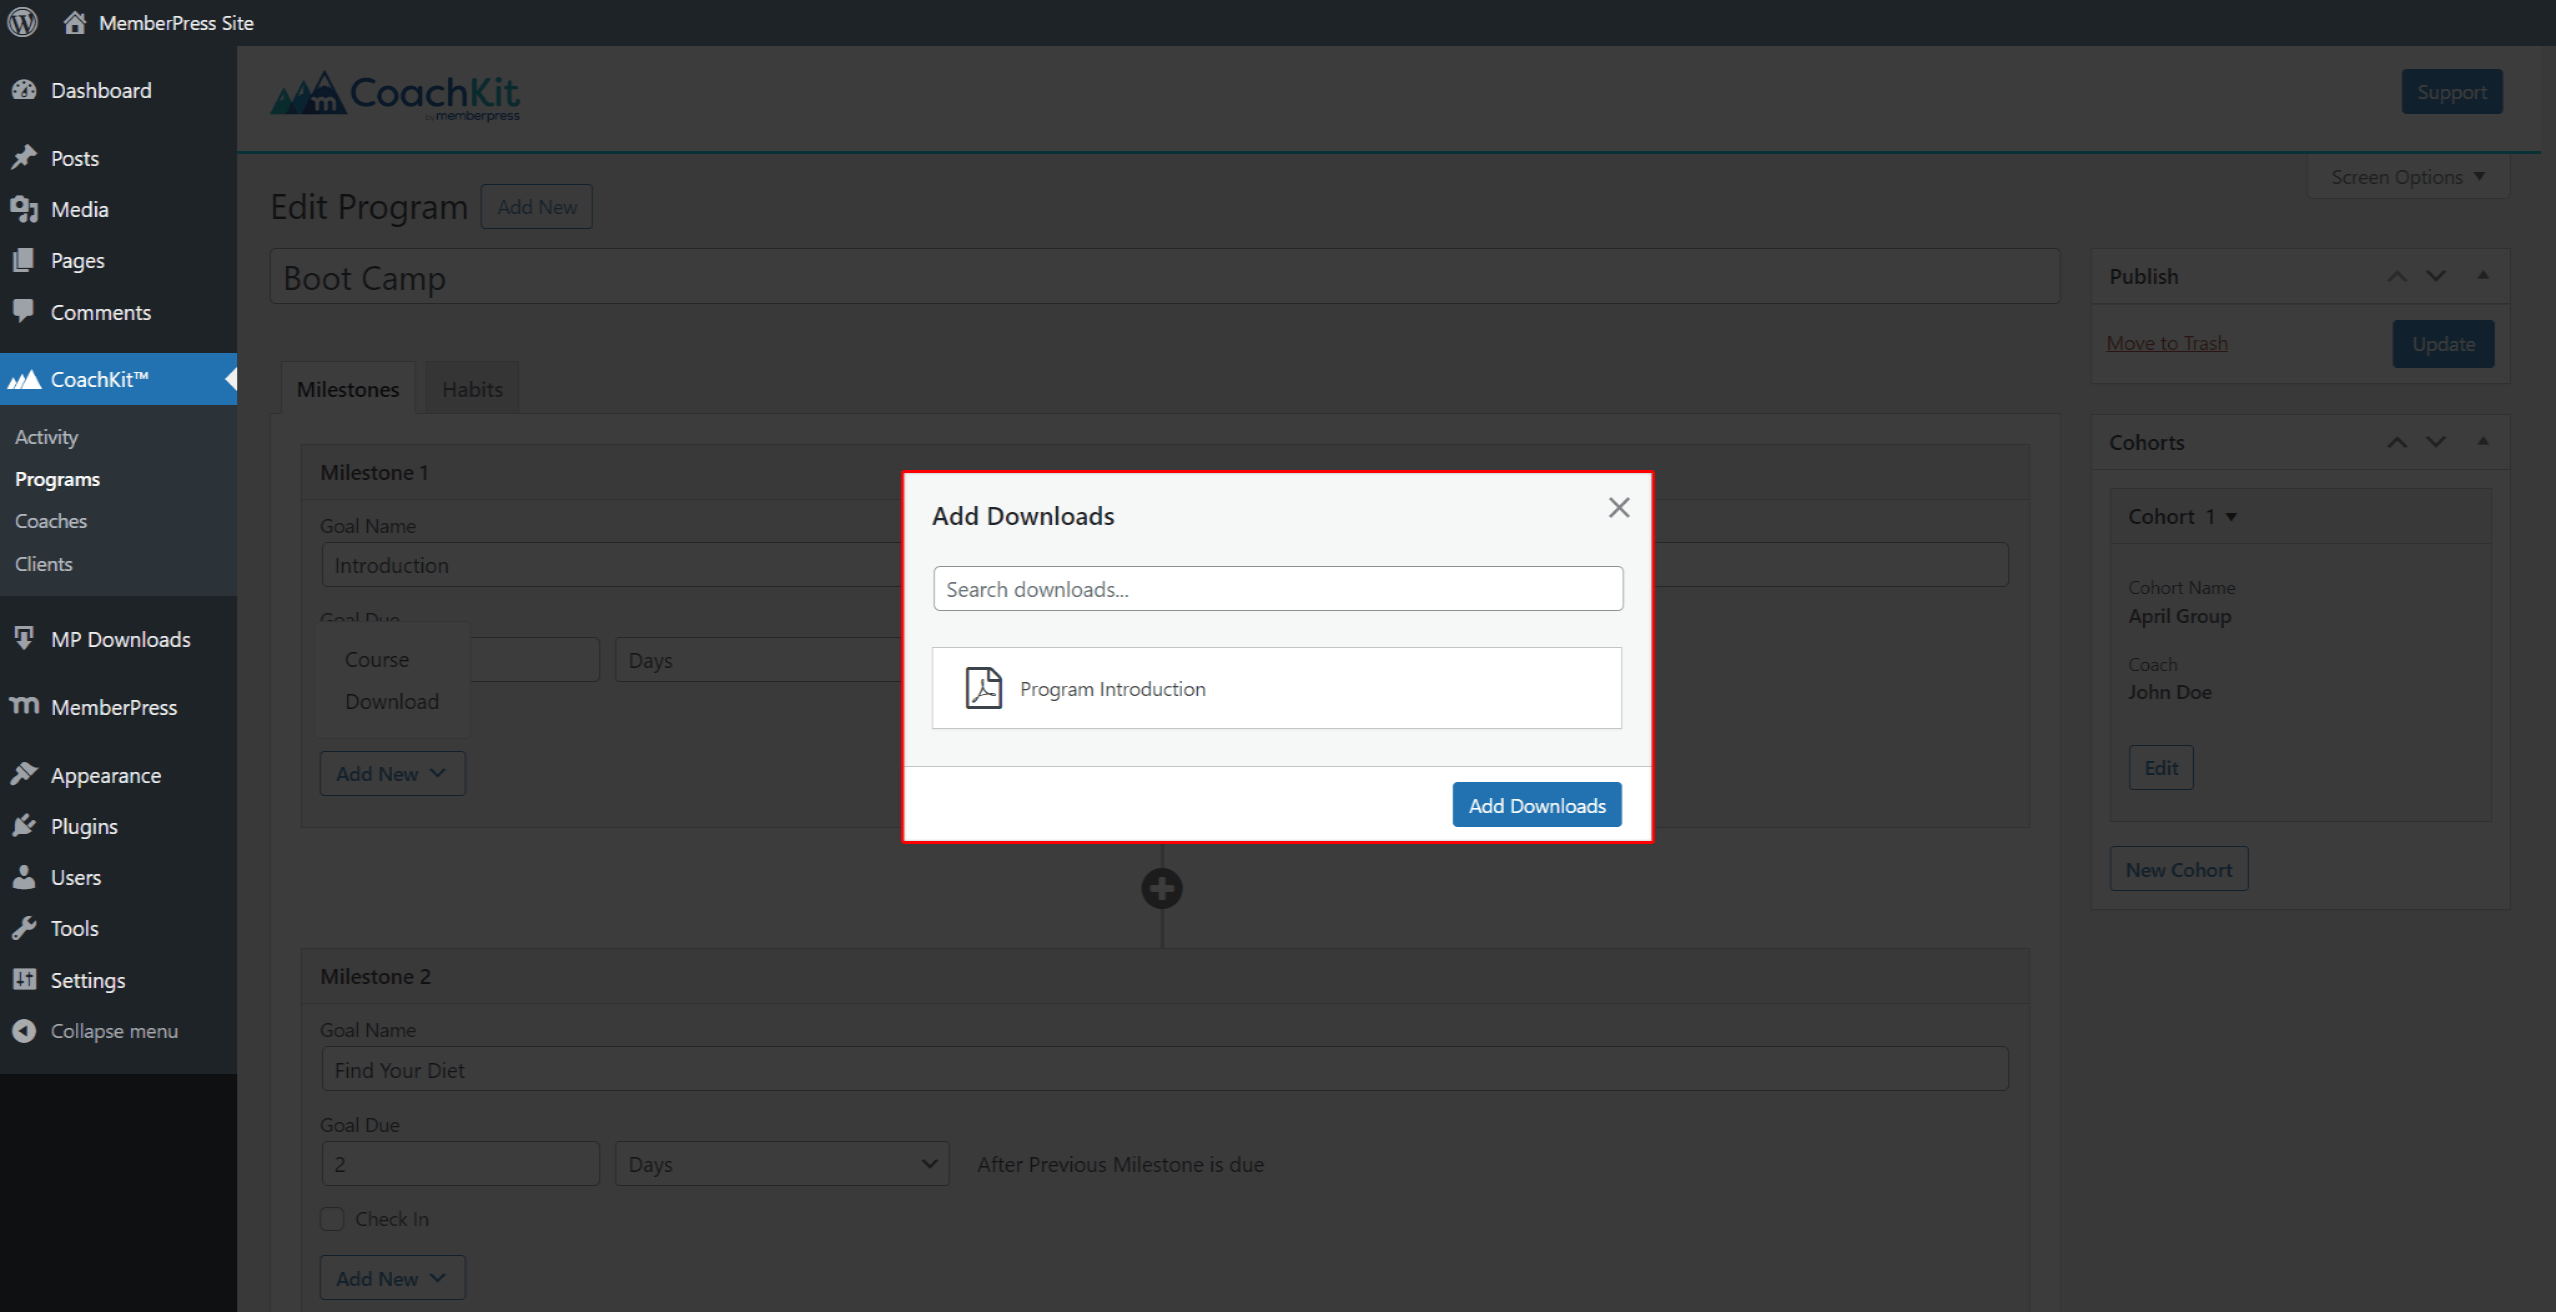
To do this, install and activate the Downloads add-on on your site.
This allows you to add files to your program to complement your courses. You can add any type of file supported by the MemberPress Downloads add-on.
For example, you can complement your milestones and habits with detailed instructions for clients. Also, you could provide additional resources as files (PDF, video, audio, etc.).
Further, you can add the tests as files if your program delivery requires this type of examination. As a result, clients can download the file, fill in the answers, and send the test file to their coach.
In addition, the MemberPress Downloads add-on allows you to protect your files. Therefore, these files can be made exclusively available to clients with an active subscription.
Curriculum Delivery With CoachKit™
Each cohort within a program must be assigned a coach. Coaches are in charge of delivering the curriculum, tracking clients' progress, and providing guidance.
You can assign a coach to multiple cohorts within the same or multiple programs. As a site administrator, you can manage all your coaches by going to Dashboard > CoachKit™ > Coaches.
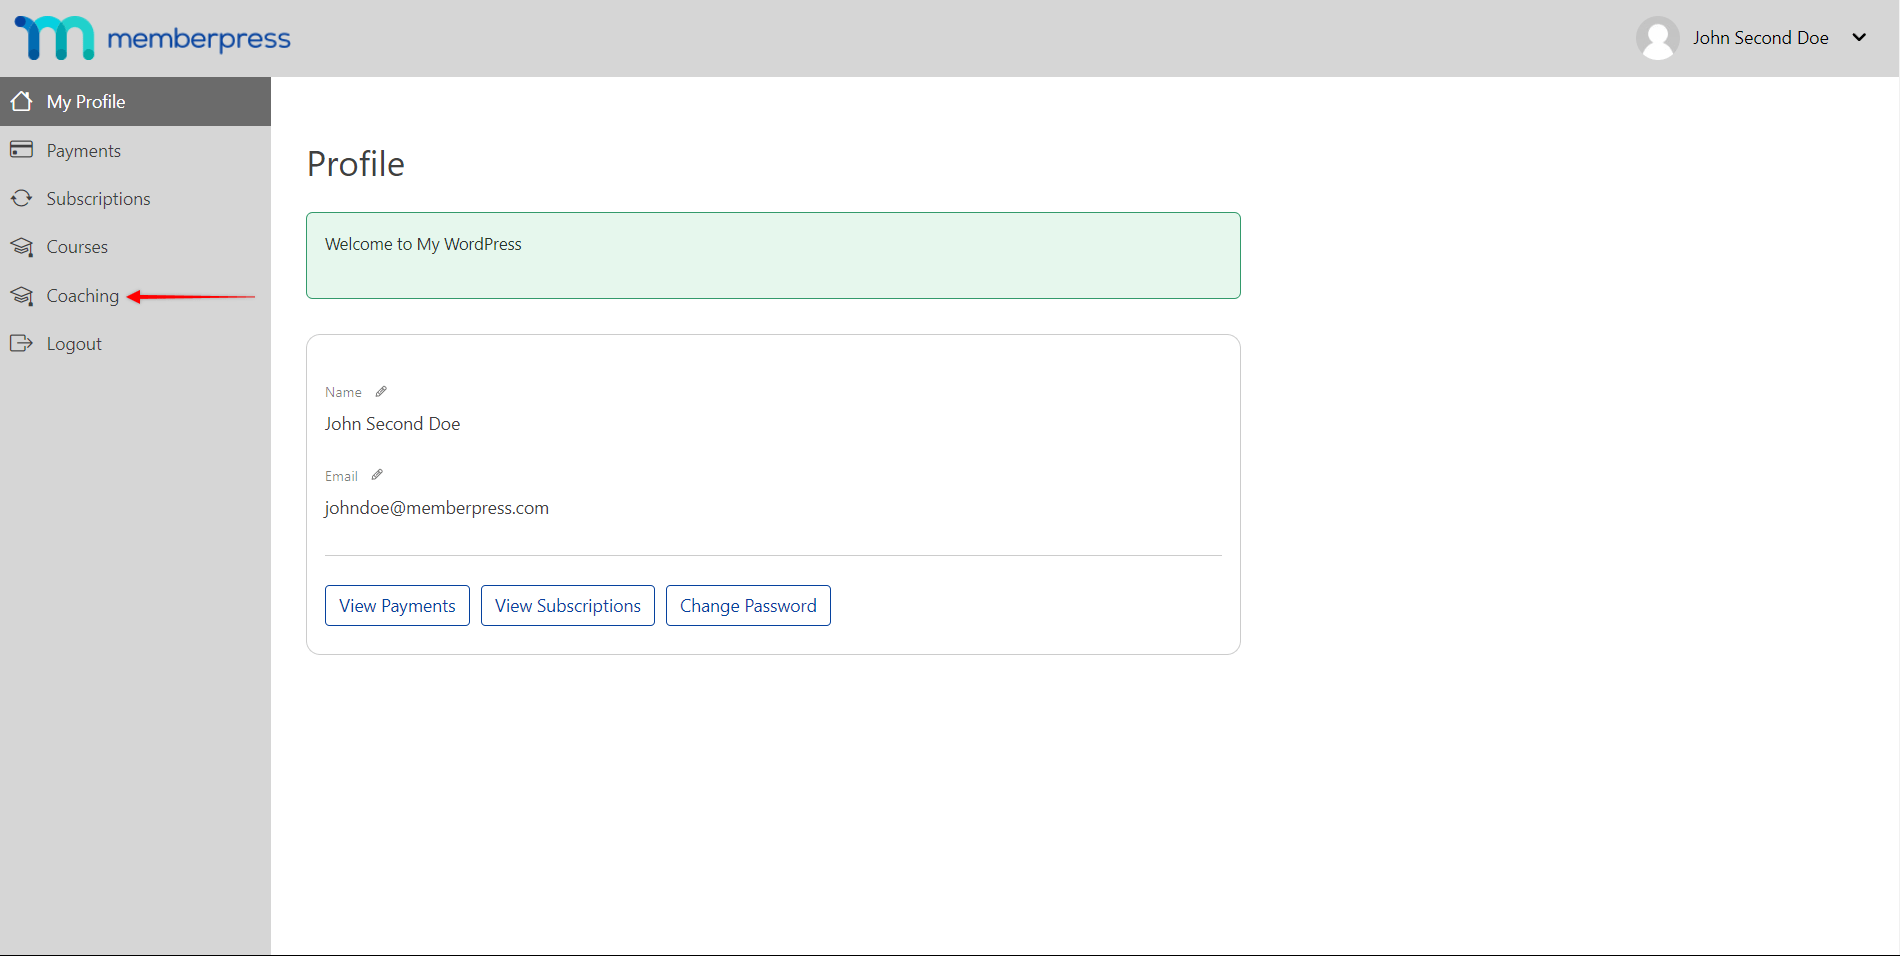
Once logged in, coaches can manage clients enrolled in their cohorts by navigating to your coaching page. By default, the slug of this page is /coaching.
Coaching
Under the Clients option on the coaching page, coaches can see all their clients.
Also, if the Messaging feature is enabled and available for their program, they will have the Messages option too. Here, they can communicate with their clients and provide support and guidance.
Clients
After you've linked your program to a specific membership, clients can enroll in your program by registering for that membership.
Coaches can see all their cohorts and clients on the coaching page. Here, they can select a specific cohort in the sidebar. Also, coaches can filter clients using the dropdown above the list of clients on the right side of the screen.
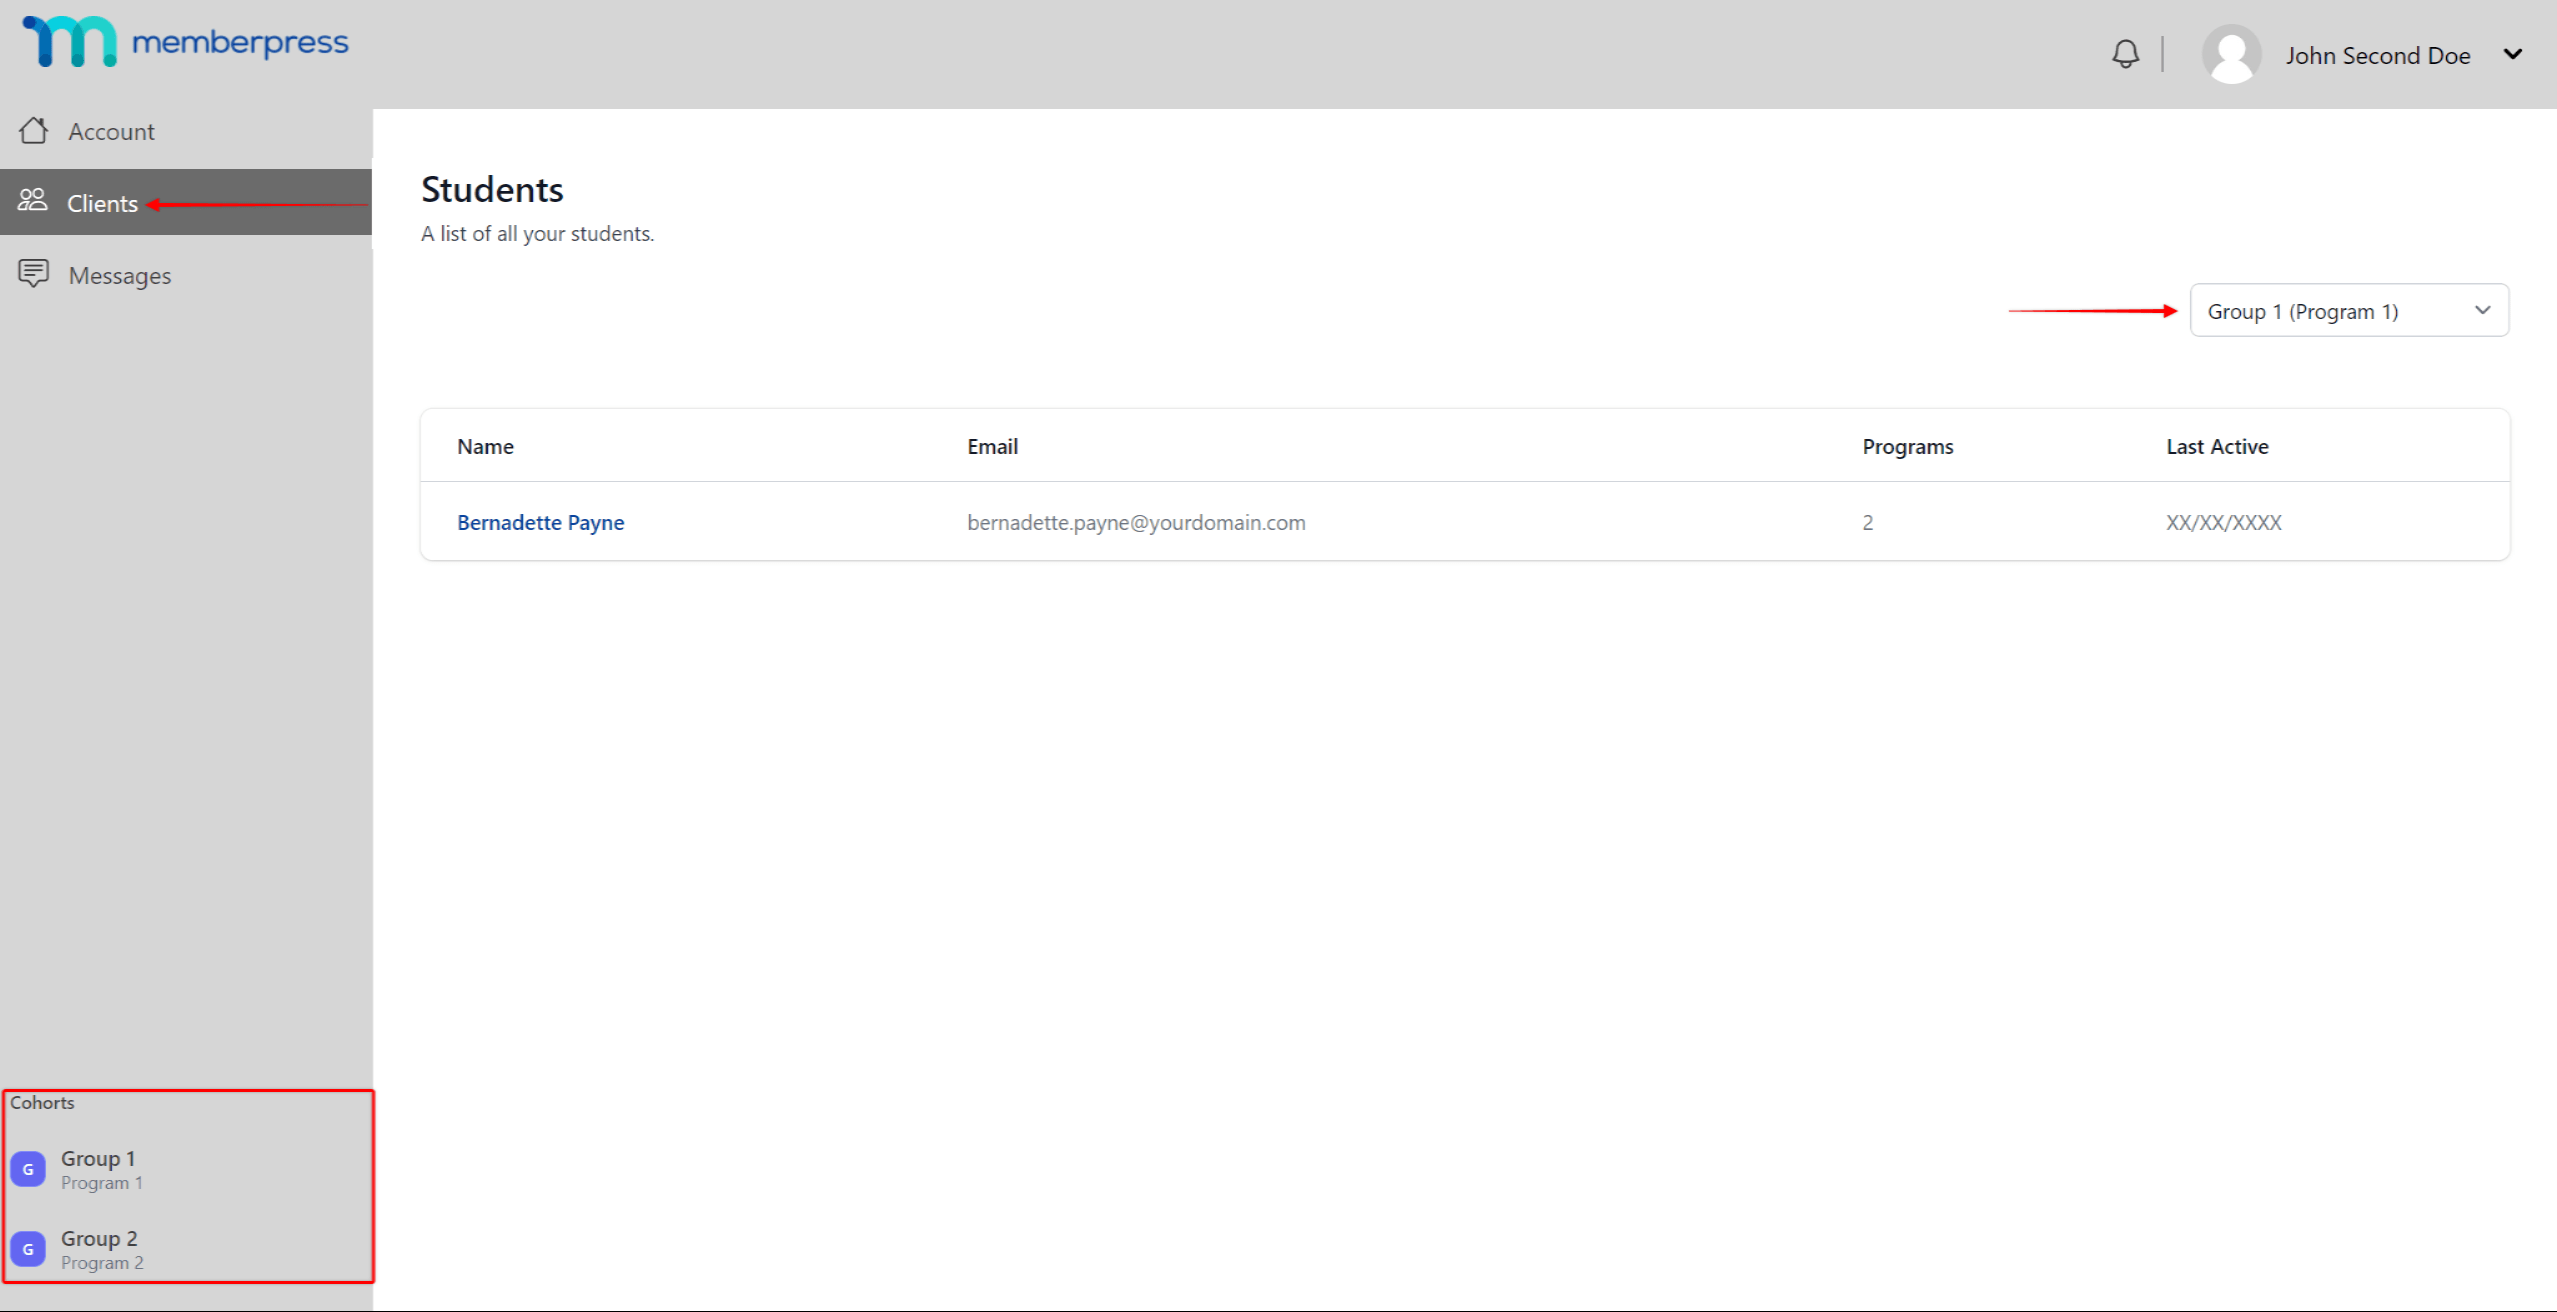
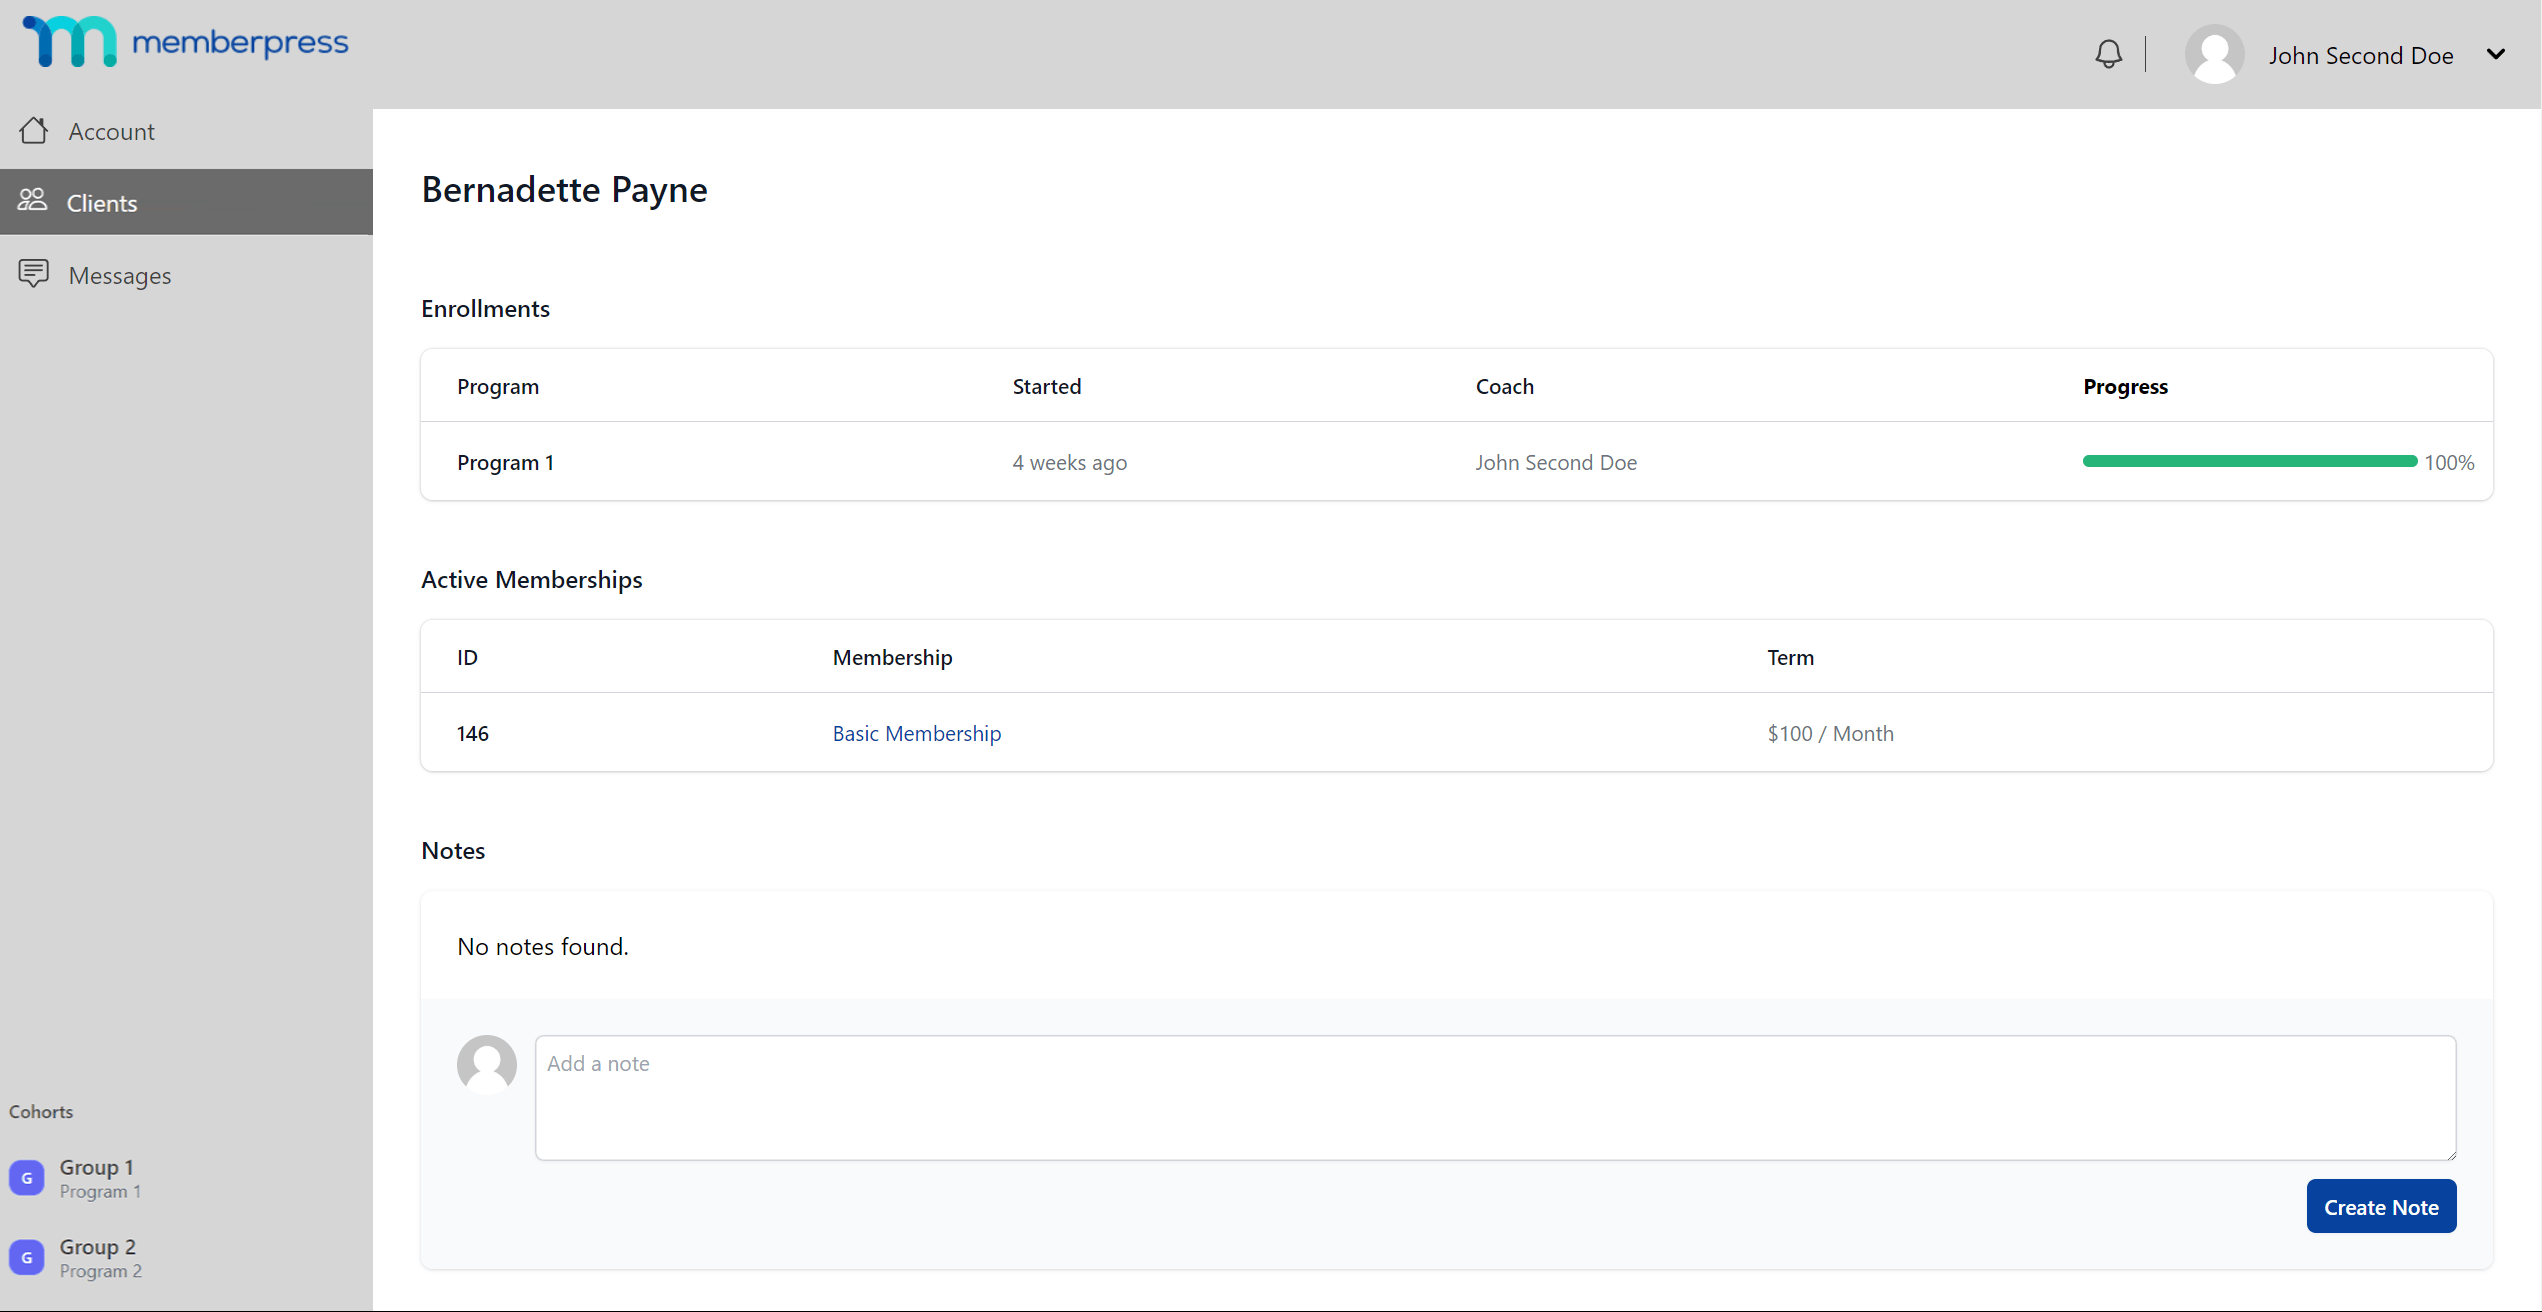
Clicking on a client's name will open the student details page. This page includes all client data like progress, memberships overview, and adding notes.
Messages
Under the Messages option, your coaches can communicate with clients enrolled in the cohorts they teach.
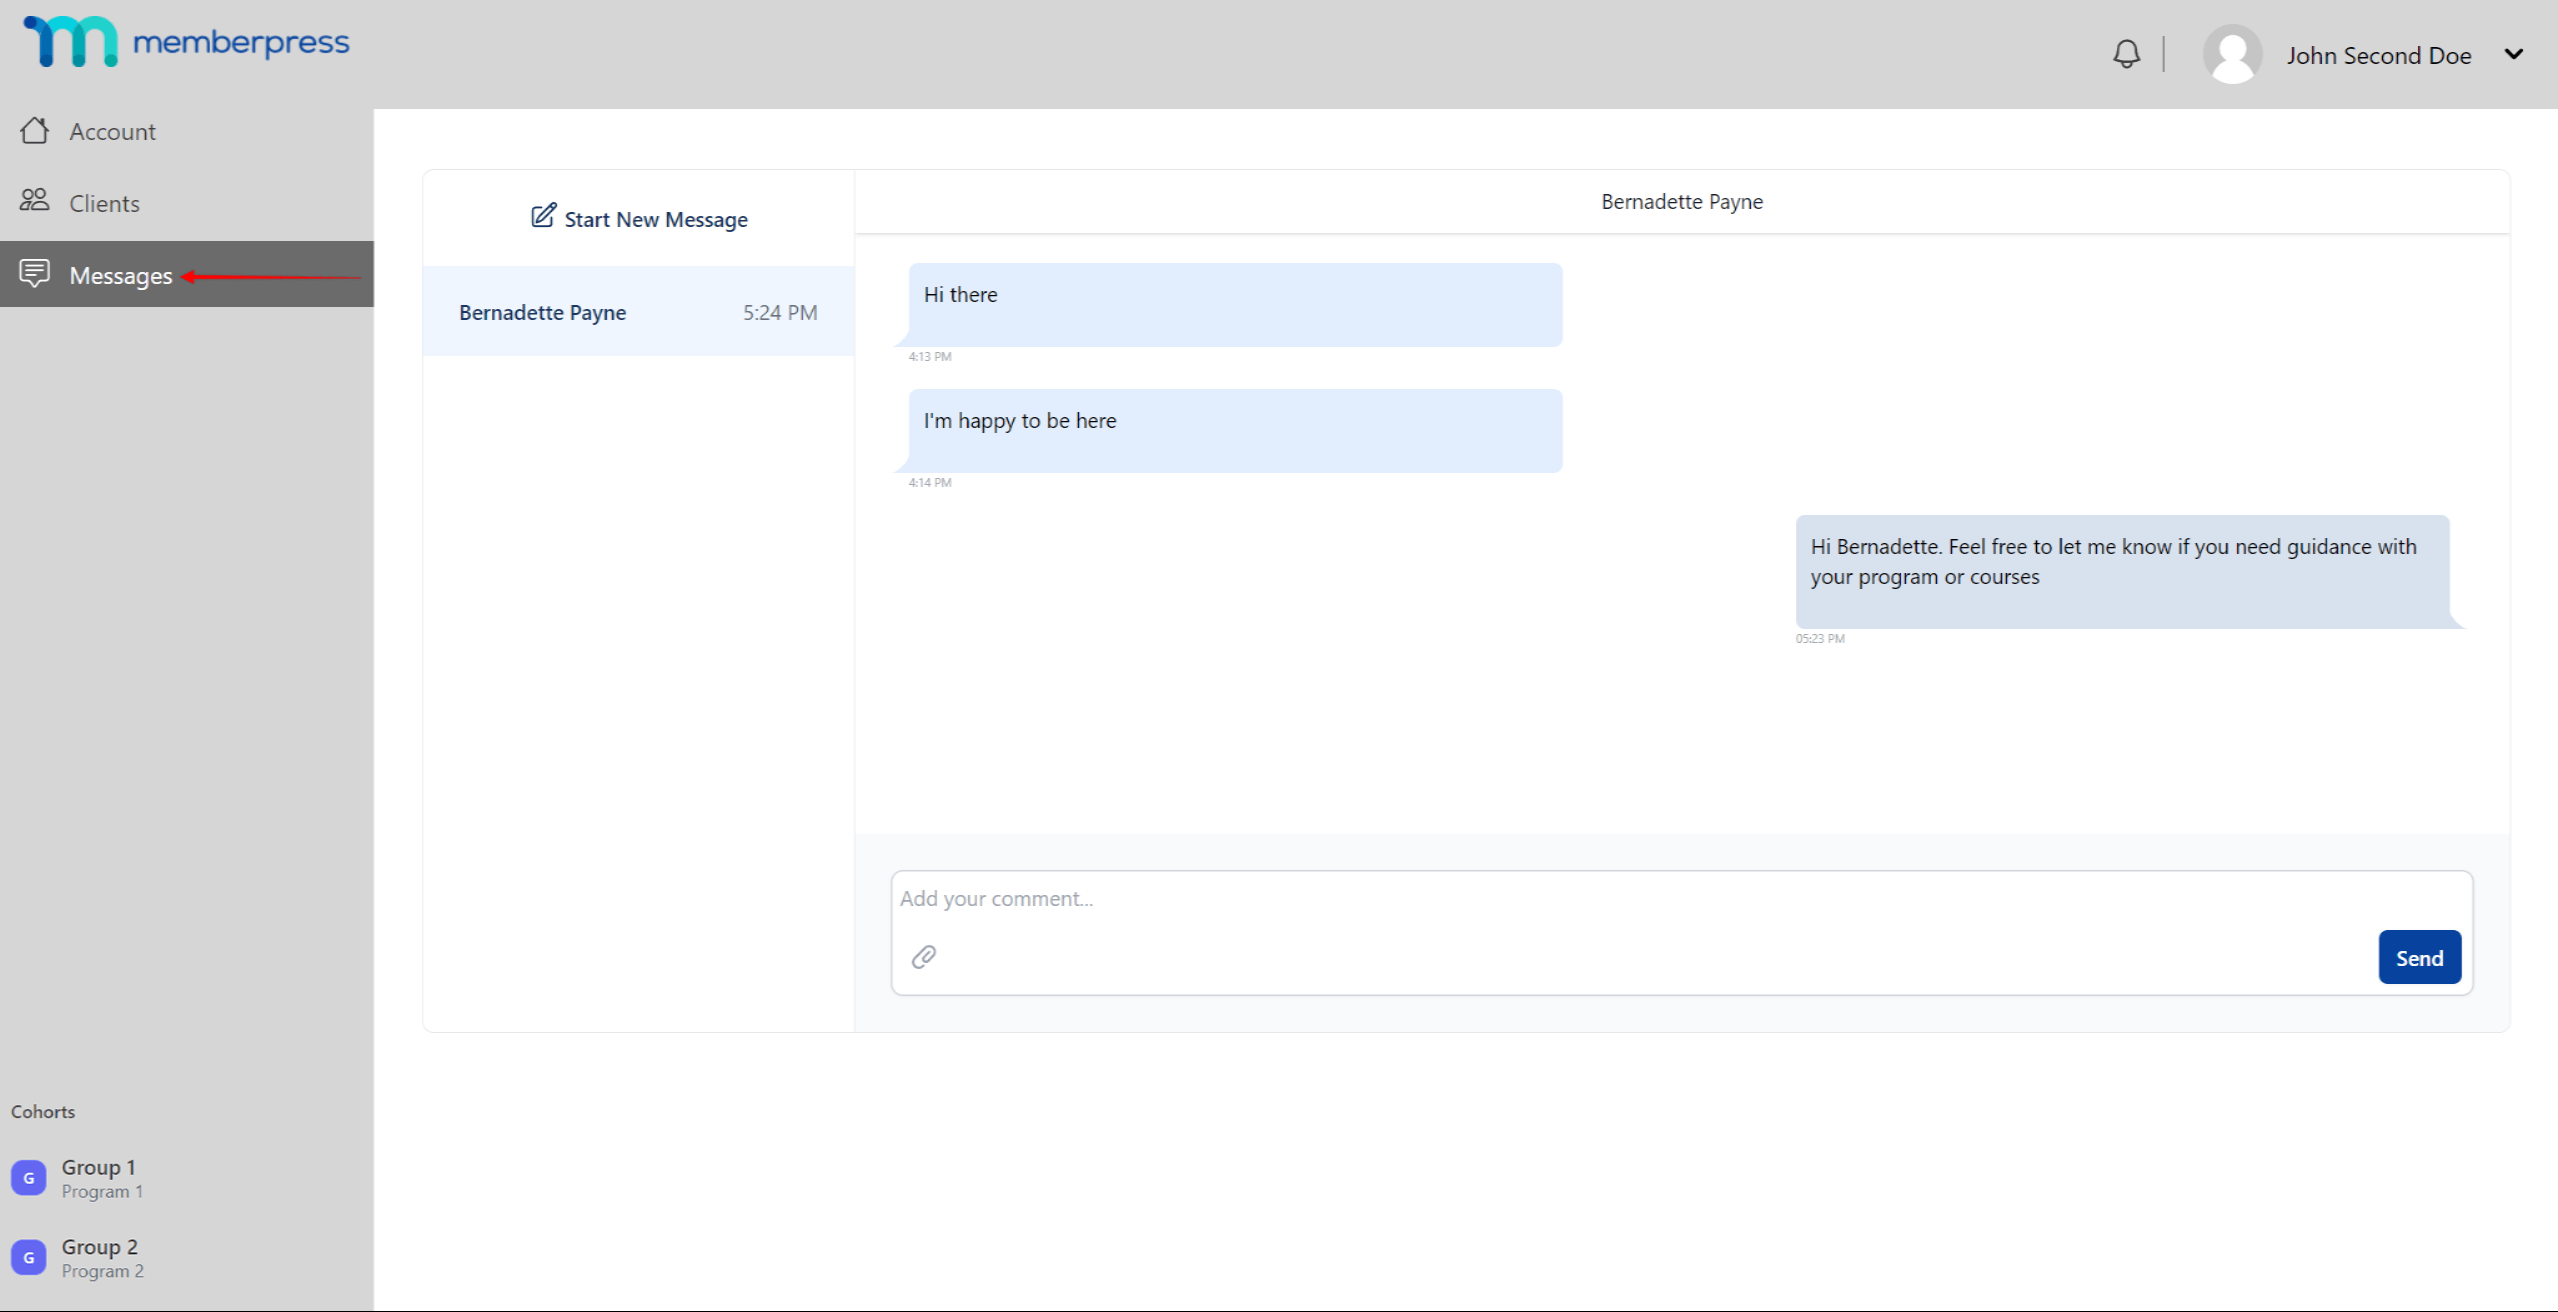
Here, coaches can communicate with clients in a chat-like messaging inbox and provide learning support.
If messaging notifications are enabled, both coaches and clients will receive a notification every time a new message is received.
Appointments
Appointment scheduling can be enabled by coaches, for any of their cohorts. Coaches are free to choose any appointment scheduling tool they are comfortable with. Once their scheduling tool is set, they will need to add the URL of the scheduling page from that tool.
Coaches should follow these steps to enable appointment scheduling for the cohorts they teach:
- Navigate to the Coaching page (Account > Coaching).
- Click on the Enrollments menu option.
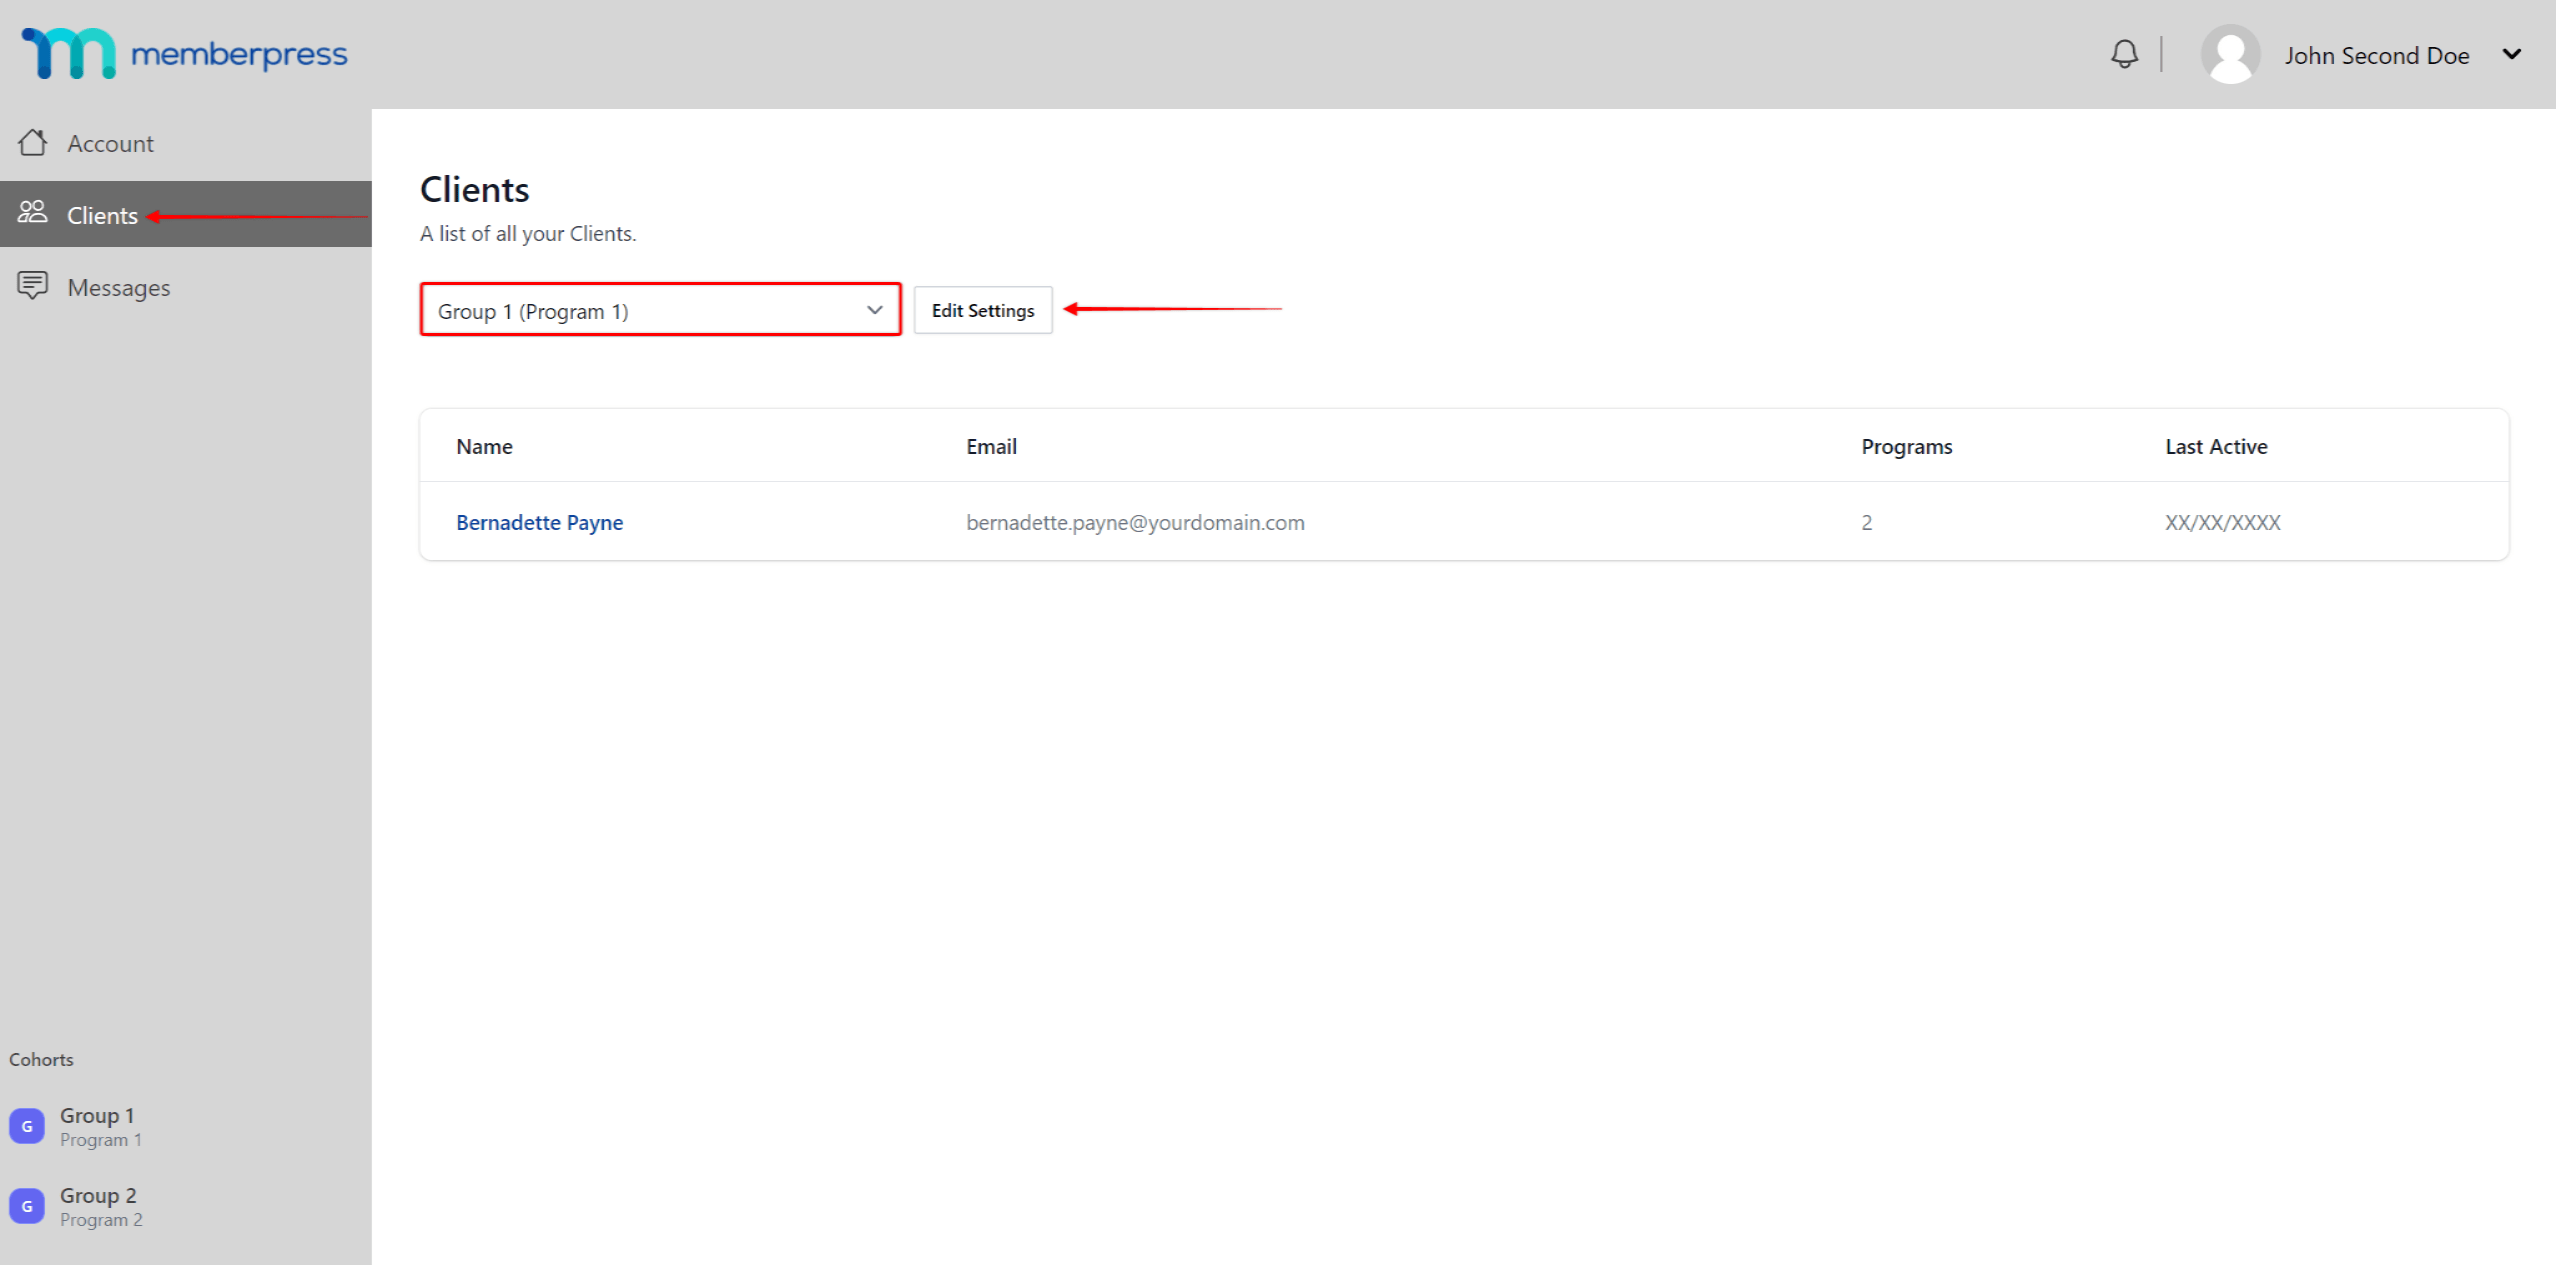
- Filter out the cohort you need using the dropdown. Click on the Edit Settings button that appears, to open a popup.
- Check the Allow Client Appointments option.
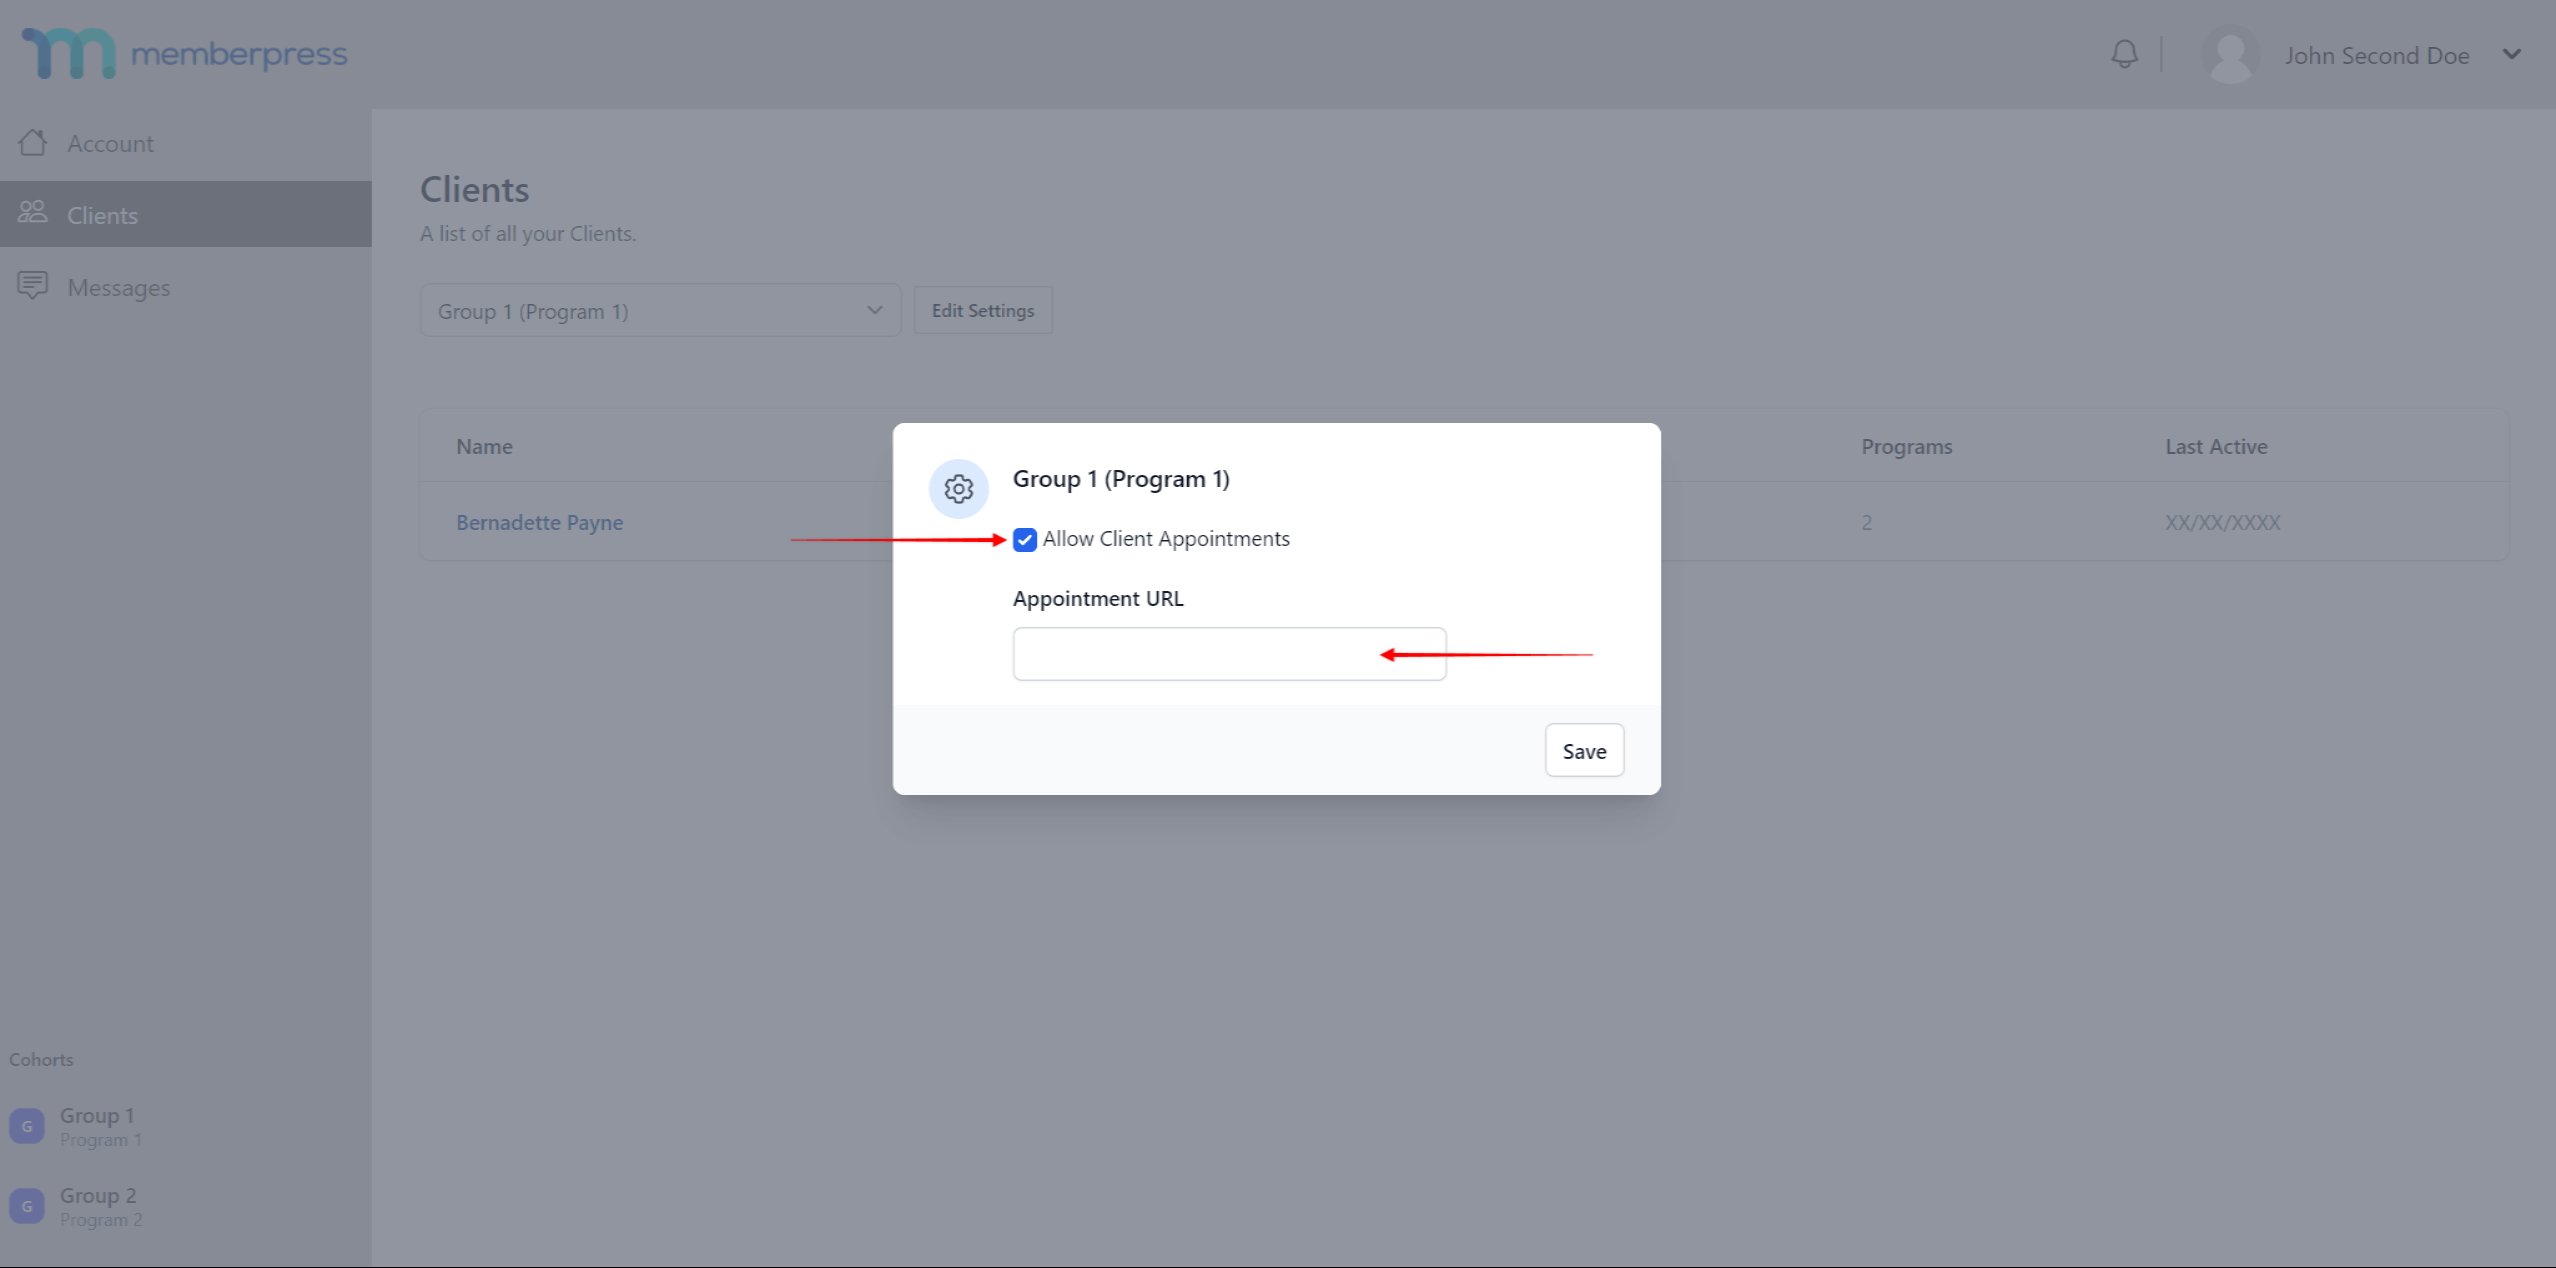
- This will open an additional Appointment URL field. Add the appointment scheduling page URL to this field.
- Click the Save button.
This will add the Schedule Appointment button on the client's Enrollments page, next to the coach’s name.
Though coaches can use any appointment scheduling tool, several existing integrations exist.
CoachKit™ integrates seamlessly with two top-level WordPress scheduling plugins, Simply Schedule Appointments (SSA) and Calendly. To use one of the integrations, install the plugin on your site, and follow the prompts.
Also, as an administrator, you can set this feature through your backend for all your coaches.


