Occasionally, you may want early access to a new feature, or our support staff might recommend you update to an “Edge build” to resolve a conflict or bug you may be experiencing which has already been addressed.
Fortunately, installing an Edge build of MemberPress is very easy, just follow the steps below. Remember that there is no guarantee that Edge builds will always be stable. Please check with our support staff for any potential issues before updating to an Edge build.
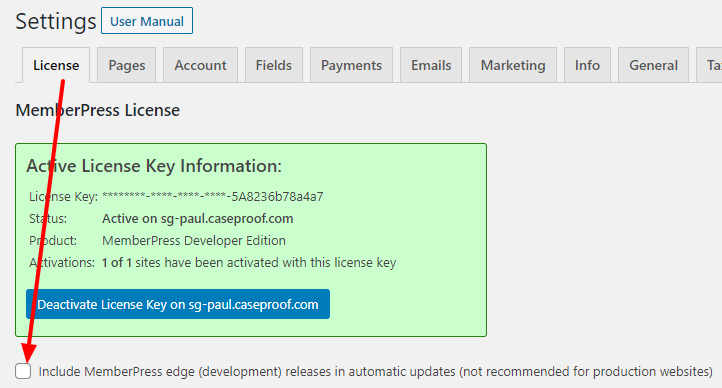
- Enable Edge Builds – In your WordPress Dashboard, choose MemberPress -> Settings -> License tab. Check the box (see screenshot below) to enable Edge build update notifications on your site.
- Auto-Update Plugin – After enabling Edge builds, head to your Plugins page in the Dashboard and update MemberPress to the latest version available. Note: you may need to refresh the plugins page a couple of times to see the update notification.
- Disable Edge Builds – After you've updated to the latest Edge build, head back to MemberPress -> Settings -> License tab and disable the Edge builds check-box again. This will prevent you from potentially updating to an unstable Edge build accidentally, and will also prevent you from being notified of plugin updates for MemberPress so frequently.


