How to Create a WordPress Course Site with MemberPress?
This article is still relevant for those wanting very basic course structure, but our integrated Courses add-on should be used now instead. Tell me more about MemberPress Courses add-on.
If you're looking for a way to create courses with MemberPress you can use the simple method detailed below. If you need more advanced LMS features for your courses, like progress tracking, or quizzes -- then you can always use a 3rd party LMS that integrates with MemberPress but if you just want to offer your videos in an organized course then this is the simplest, fastest and least expensive option.
Video Overviews
Creating your Courses and Child Courses (Lessons)
Protecting and Setting up your Course Site with MemberPress
Written Instructions
Please use the following written instructions in setting up your course site through MemberPress.
Steps Covered in our Written Instructions:
- Step 1: Add the Custom Post Type UI Plugin to your Site
- Step 2: Create the Custom Post Type (CPT) that will be Used to Create your Courses
- Step 3: Create Your Course Content
- Step 4: Create Your Child Courses (Lessons) Content
- Step 5: Create the Membership(s) that Your Users will be Required to Purchase for Access to your Course(s) and Child Courses (Lessons)
- Step 6: Create Rules to Protect Your Course(s) and Child Courses (Lessons)
- Step 7: Test your Setup
Step 1: Add the Custom Post Type UI Plugin to your Site
This plugin will be used to create a Custom Post Type (CPT) that will aid you in organizing your courses and lessons.
- Navigate to your WordPress Dashboard > Plugins > and click on the Add New button.
- In the Search bar, type Custom Post Type UI
- Install and Activate the plugin by WebDevStudios
With the plugin installed and activated, you will now see this menu item in your WordPress Admin Panel:

Step 2: Create the Custom Post Type (CPT) that will be Used to Create your Courses
- Navigate to your WordPress Dashboard > CPT UI admin panel menu item > and click on Add/Edit Post Types.
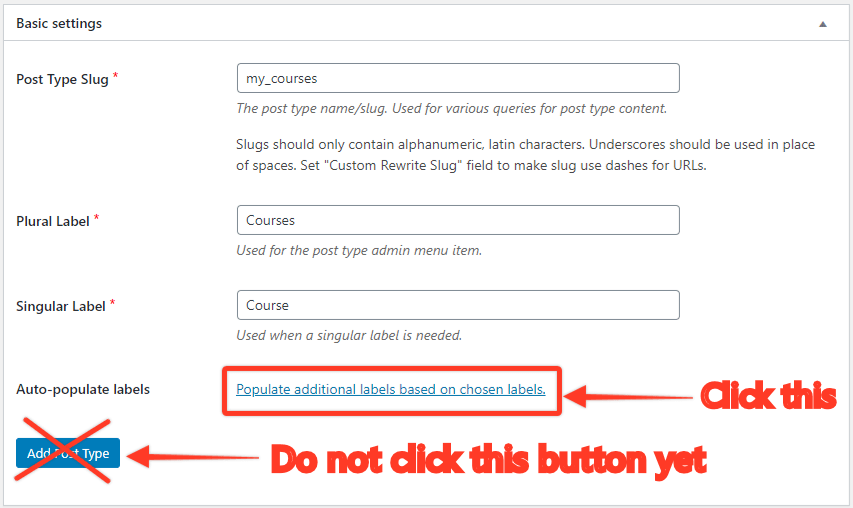
- Configure the Basic Settings as follows:
- Set Post Type Slug to my_courses.
- Set Plural Label to Courses.
- Set Singular Label to Course.
- Then, click on the link that says, Populate additional labels based on chosen labels, to the right of the Auto-populate labels setting. Doing this will help auto-populate the fields in the Additional labels settings.
- Do NOT click the Add Post Type button yet.
- Skip over the Additional labels settings as they will have been auto-populated after completing step 2d above.
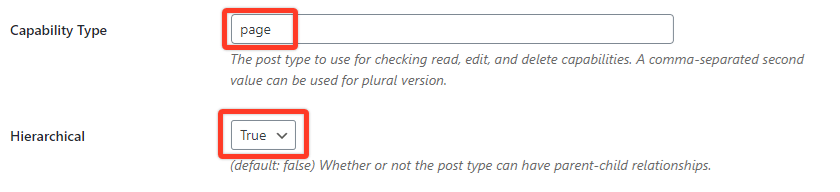
- Configure the Settings section as follows (leaving everything else at their defaults):
- Set Capability Type to page.
- Set Hierarchical to True.
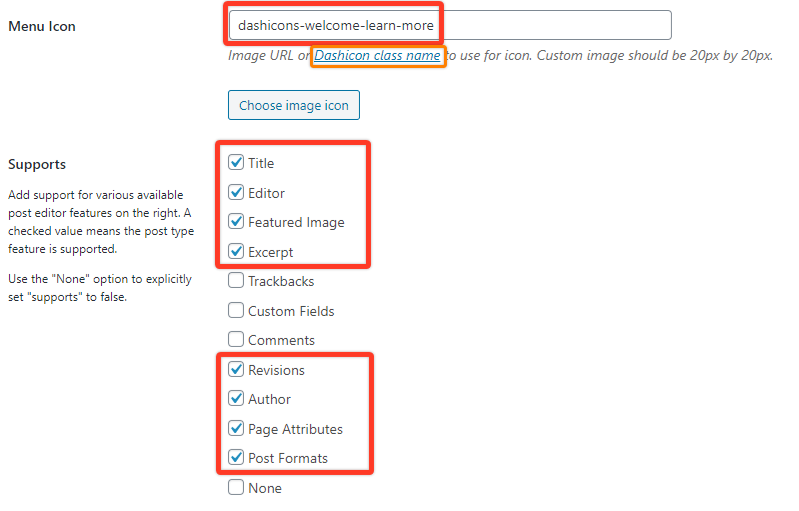
- On the Menu Icon setting, enter the Dashicon class name, which can be found here when selecting on the desired icon. The dashicons-welcome-learn-more icon is a good option. OR (more advanced) use the Choose icon image button to add an icon to be used in your WordPress Admin menu. NOTE: any custom image should be 20px by 20px.For the Supports setting, check the following options (leaving all others unchecked):
-
- Title
- Editor
- Featured Image
- Excerpt
- Revisions
- Author
- Page Attributes
- Post Formats
- For the Taxonomies setting, check both options: Categories (WP Core) and Tags (WP Core)
- Click the Add Post Type button found at the bottom of the page.

Following these steps you will now see a new menu item in your WordPress Dashboard Admin Menu that may look like this (image will vary if you did not use the same Menu Icon setting):
![]()
Step 3: Create Your Course Content
Now that you've created your CPT for your Courses, you can create new Course(s) following the steps below:
- Navigate to your WordPress Dashboard > My Courses admin panel menu item > and click on Add new.
- This will take you to the edit page for your CPT, which looks like the edit page for all other pages and posts on your site. On the edit page, add the content of your course, which will likely include links to your various Child Courses that will act as your individual Lessons (please see Step 4 below).
- Click the Publish... button to save the Course.
- Repeat for as many Courses that you are going to offer on your site.
Step 4: Create Your Child Courses (Lessons)
The way to create Child Courses (Lessons) that are connected to your Course(s) created in Step 3 above, is to create new Courses that will be set as Child Courses to the main Course(s).
- Navigate to your WordPress Dashboard > My Courses admin panel menu item > and click on Add new.
- Add content to the CPT that will be for your Child Course (Lesson).
- On the right hand side of the edit page, use the Course attributes setting to select the Course that you would like this Child Course (Lesson) to be connected to, as shown here:
- Under the Course attributes setting, use the Order setting to select the order the should appear in relation to other Child Courses. For your first Child Course (Lesson), this should be set to zero, for your second Child Course (Lesson) it should be set to one, etc.
- Click the Publish... button to save the Course.
- Repeat for as many Child Courses (Lessons) that you are going to offer for this Course.
Step 5: Create the Membership(s) that Your Users will be Required to Purchase for Access to your Course(s) and Child Courses (Lessons)
In order to "sell" your Courses and Child Courses (Lessons) you have to create a Membership in MemberPress. To learn how to create Memberships in MemberPress, please see this page. In this way, users will purchase a Subscription to your Membership, which will then grant them access to your Courses and Child Courses (Lessons) after you complete Step 6 below.
The amount of Memberships that you will need to create in MemberPress for your course site will depend on how you want to sell your courses. For example:
- If you want one Membership to grant access to all Courses and associated Child Courses (Lessons), you will only create one Membership.
- If you want to sell each Course Individually, then you will create a unique Membership for each Course you create.
- If you want to sell each Child Course (Lesson) individually, but ALSO sell the entire course together, you will will need to create one Membership for the Course to be sold together and a unique Membership for each Child Course (Lesson) you want to sell individually.
Step 6: Create Rules to Protect Your Course(s) and Child Courses (Lessons)
The types and number of rules that you will create will depend on how you want your users to interact with your Courses and Child Courses (Lessons). Below are some possible scenarios with the types and numbers of rules that you will need to create (all of the below assume that the user has first purchased a Subscription to one or more of your Memberships). Before reviewing this section, it is recommended that you review our Rules Overview page.
Immediate Access to All Courses and Associated Child Courses (Lessons)
For this type of access you will only need to create one Membership in MemberPress for your course. The easiest way to accomplish this is through the use of a tag for the CPT you created earlier. Follow these steps:
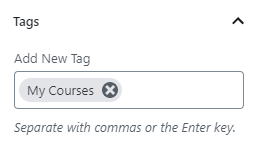
- Navigate to your WordPress Dashboard > My Courses admin panel menu item > and click on Tags.
- In the Add New Tag section give the tag a name and a slug (e.g. Name: My Courses, Slug: my-courses).
- (Optional) Add a description to the tag.
- Click the Add New Tag button.
- With the tag created, navigate to your WordPress Dashboard > MemberPress admin panel menu item > Rules > and click on the Add New button.
- Configure your rule to grant access to the membership you want users to purchase for their access, as shown here:
Tag all Courses and Child Courses (Lessons) with this tag through the Tags option when editing the CPT Courses:
With that configuration, any new course that you tag with your created tag will automatically be protected by this rule.
Selective Immediate Access to Each Course and Associated Child Courses (Lessons)
To do this you can either repeat the steps above to create a separate tag for each Course instead of for all Courses, or create a rule for each course and a rule for child courses for each course.
Creating the rule for each course
Creating the child courses of rule

Ability to Collectively Purchase a Course While Also Selling the Associated Child Courses (Lessons) Individually
For this type of setup, you will need to first follow the instructions above under the Immediate Access to All Courses and Associated Child Courses (Lessons) section above for.
From there, you will need to duplicate each Course and Child Course (Lesson) and create a new Membership in MemberPress for each one.
Finally, you will need to create a separate rule for each Course and Child Course (Lesson) that can be connected to each unique Membership you created earlier.
This means that if you have a Course that has 5 Child Courses (Lessons) connected to it you would need to create a total of 6 Memberships and 6 Rules for the separate purchases in addition to what you created for the global purchase.
Adding the Ability to Drip the Child Courses (Lessons) Individually within any given Course
This feature works in conjunction with any of the above outlined options as well. Please review this page to learn how to add a drip feature to your rules.
You may find it most beneficial to add a drip feature to each of the individual Child Courses (Lessons) connected to a Course so that users need to progress through them systematically.
Don't see an option here that fits your needs or you cannot figure out how to set up your rules, please submit a support ticket (login required) and let us know what you are trying to do.
Step 7: Test your Setup
The best way to test your course setup is to follow our instructions here. Please note that if you are testing the drip functionality of a rule, you will need to manually edit the Start Date of the first Transaction for the user's Subscription. You can do this by going to the MemberPress > Subscriptions page > clicking on the number of transactions > then hovering over the unique ID of the transaction > Clicking Edit > and changing the Start Date to a date in the past to reflect the desired drip outcome.